
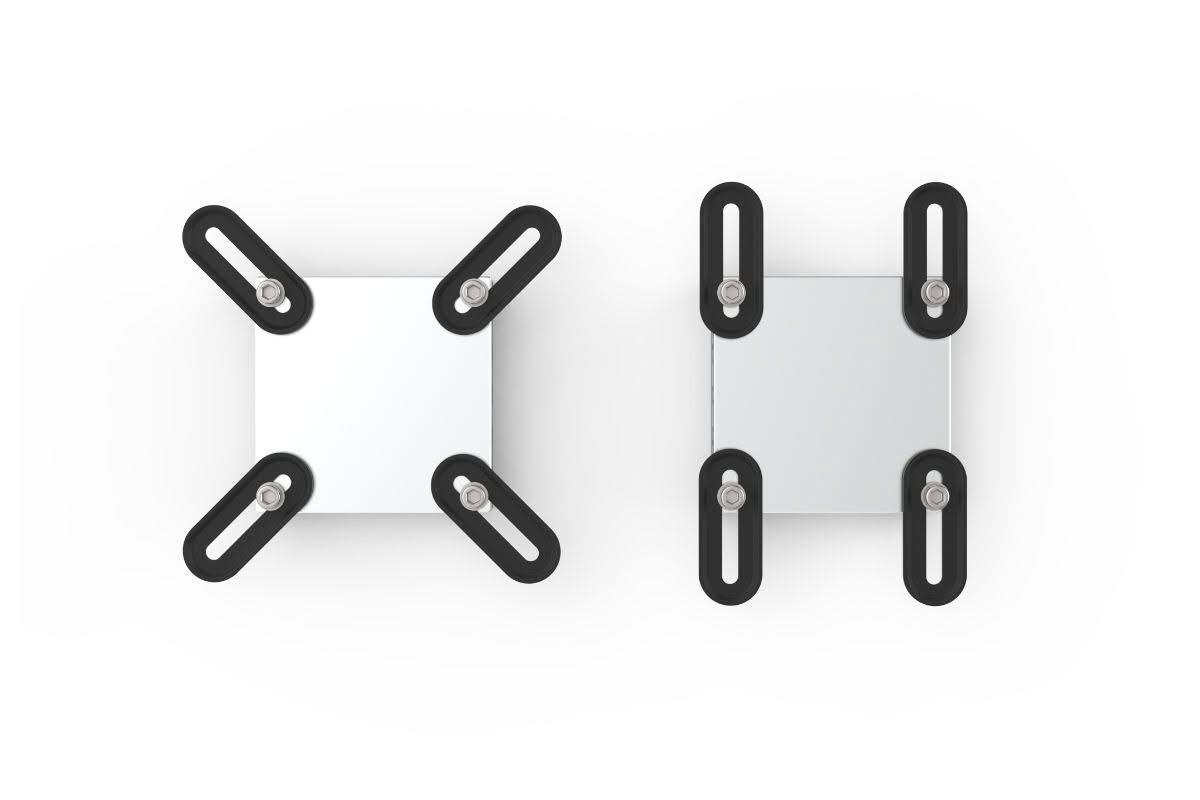
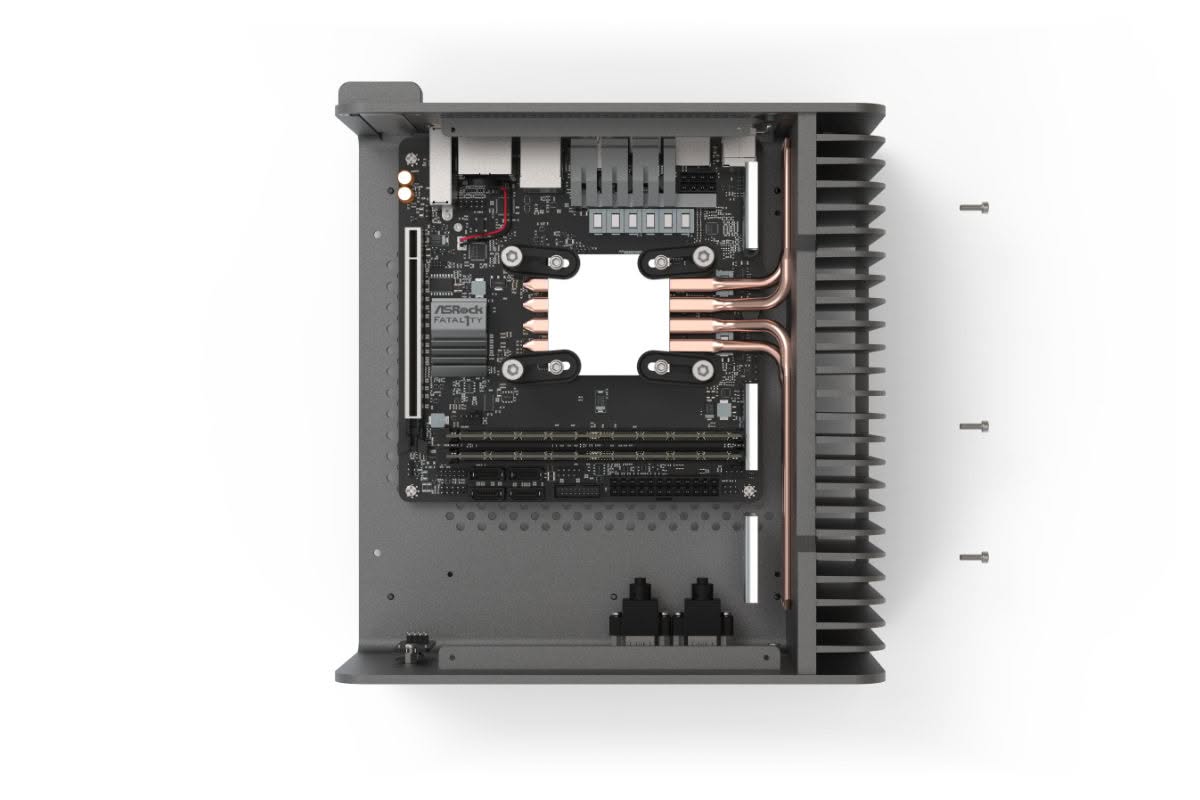
Prepare the Cooler Heat Pipe Assembly
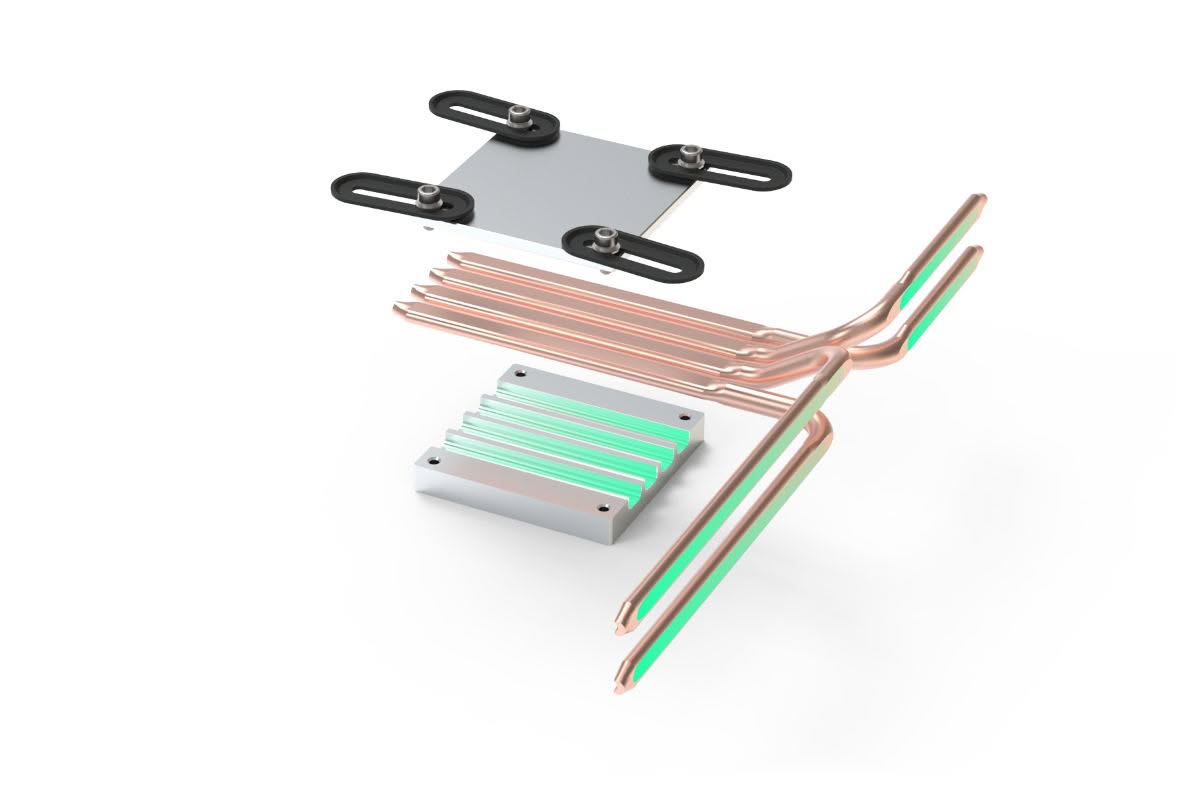
You should already have a rough idea of the position of the heat pipes and CPU mount assembly. Apply thermal paste along the Lower CPU mount heat pipe slots and secure them by adding the upper mount, arms and screws. Note that the screws don’t need to be fully tightened yet.
You can also apply thermal paste along the surface of the heat pipes that will make contact with the heat sink in preparation for the next steps.
Apply Thermal Paste to the CPU
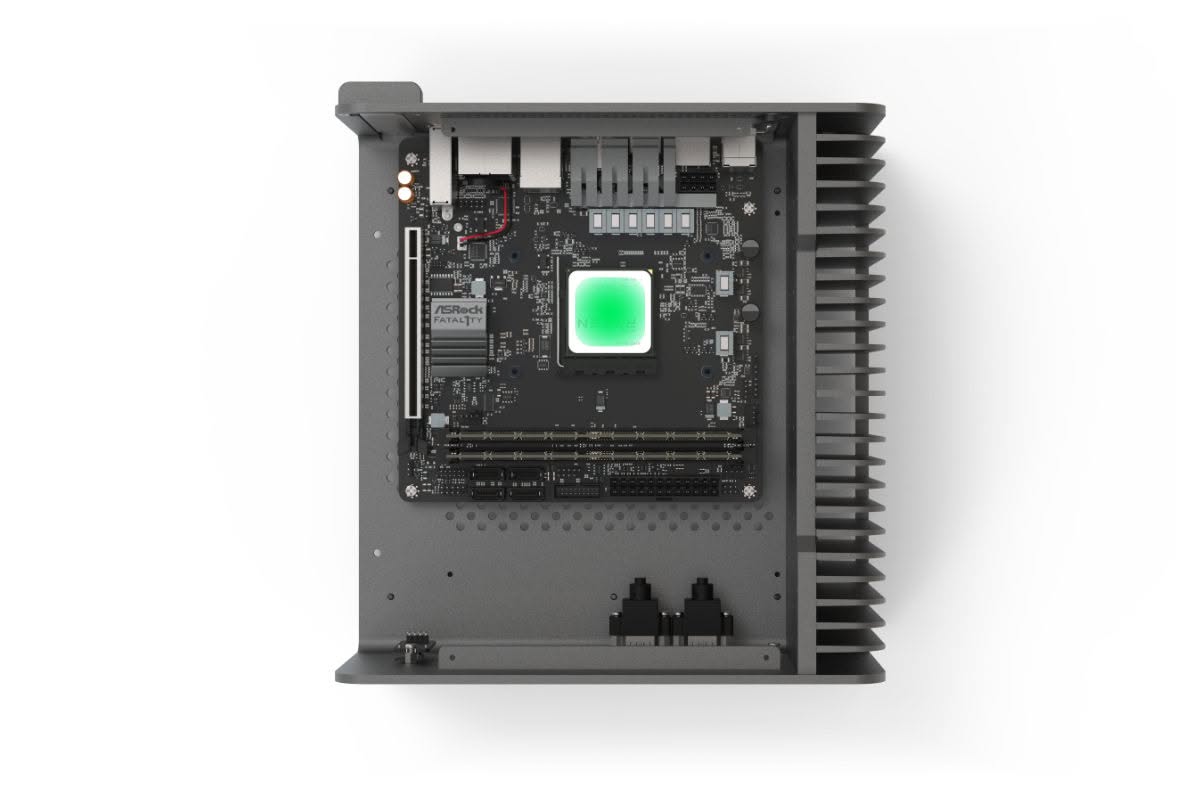 Apply thermal paste to the CPU IHS, this can be done using any method of your choice, just make sure the coverage is complete and even.
 Place the Cooler Assembly onto the CPU
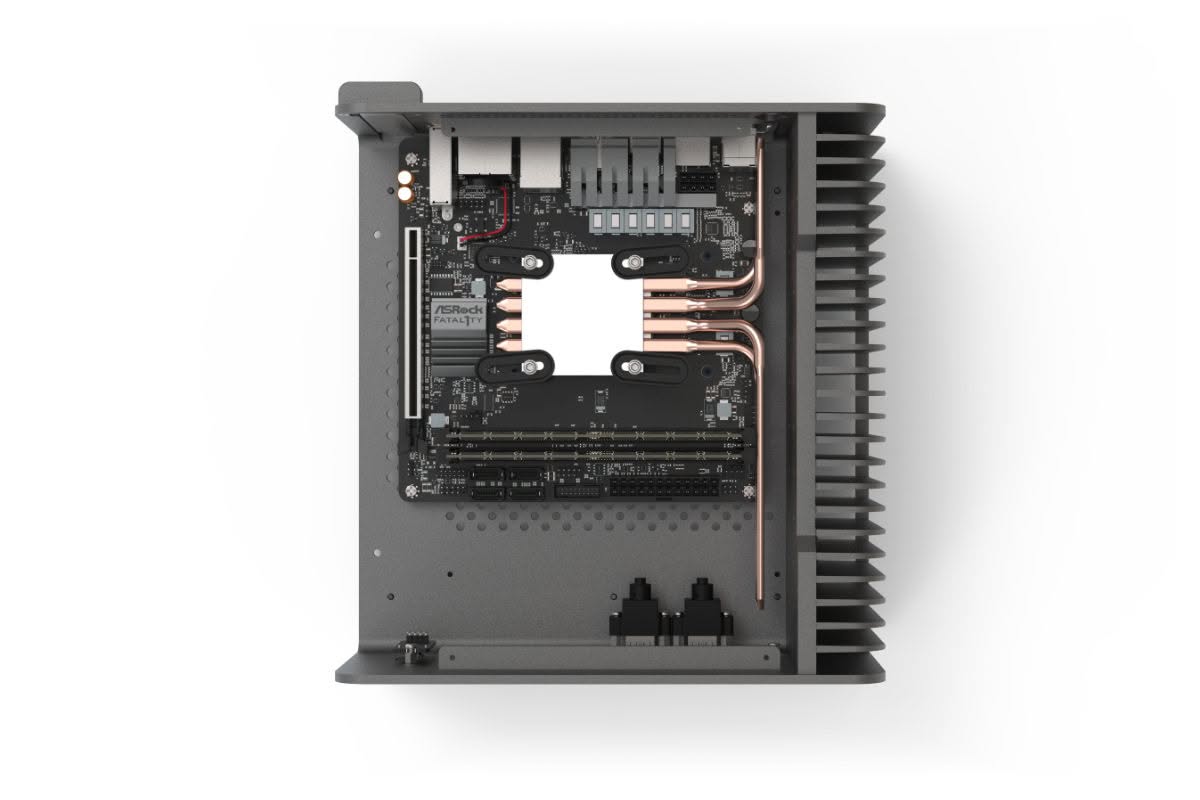
Carefully place the cooler assembly (CPU Mount + Heat Pipes) onto the CPU ensuring its centered on the IHS
Secure the Cooler Assembly

With the CPU mount centered on the CPU IHS, use the spring loaded retention screws to secure the position but Do NOT tighten them yet.
 With the CPU mount centered on the CPU IHS, use the spring loaded retention screws to secure the position but Do NOT tighten them yet.
 Tighten the CPU Mount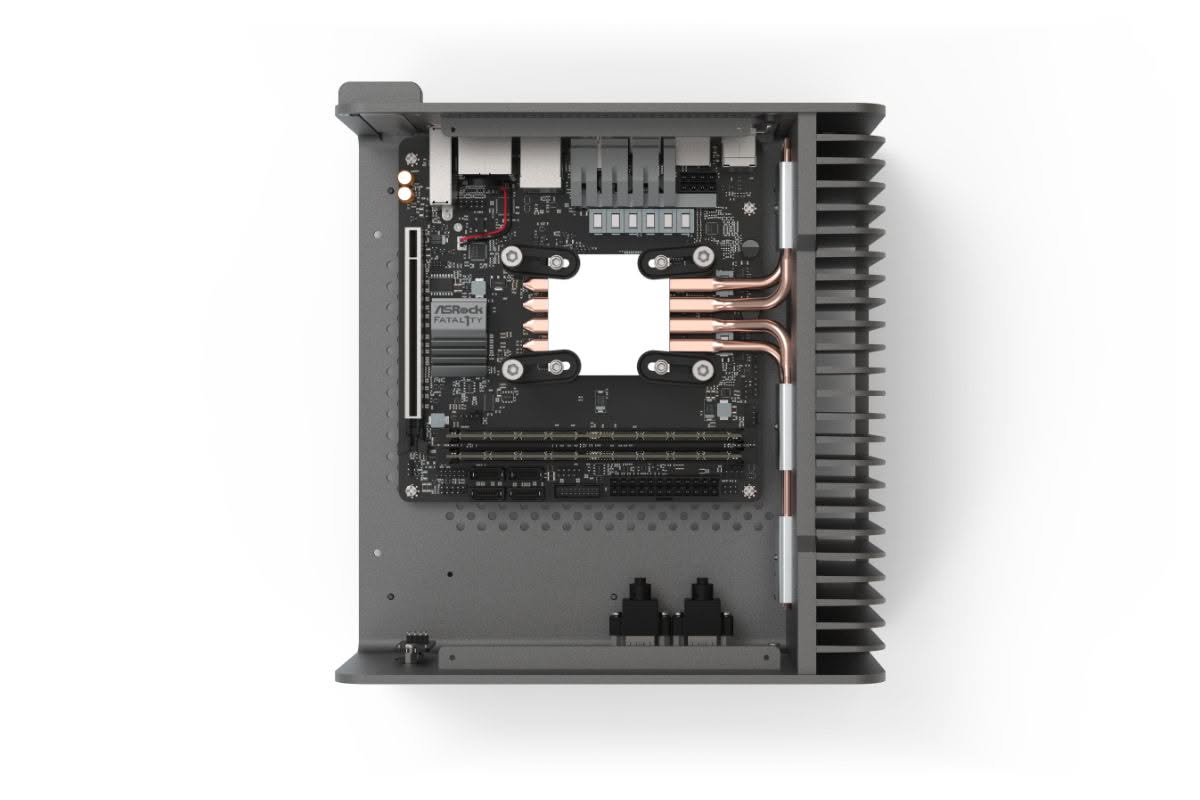
With the CPU mount centered on the CPU IHS, use the spring loaded retention screws to secure the position but Do NOT tighten them yet.