Preface to our Online Guides
We appreciate that for some, a printed user guide will always be the preferred option, which is why, in the past, we had always produced a clear and comprehensive one.
With the aim of reducing our environmental impact and waste, we have switched to this online guide. Beyond simply reducing material waste, this online format allows for an even more comprehensive product guide with more detailed steps and the ability to add or improve any part of the guide quickly based on user feedback.
Thank you for your understanding and if we can do anything to improve this experience, please let us know.
Introduction to the BC1 VGPU Kit
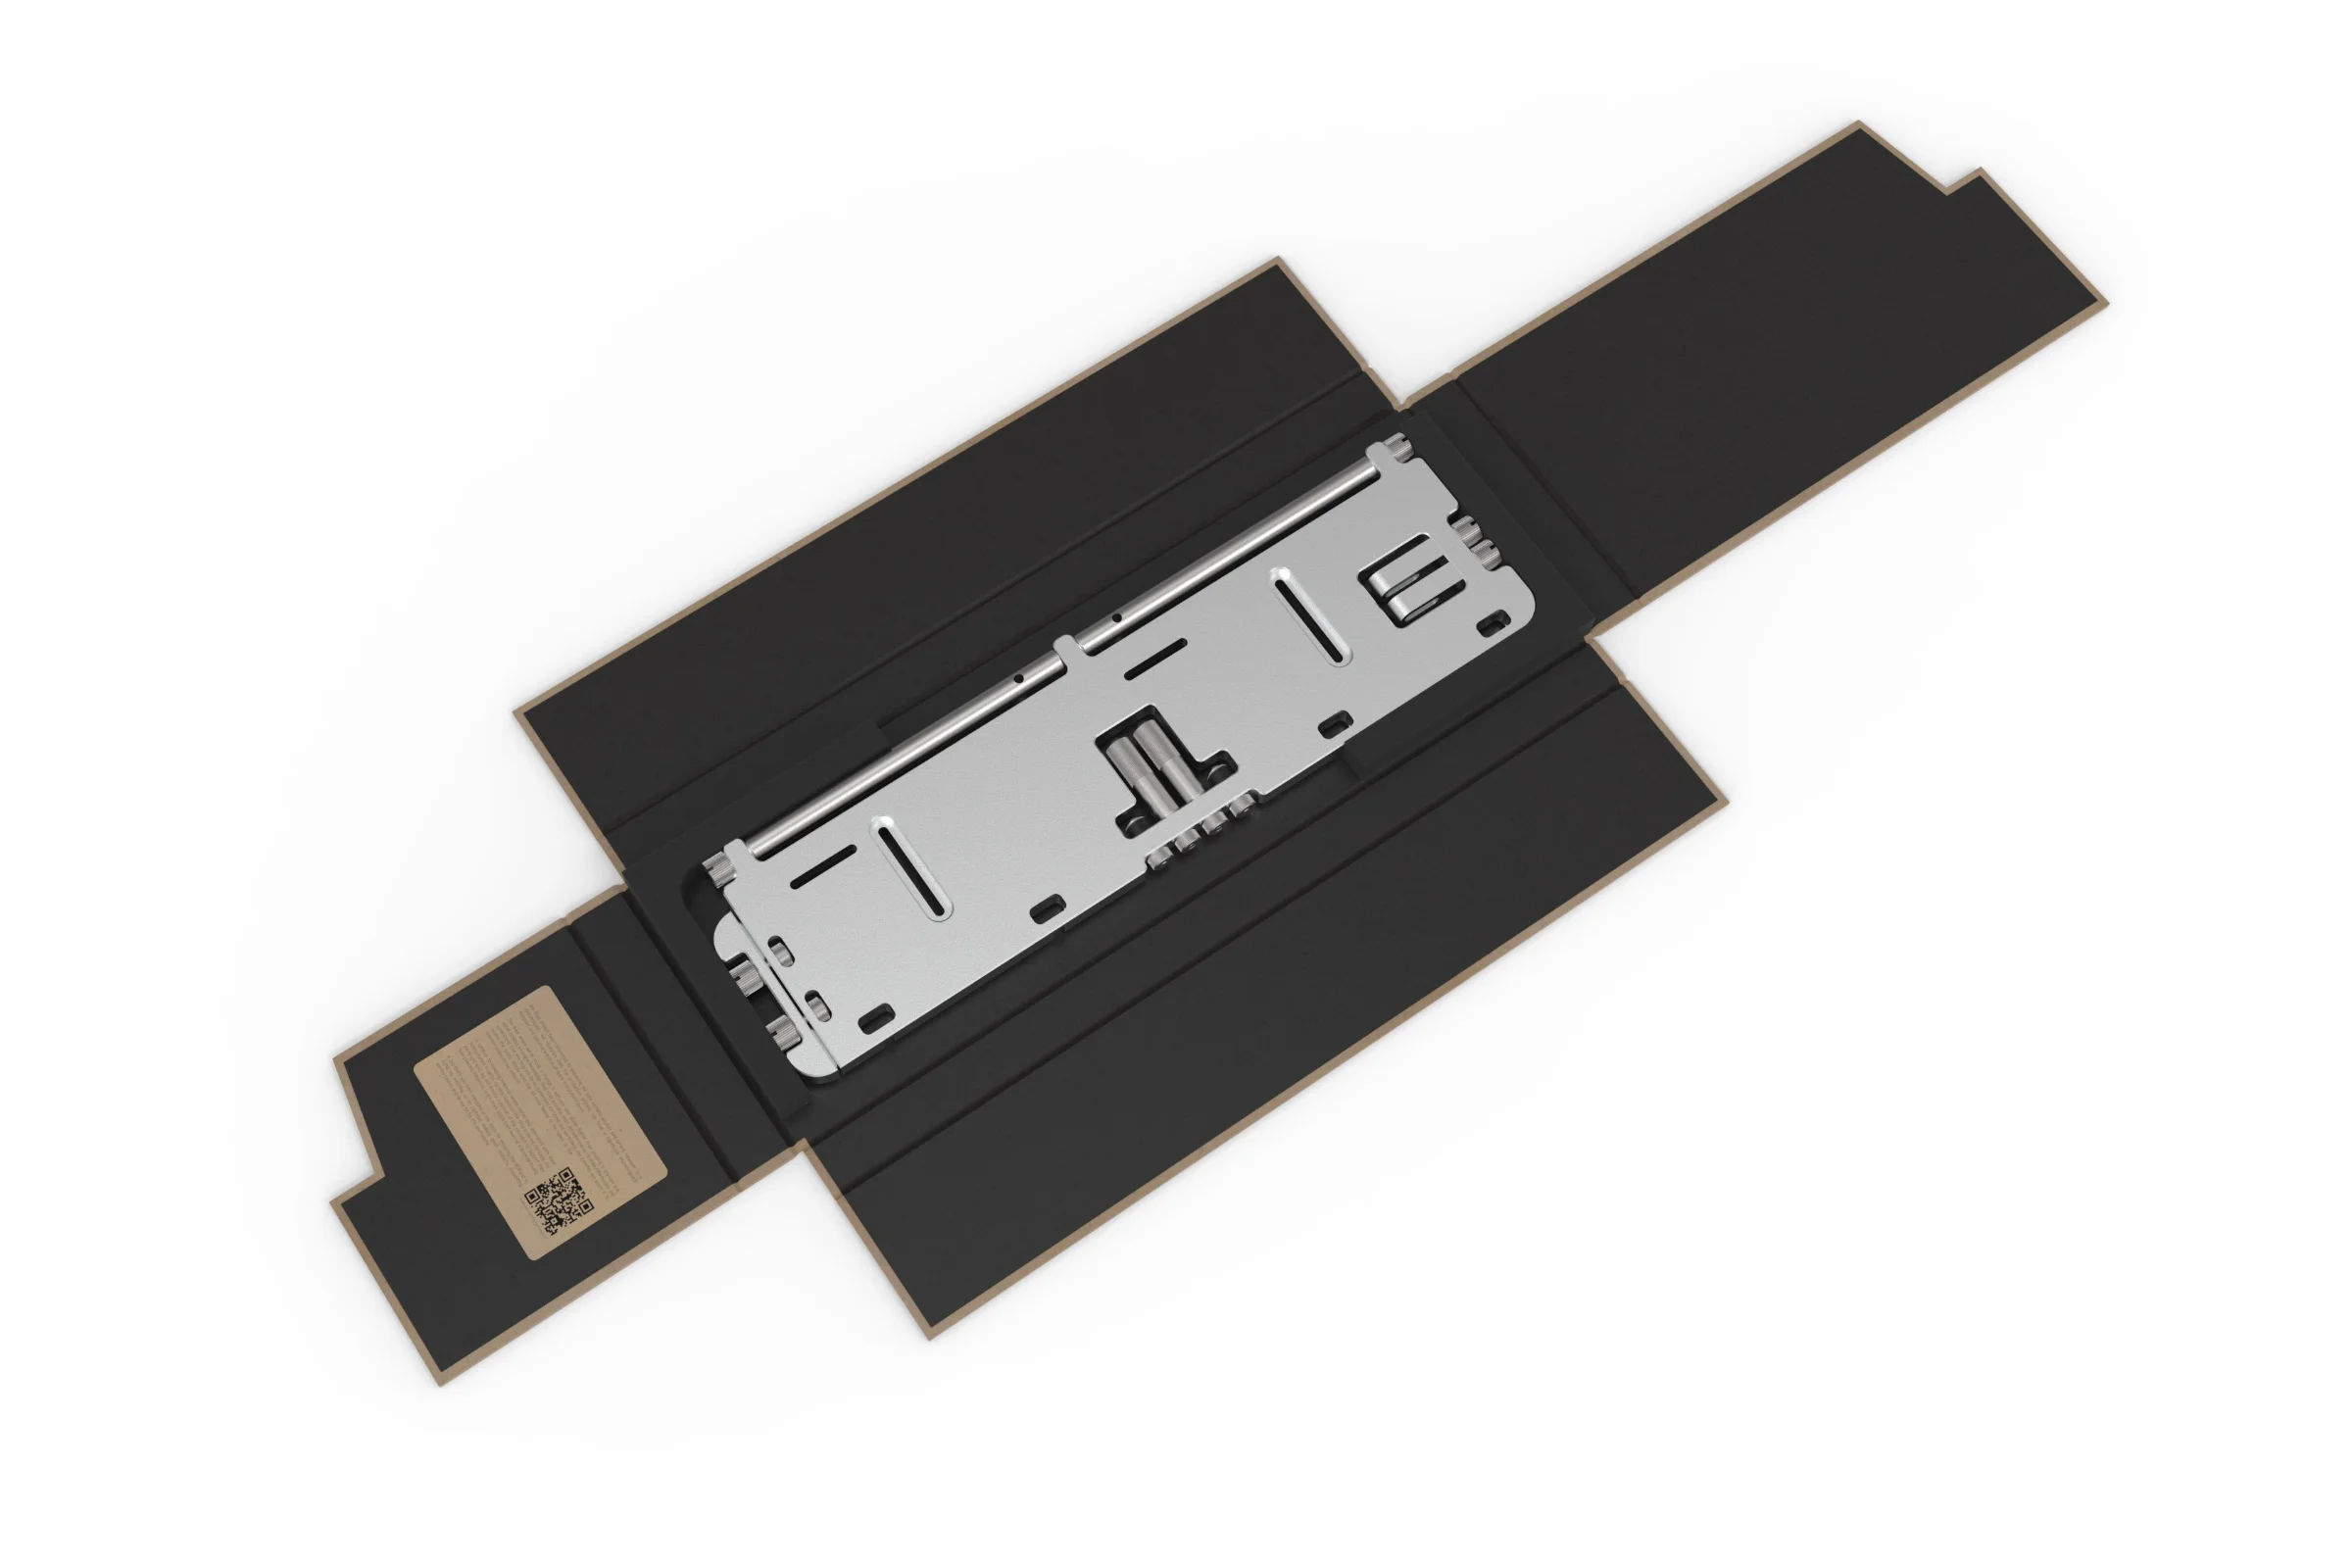
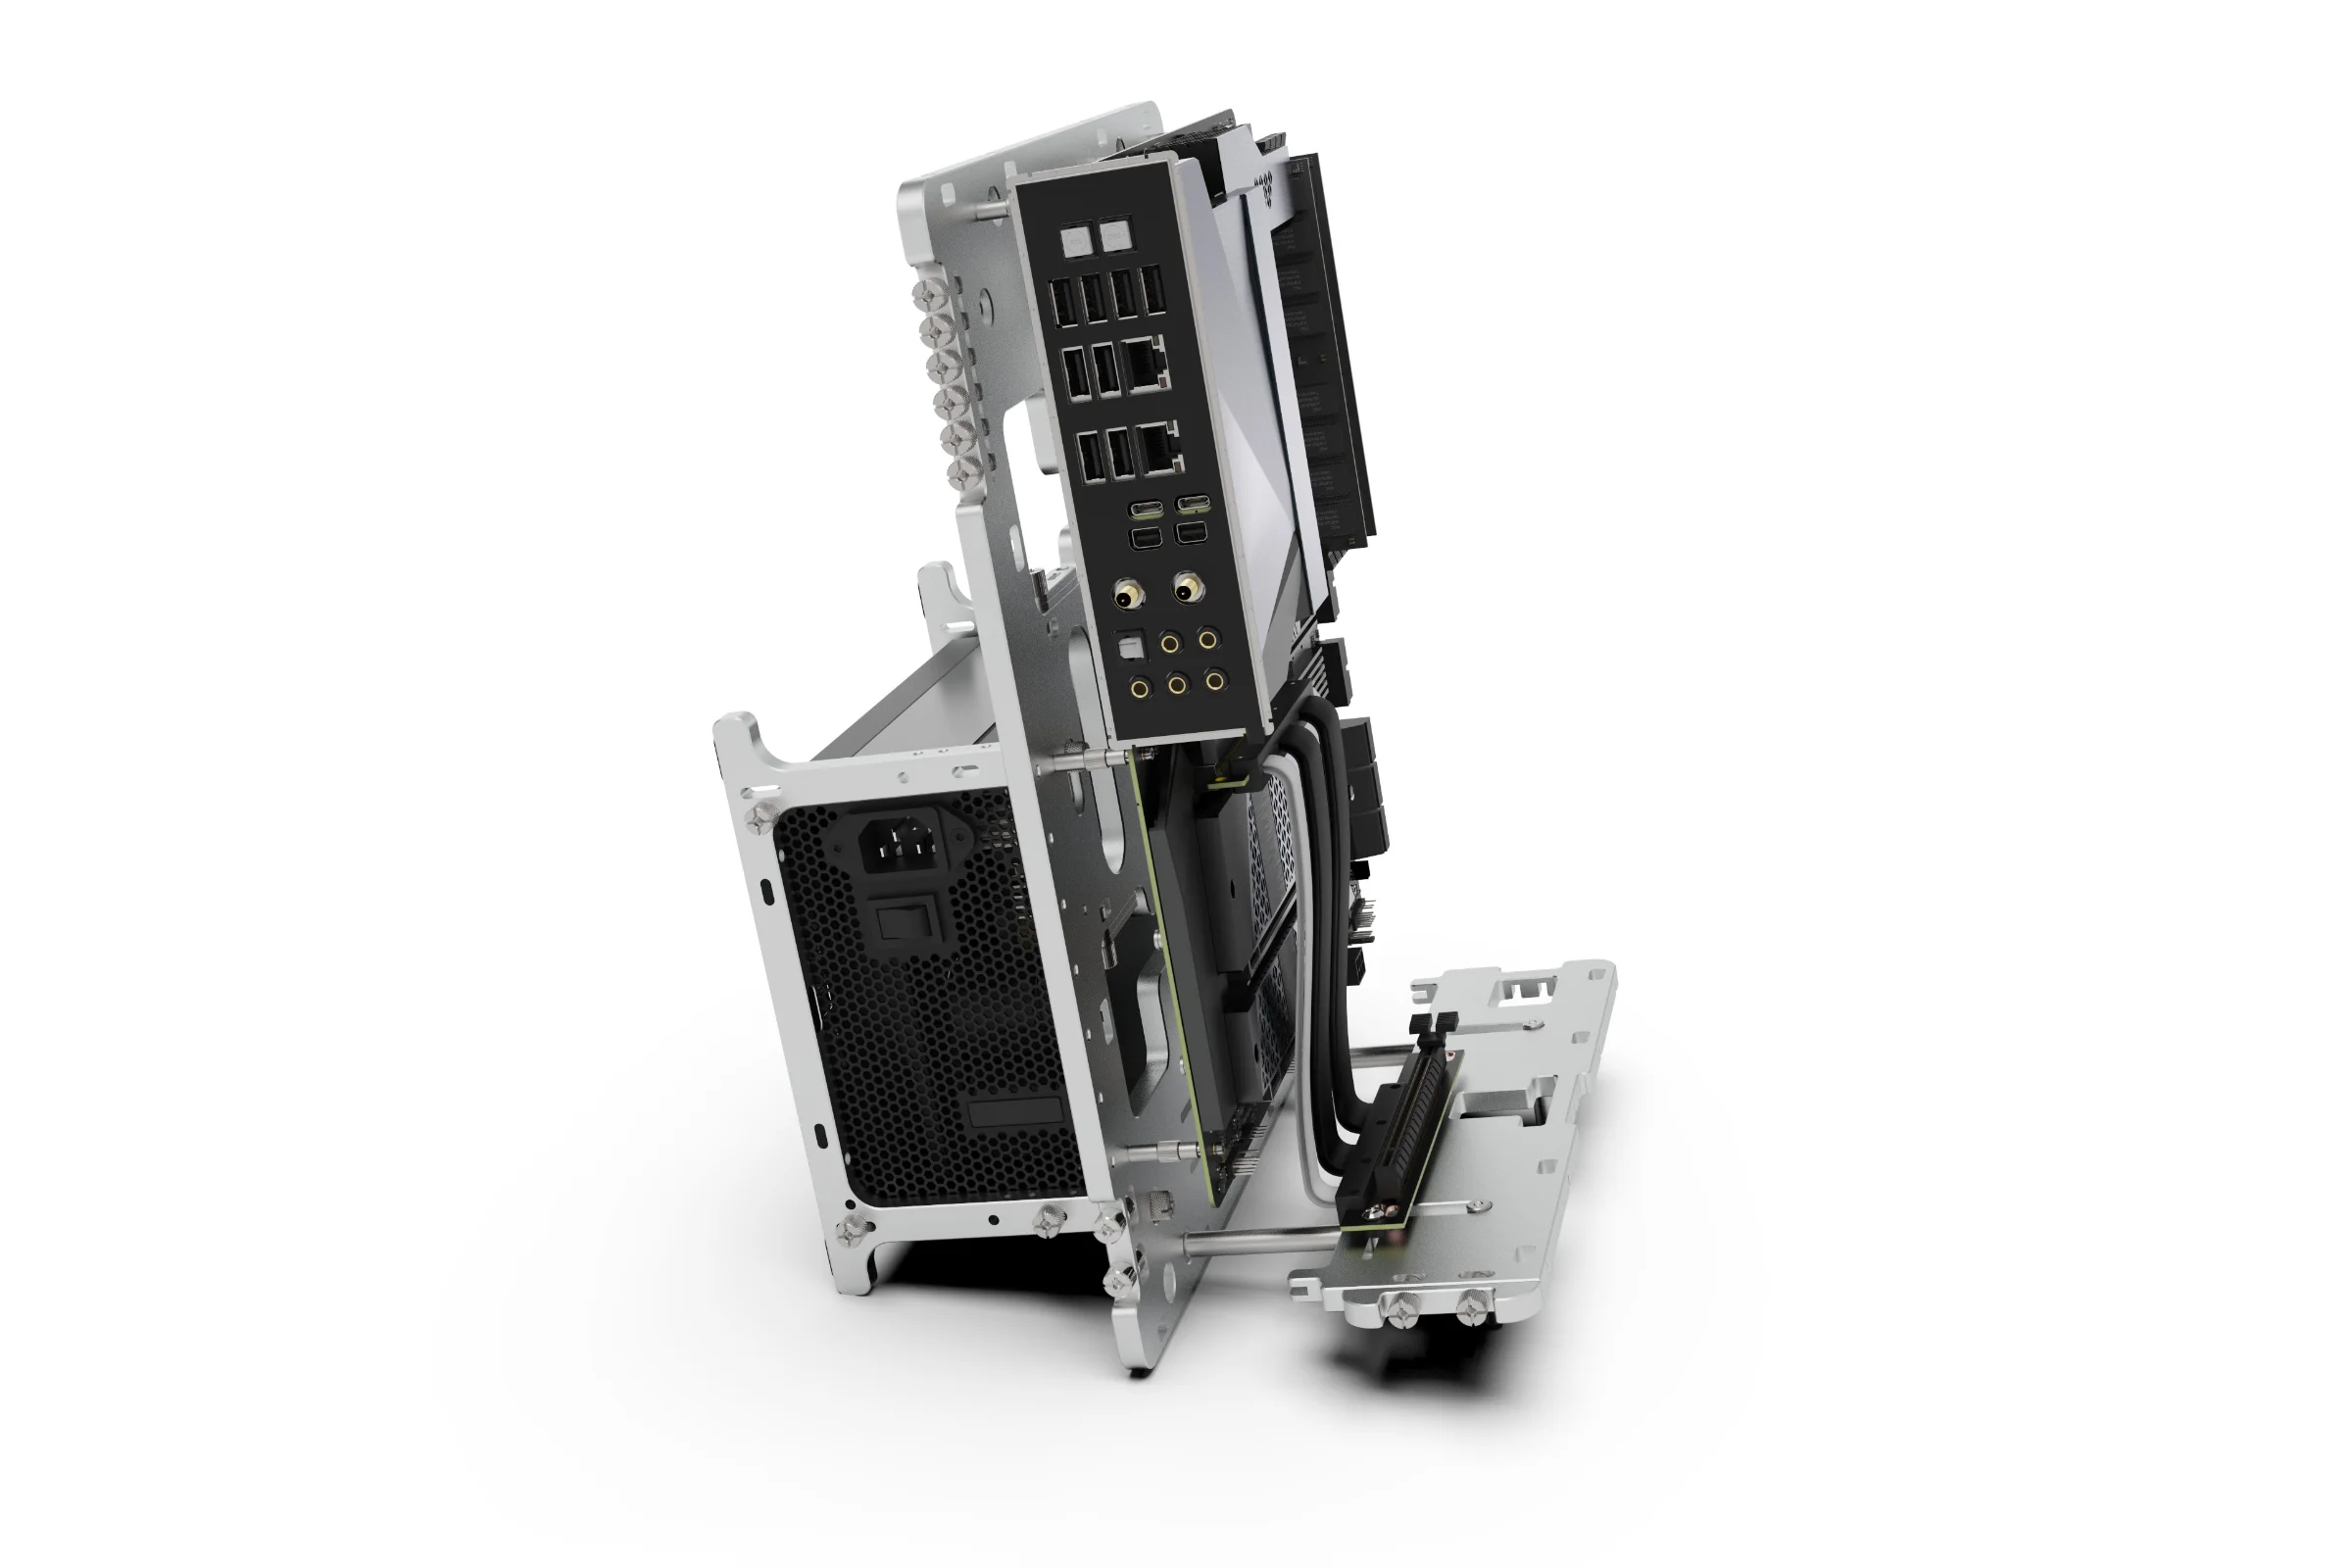
The BC1 VGPU Kit is a dedicated, adjustable base that fully supports the weight of modern GPUs while delivering complete vertical stability for the BC1 Open Benchtable. Using a standard riser cable (not included, ~18 cm with a 90° socket), your graphics card is securely mounted, resulting in a build that is both visually impressive and mechanically sound.
The kit also includes mounts for a radiator, allowing it to be fitted neatly behind the benchtable in a streamlined vertical orientation.
Design Overview
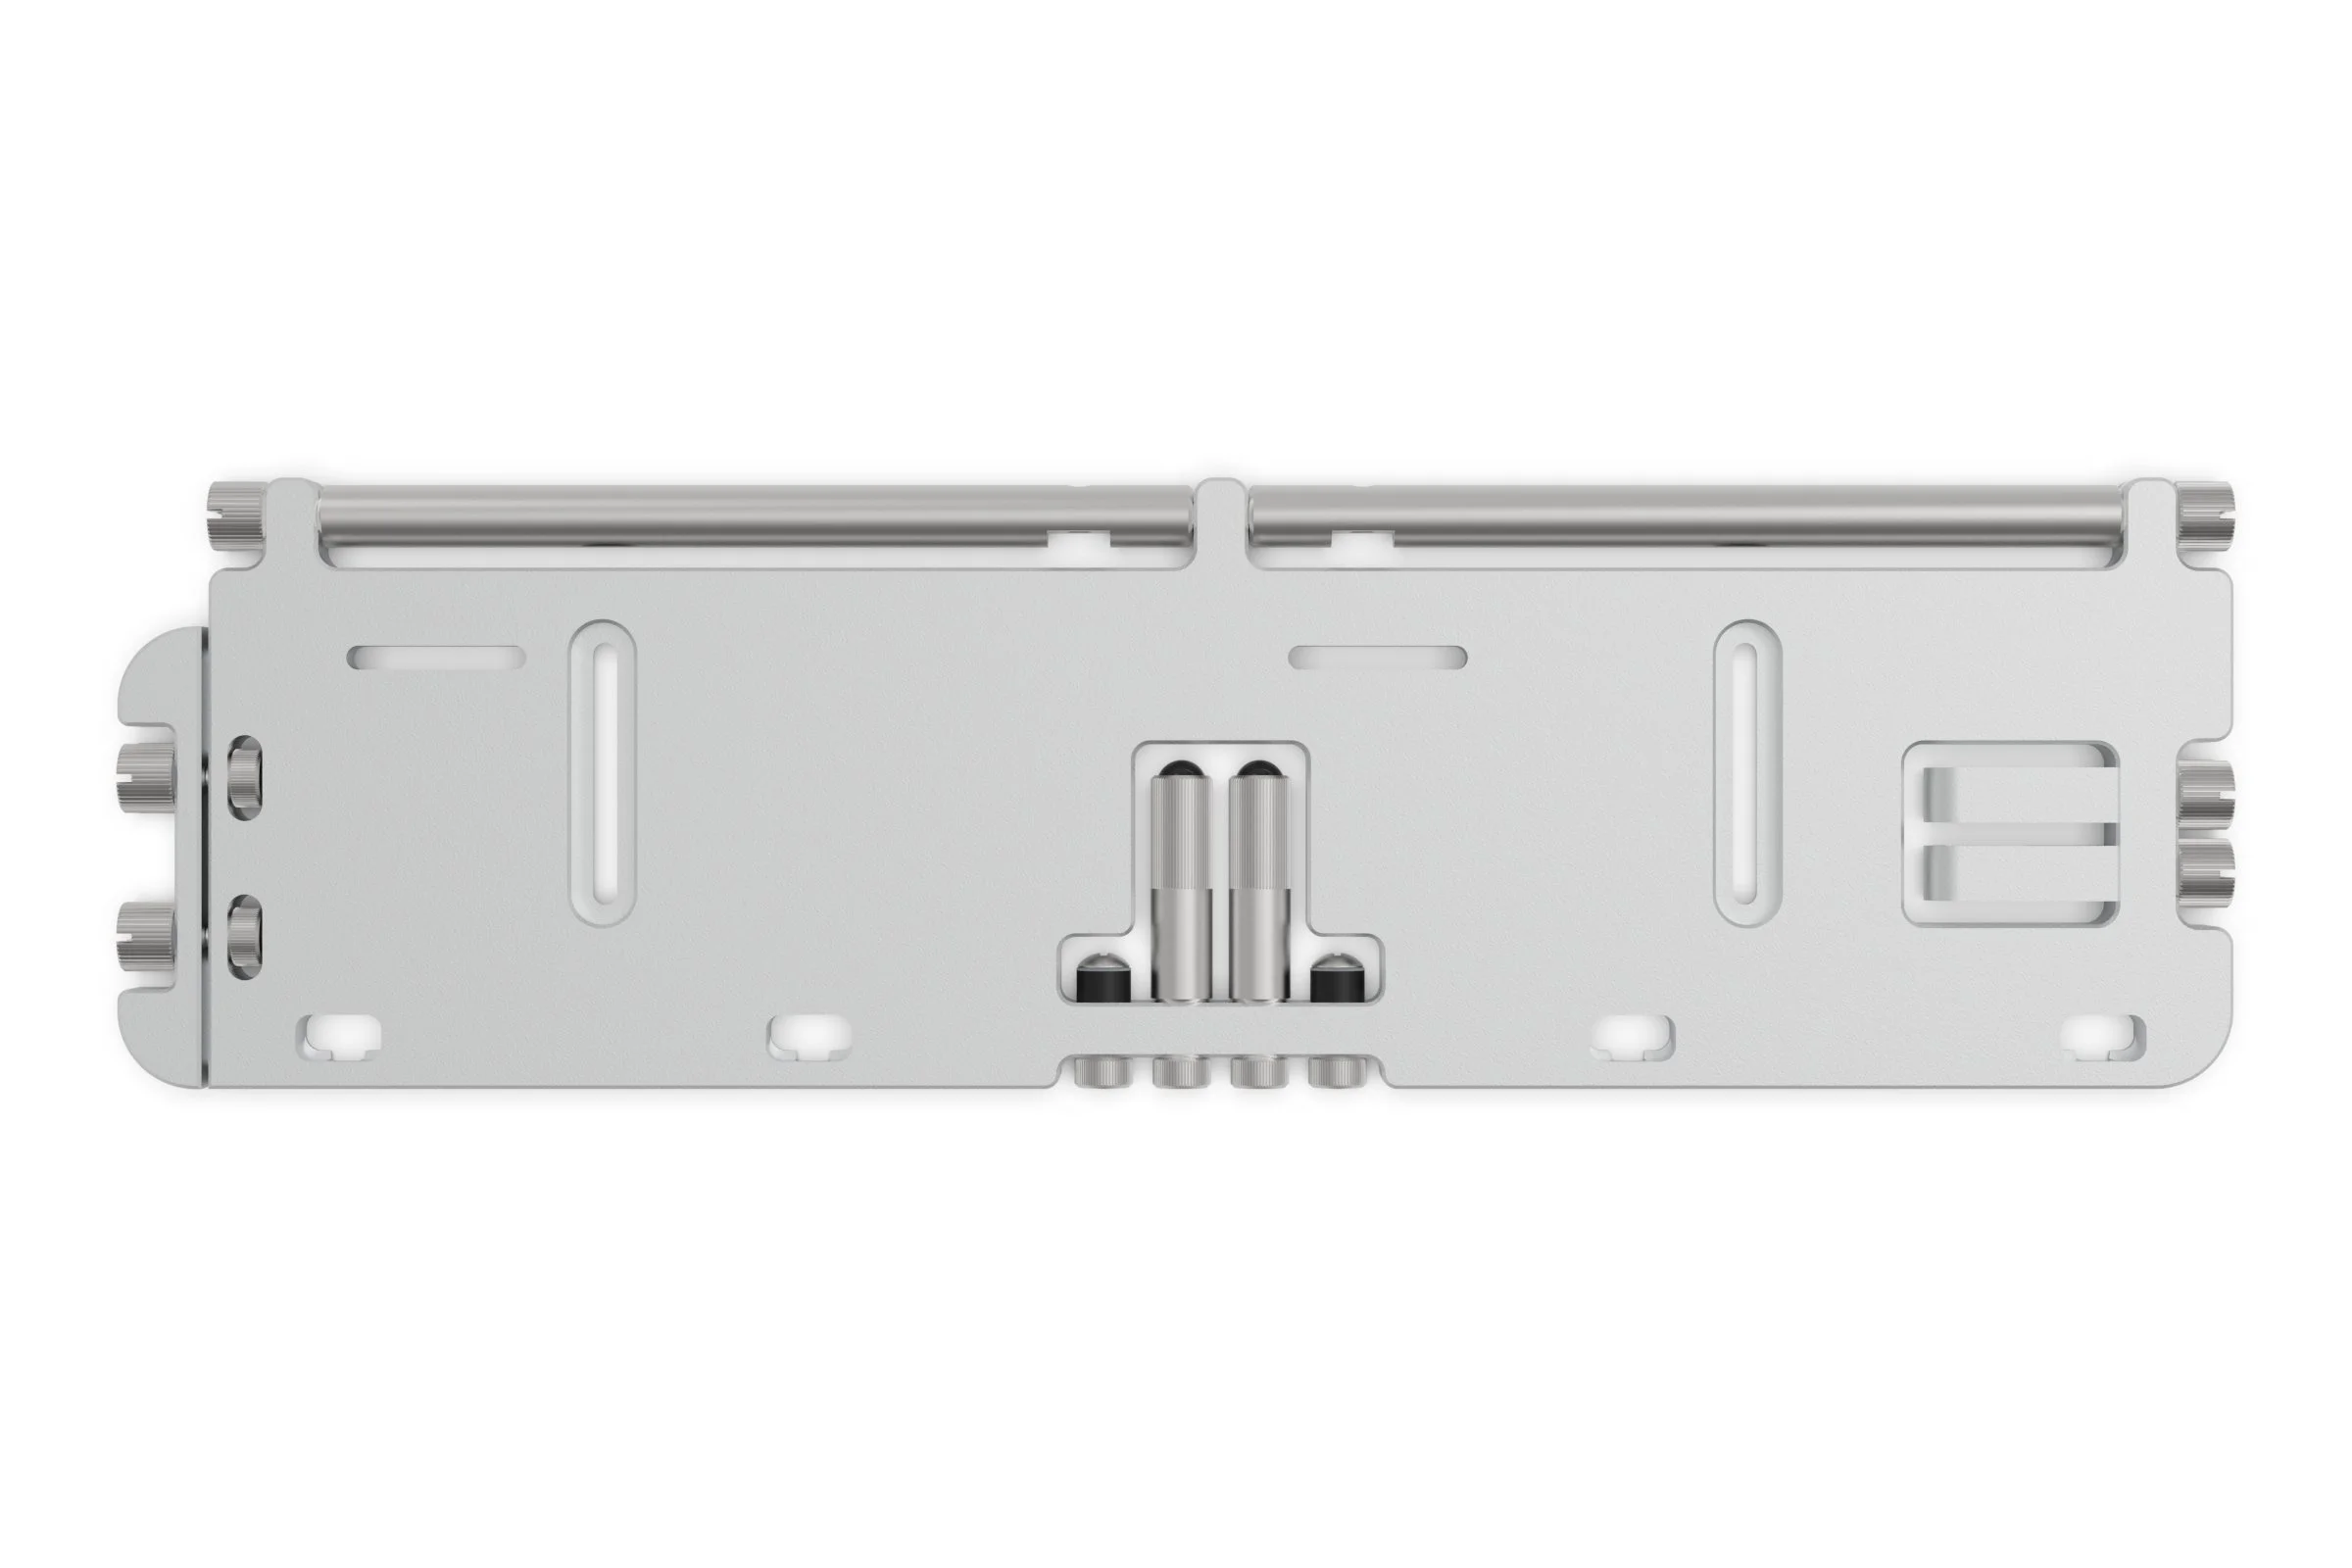
Main Body
Support Rod
M3 Thumbscrew
PCI Lock
M3 Thumbscrew
M3 Nut
Foot
Riser PCB Screws, Standoff & Washer
M3 Nut
Radiator Vertical Mount
M3 Thumbscrew
Slot for base position adjustment
Slot for riser PCB mounting
Side mount location
Prepare the BC1
Before being able to attach the VGPU, the BC1 should already be setup in vertical mode (by relocating the feet to the alternative mounting points). If you dont know how to do this, please refer to the BC1 V2 user guide for details.
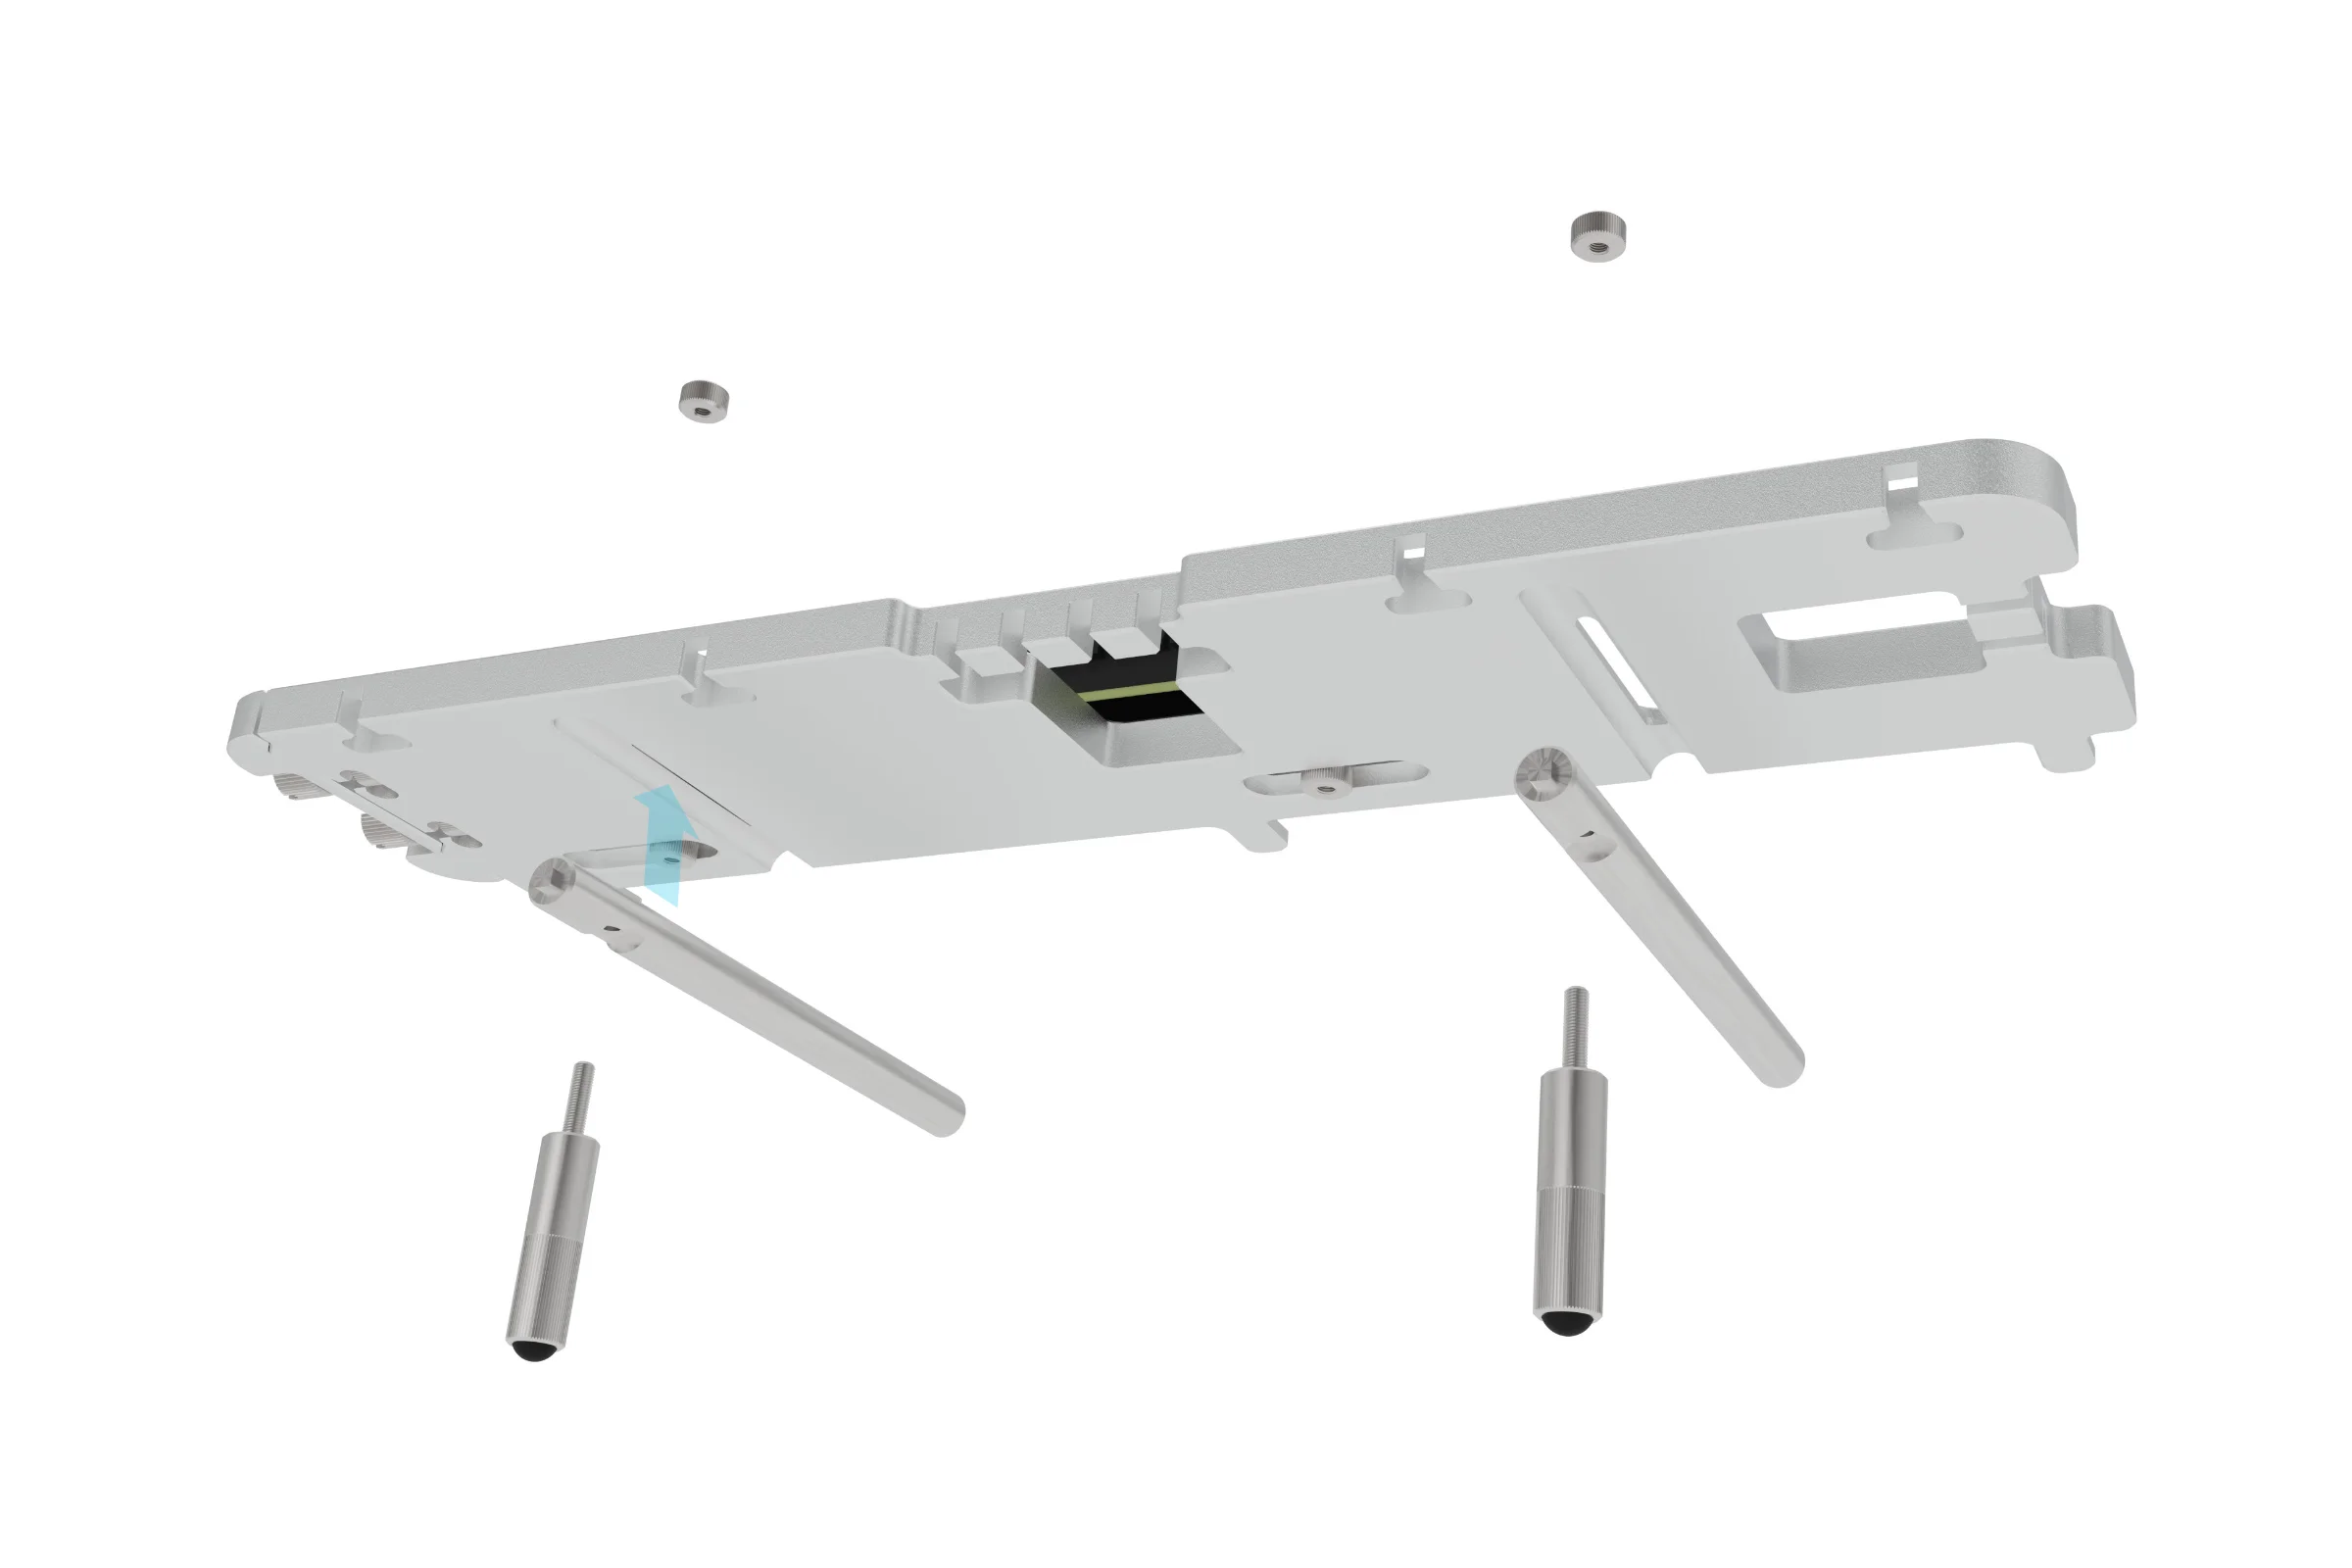
Rod
Support Rod
M3 Thumbscrew
Radiator Vertical Mount
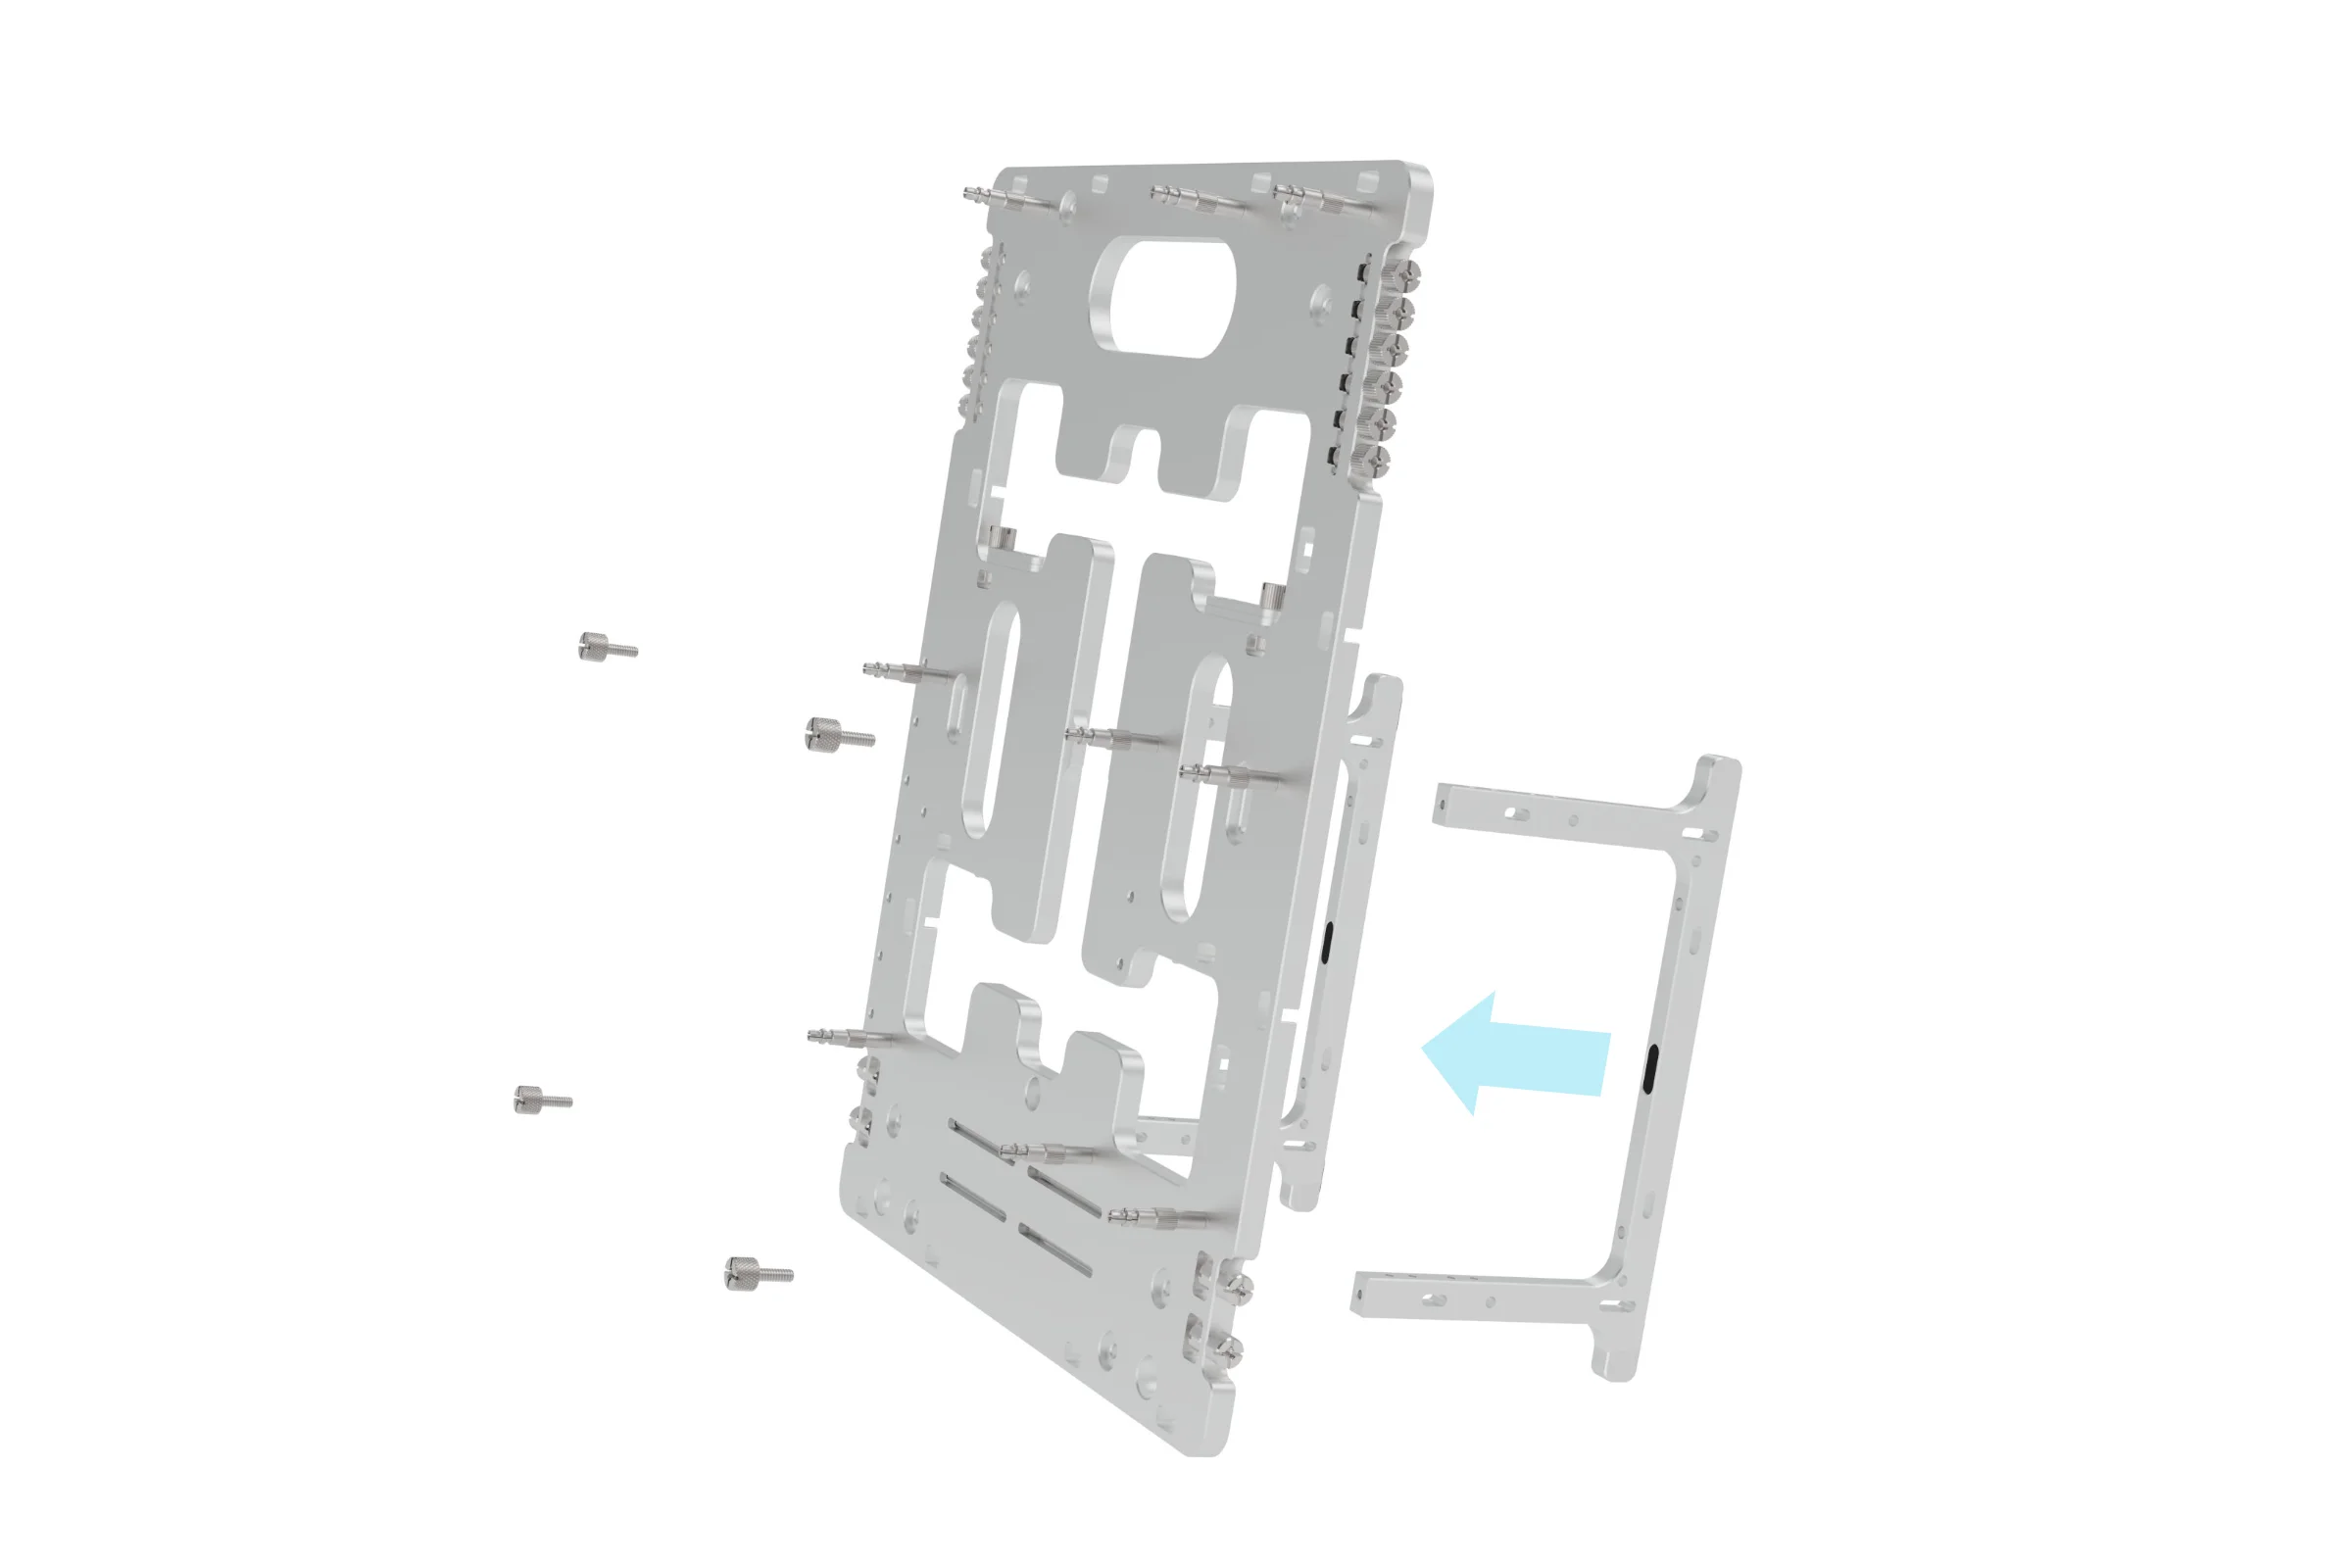
Prepare the VGPU
Remove the following parts from the VGPU body
- Rod (x2)
- Feet (x2)
- Riser Mount (x2)
- Radiator Mount (x2) – Only if you plan to mount a radiator behind the BC1
Rod
Support Rod
M3 Thumbscrew
Radiator Vertical Mount
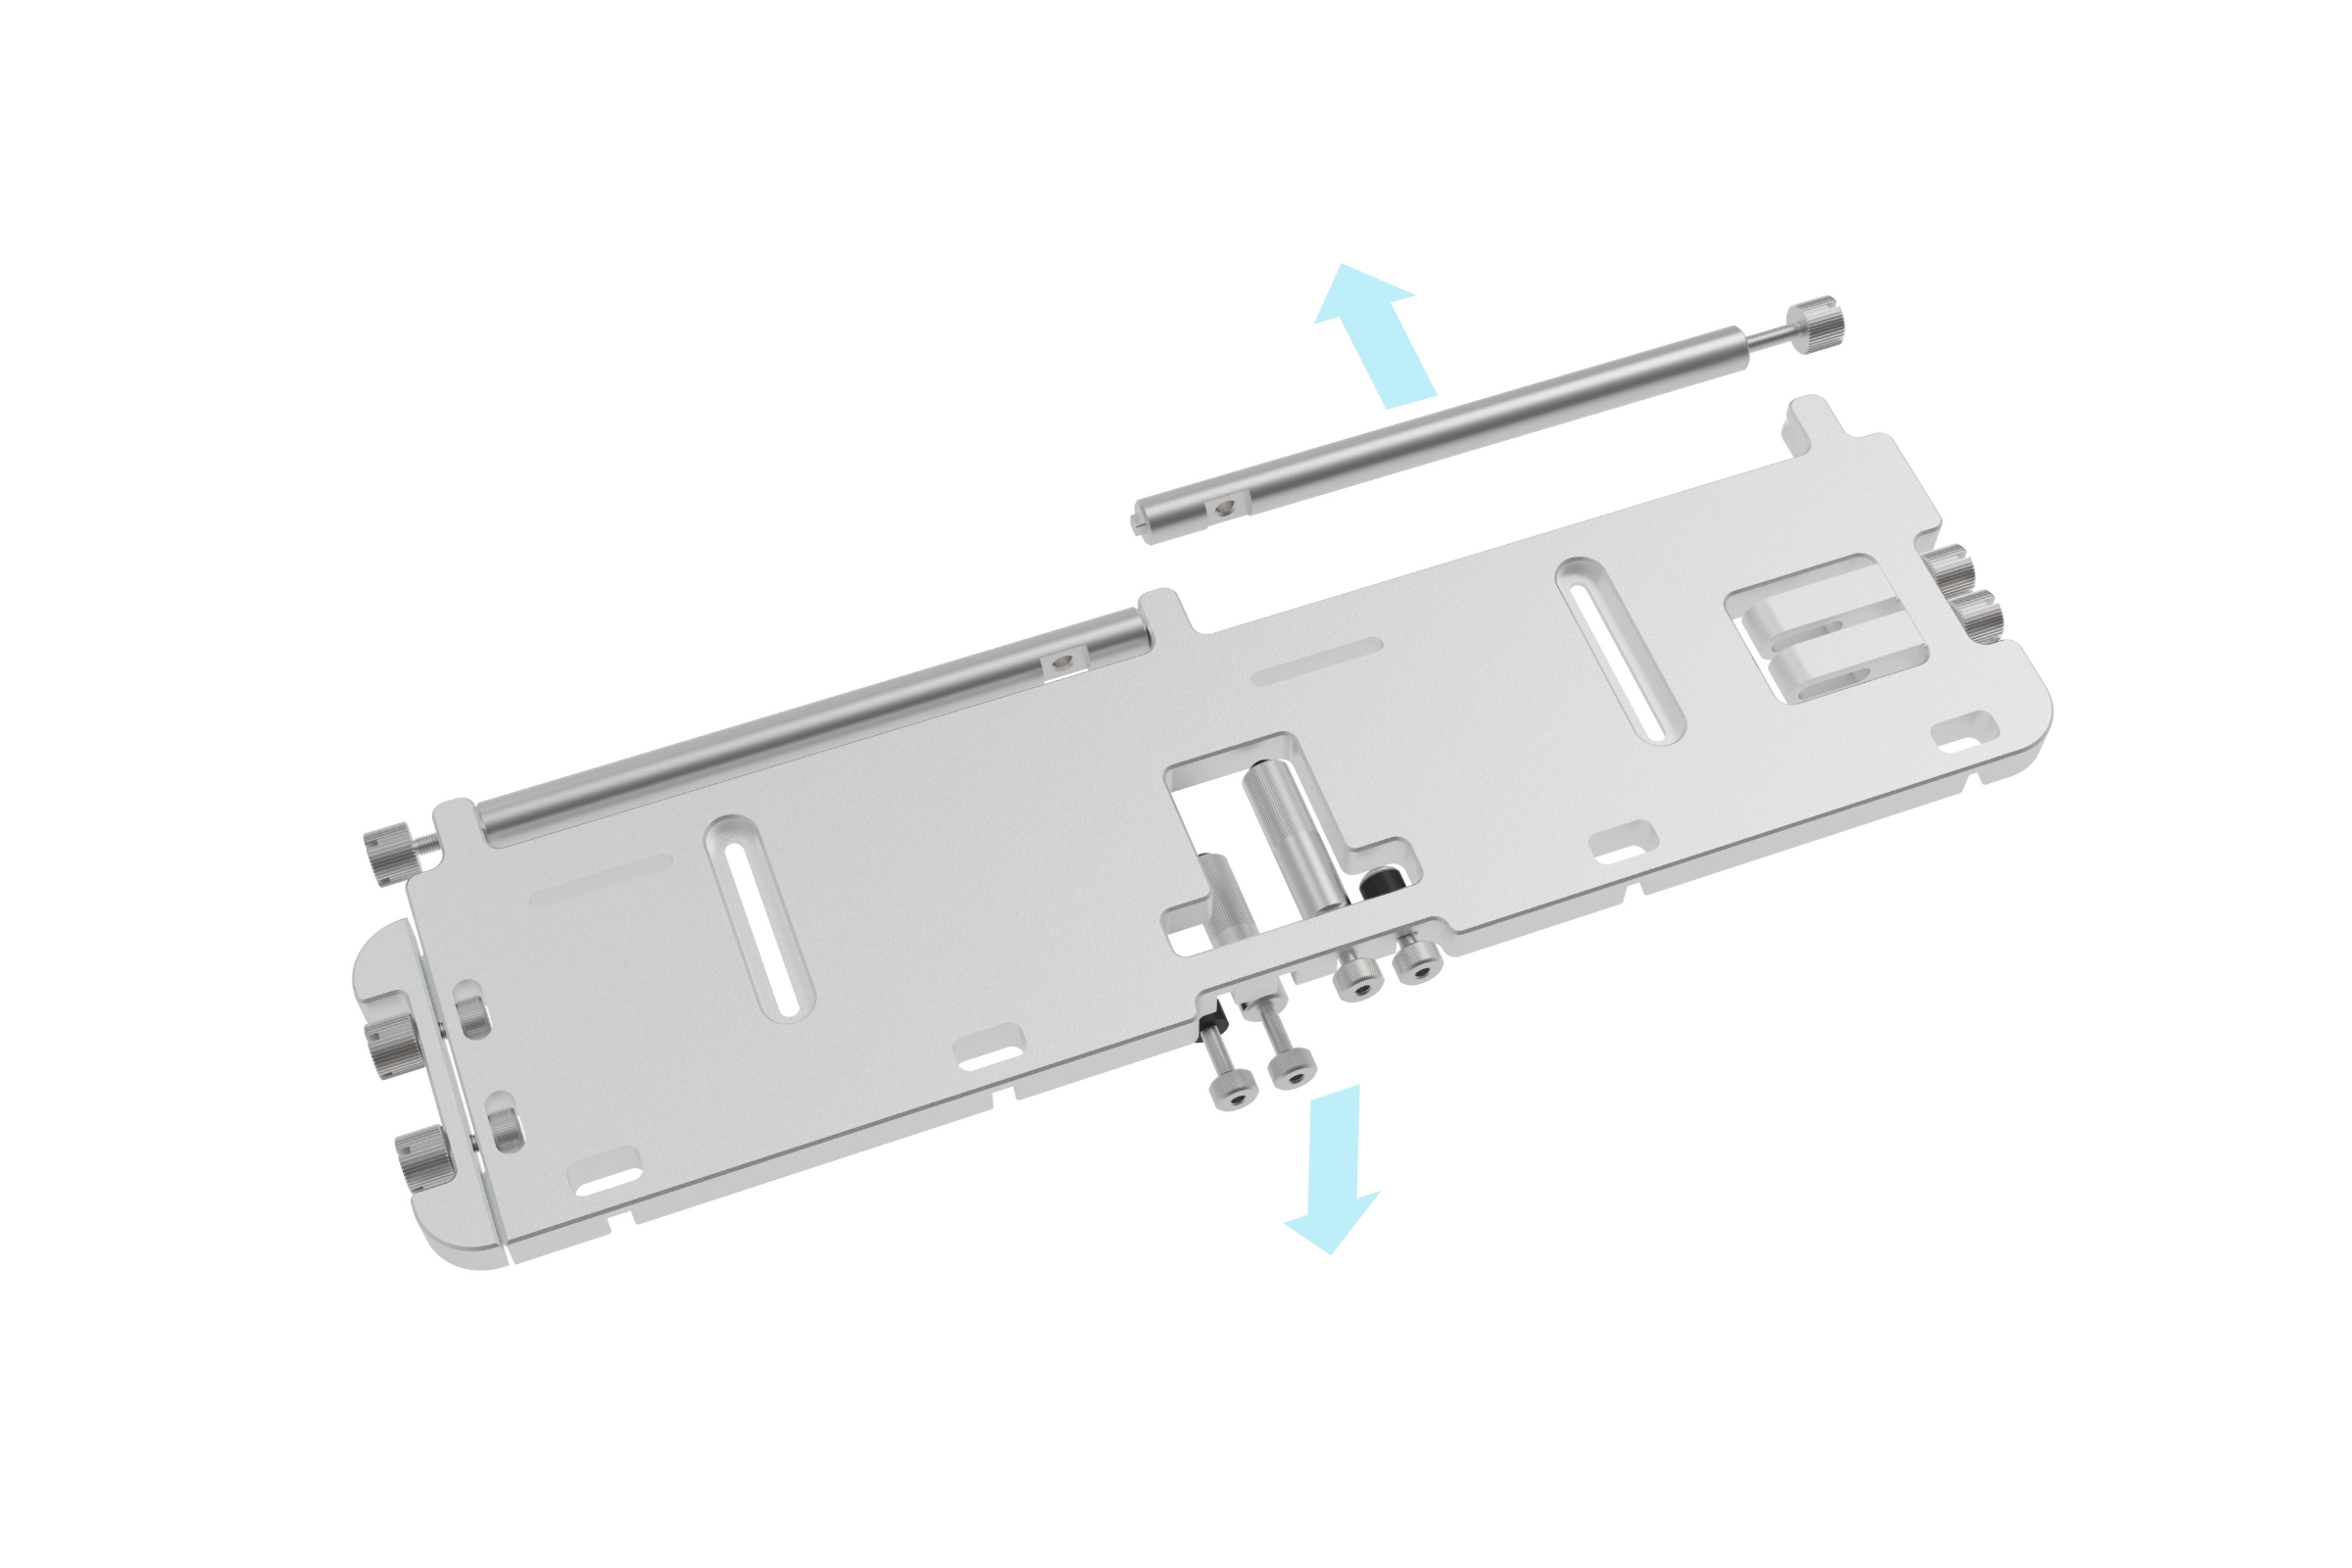
Whilst it can be done after fitting to the BC1, now is an ideal time to attach the riser cable to the VGPU. The exact hole location on the riser cable PCB will vary between different makes/models which is why the VGPU features slots instead of fixed hole locations.
Using the included screws, washer, nylon spacer and nut, attach the riser cable PCB to the VGPU via the 2 slots.
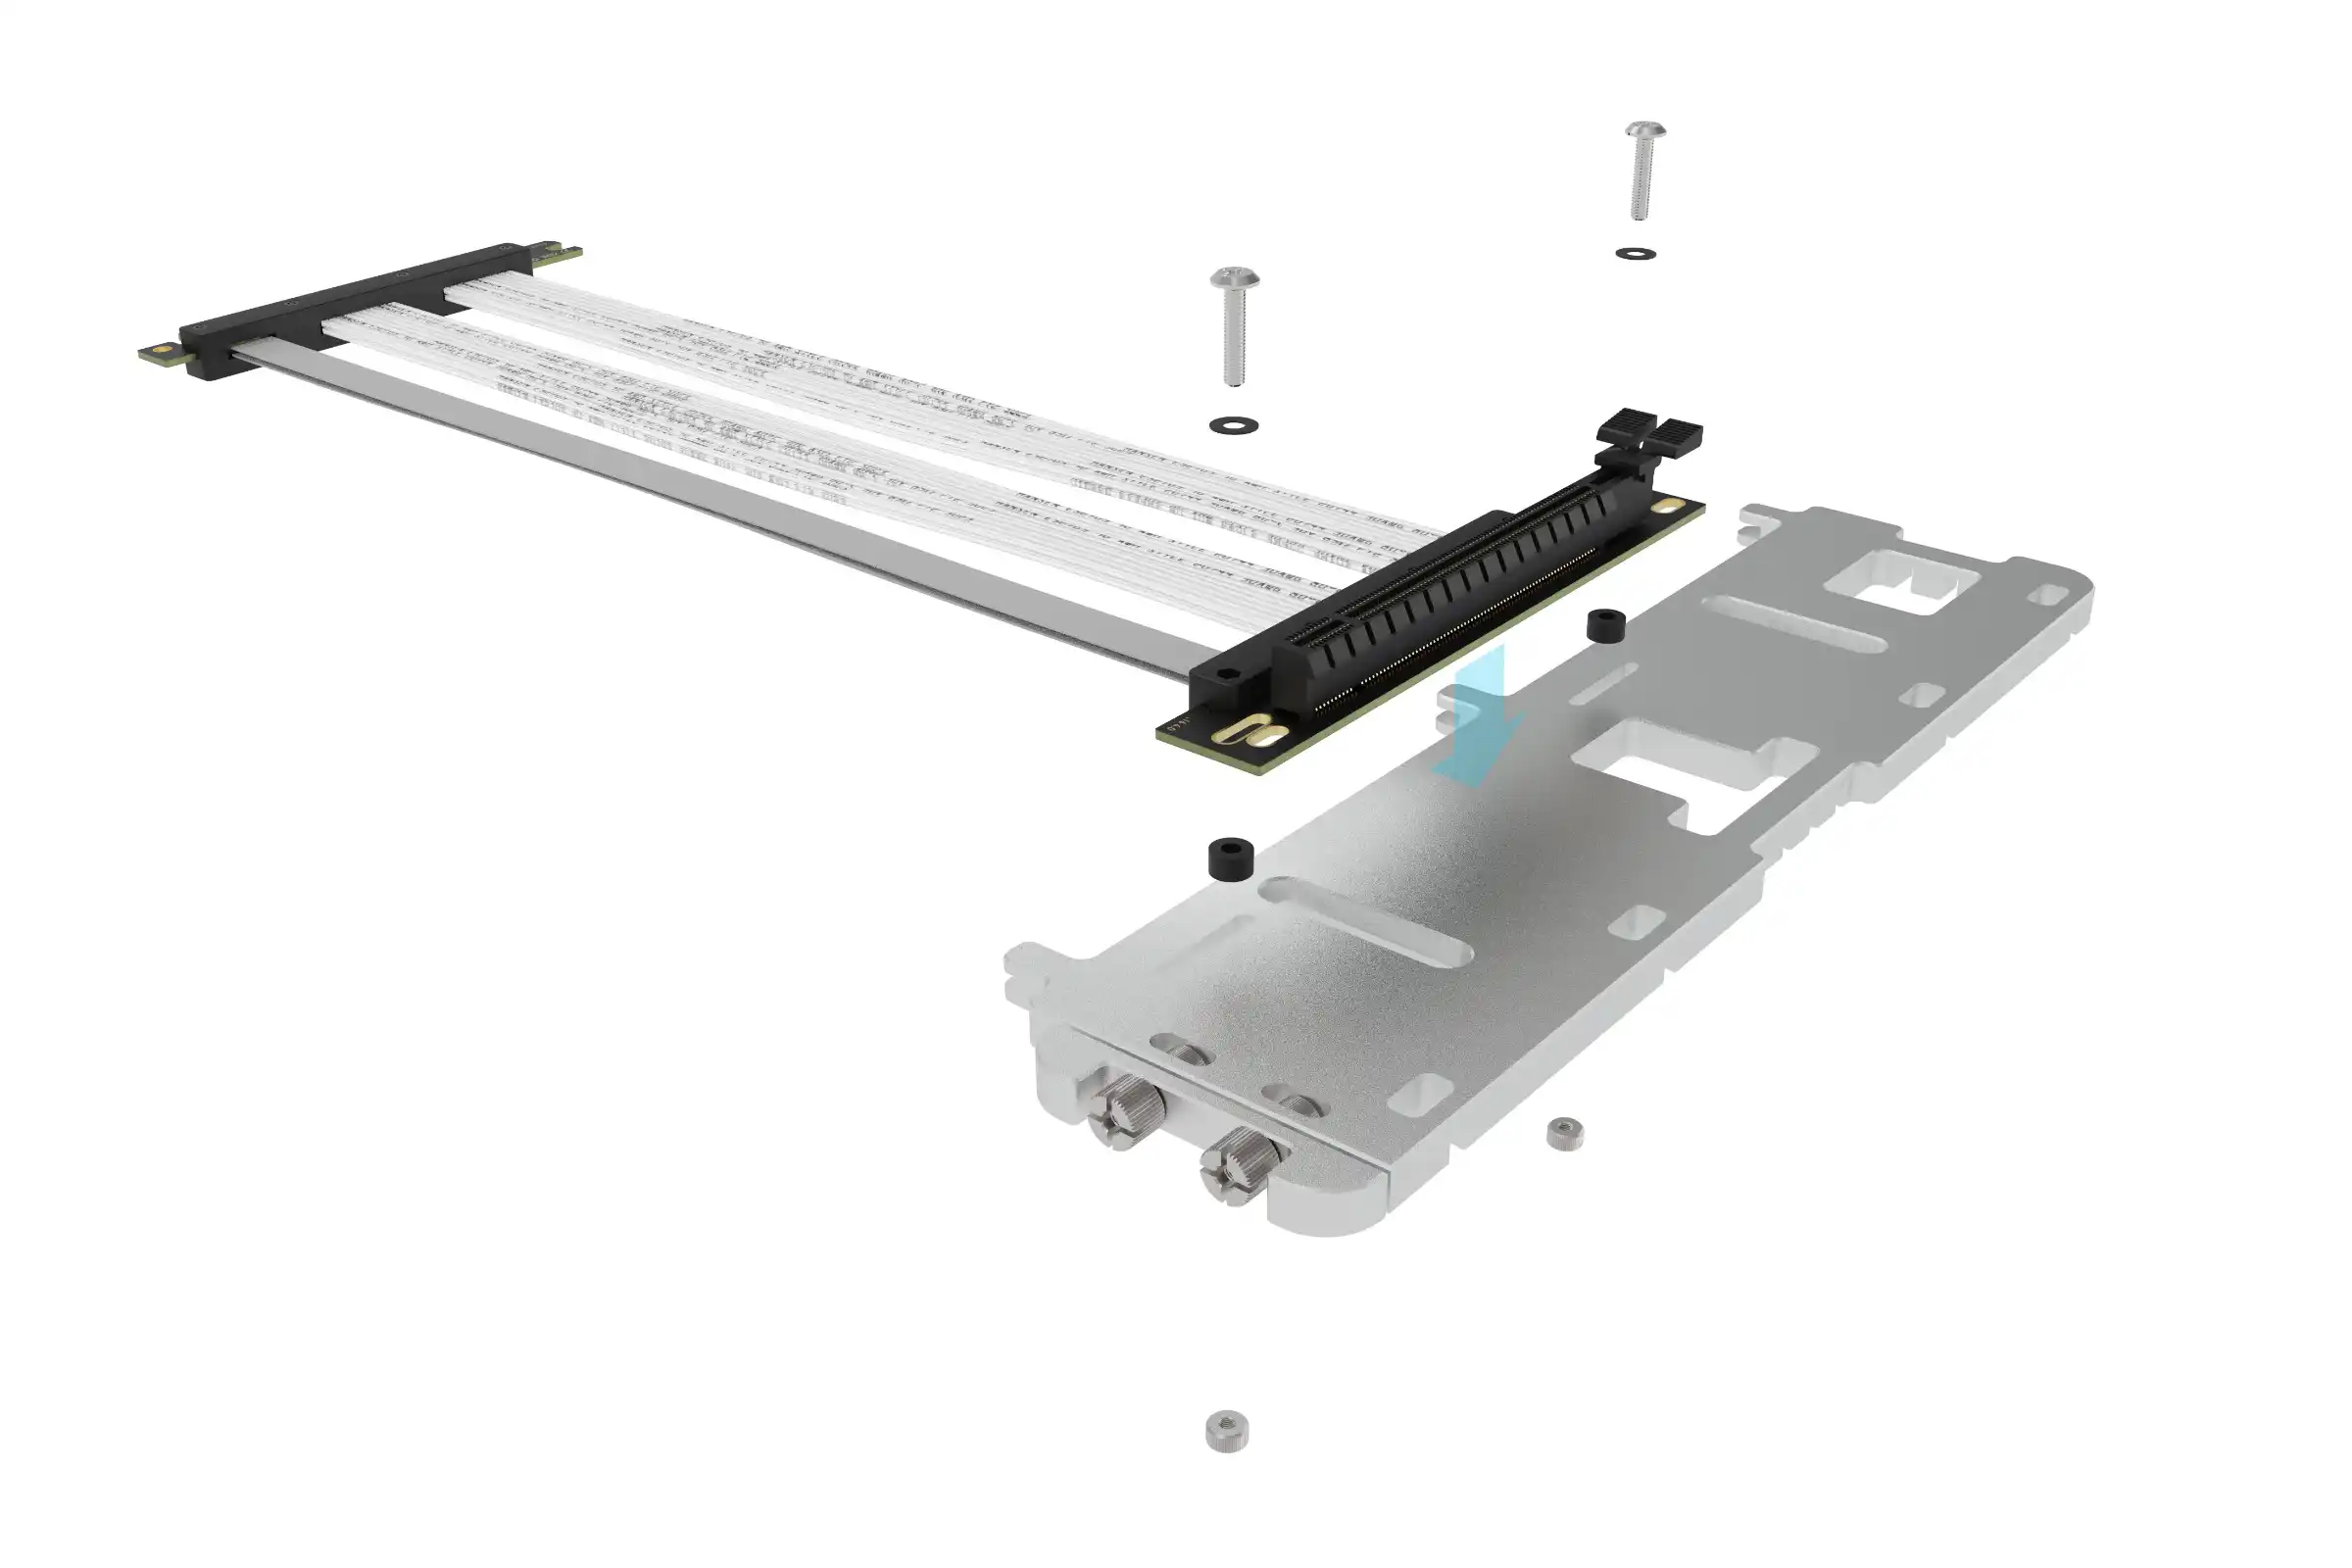
Screw
Washer
Riser Cable PCB
Nylon Spacer
Slot
Nut
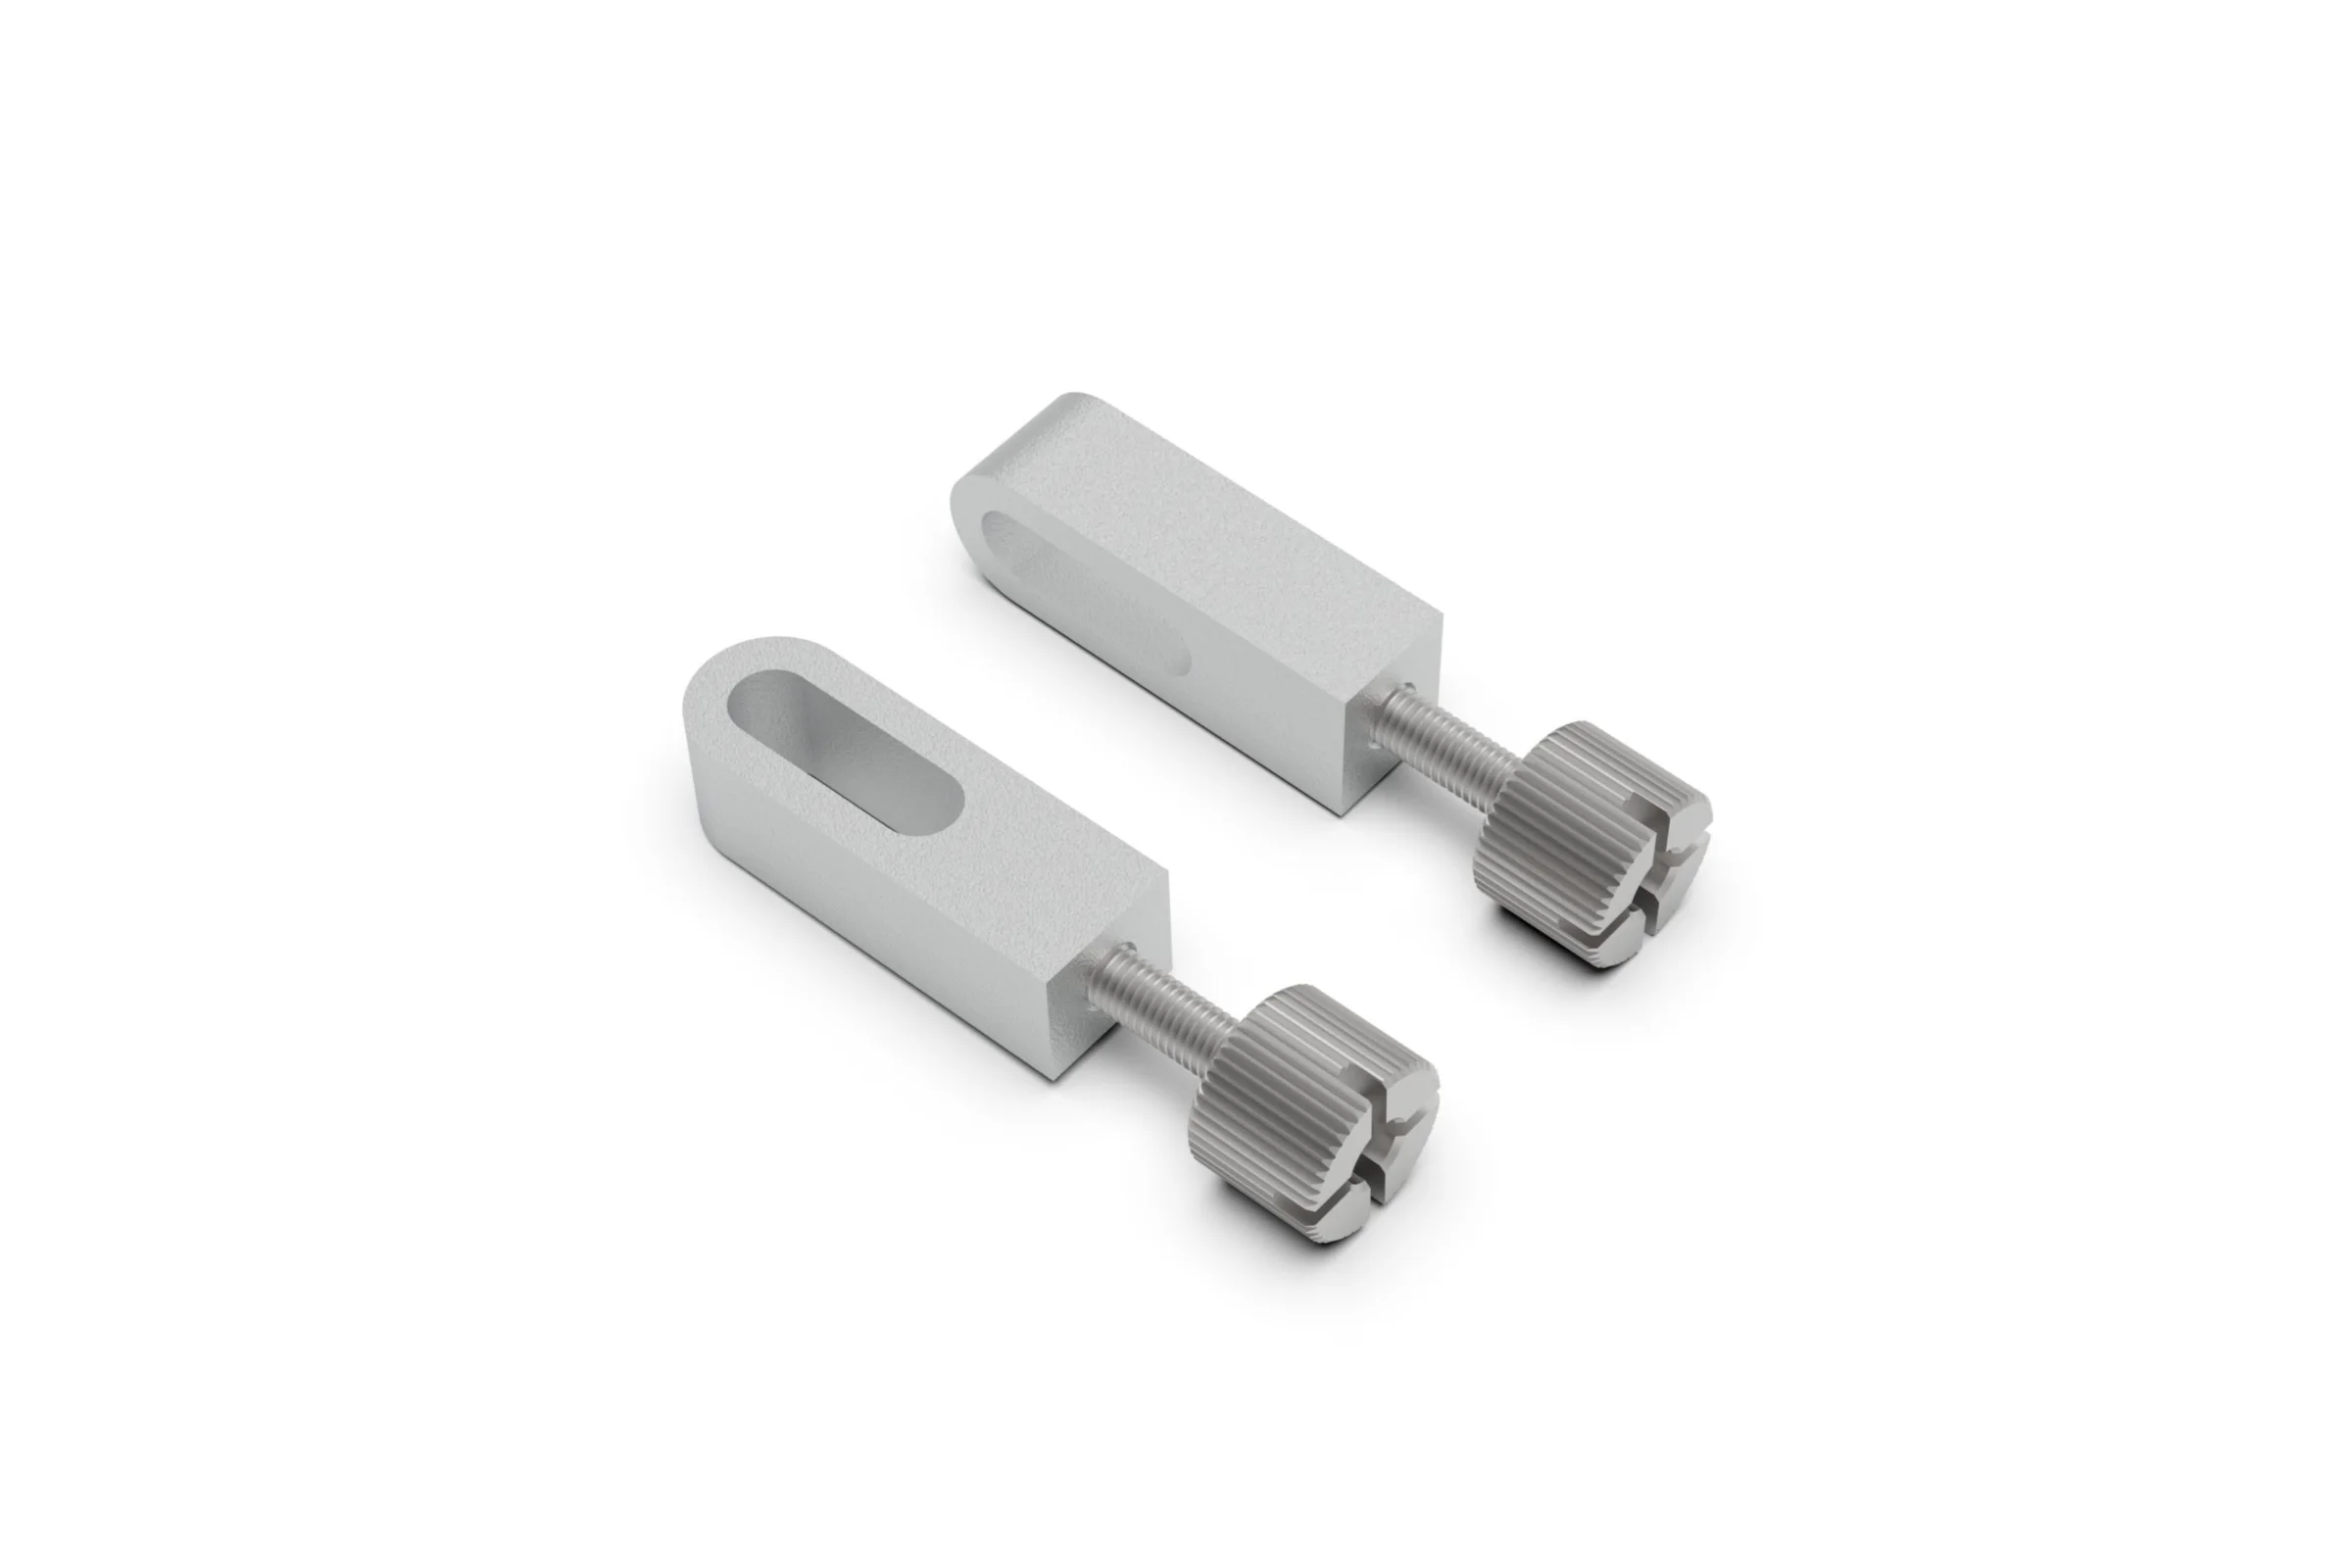
Finally, attach the rods to the underside of the VGPU using the feet and nuts. The feet also act as a thumbscrew that passes though the hole in the rod and is then secured to the VGPU from above using the m3 nut.
Foot
Rod
Nut
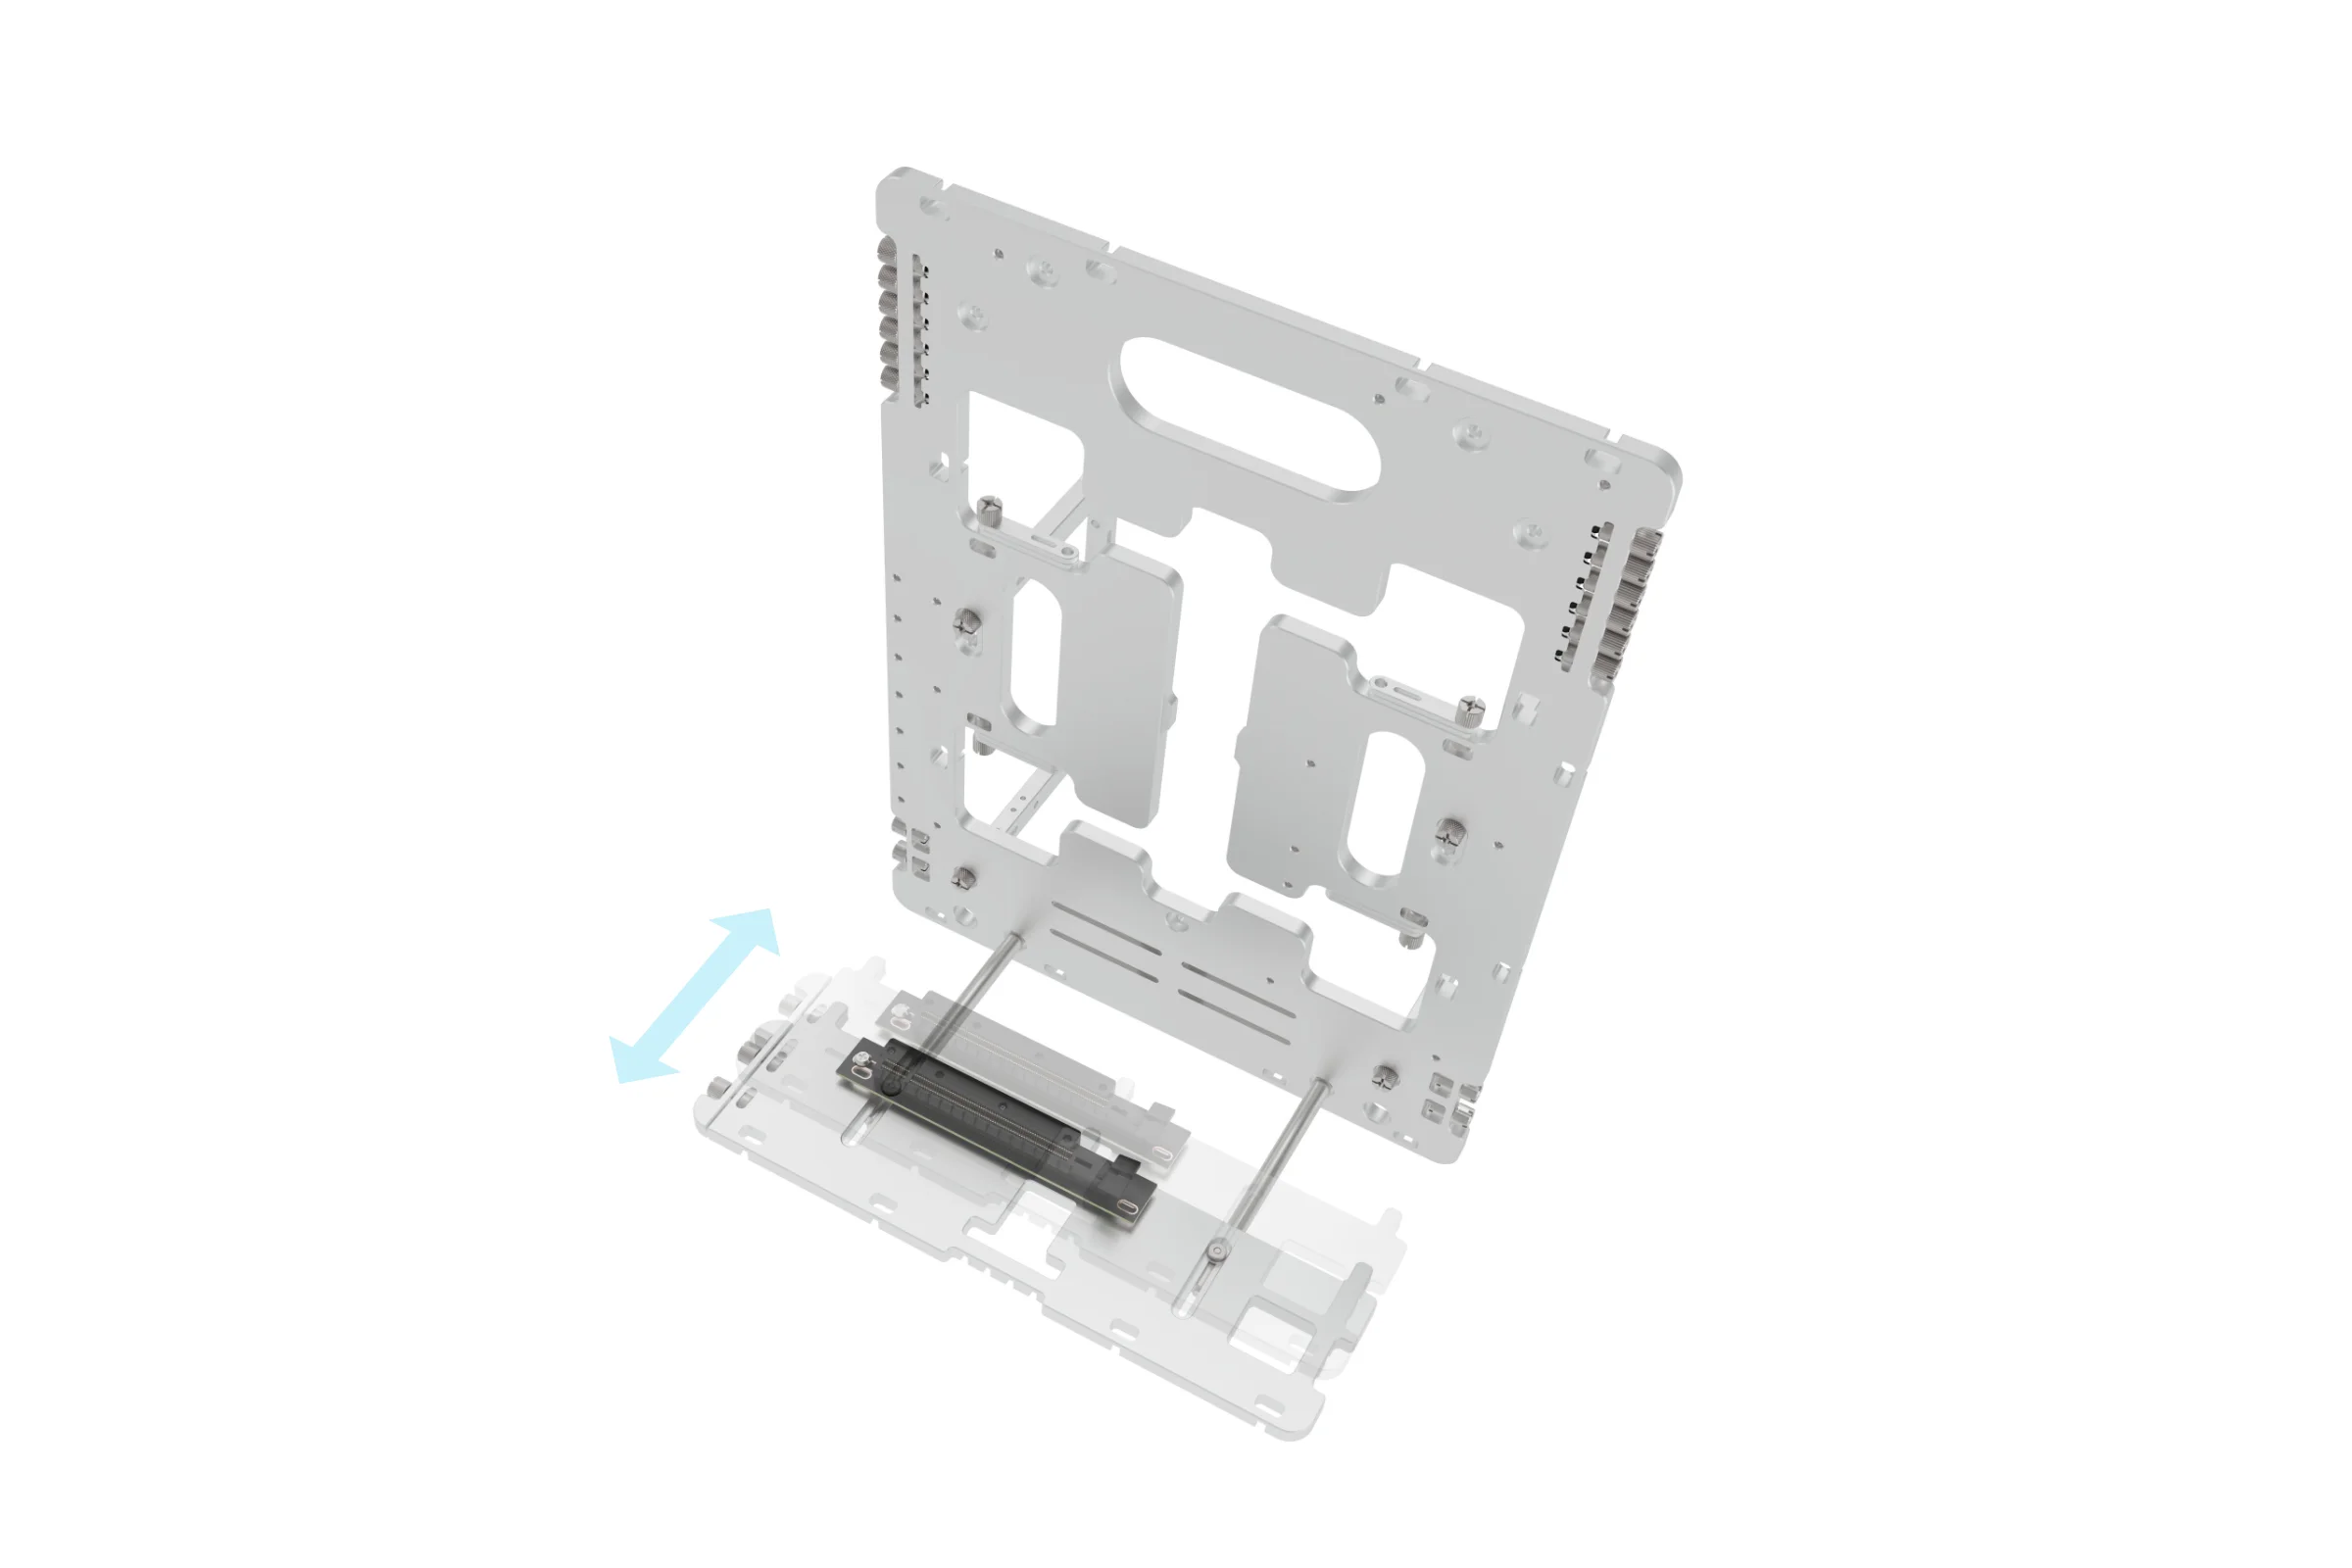
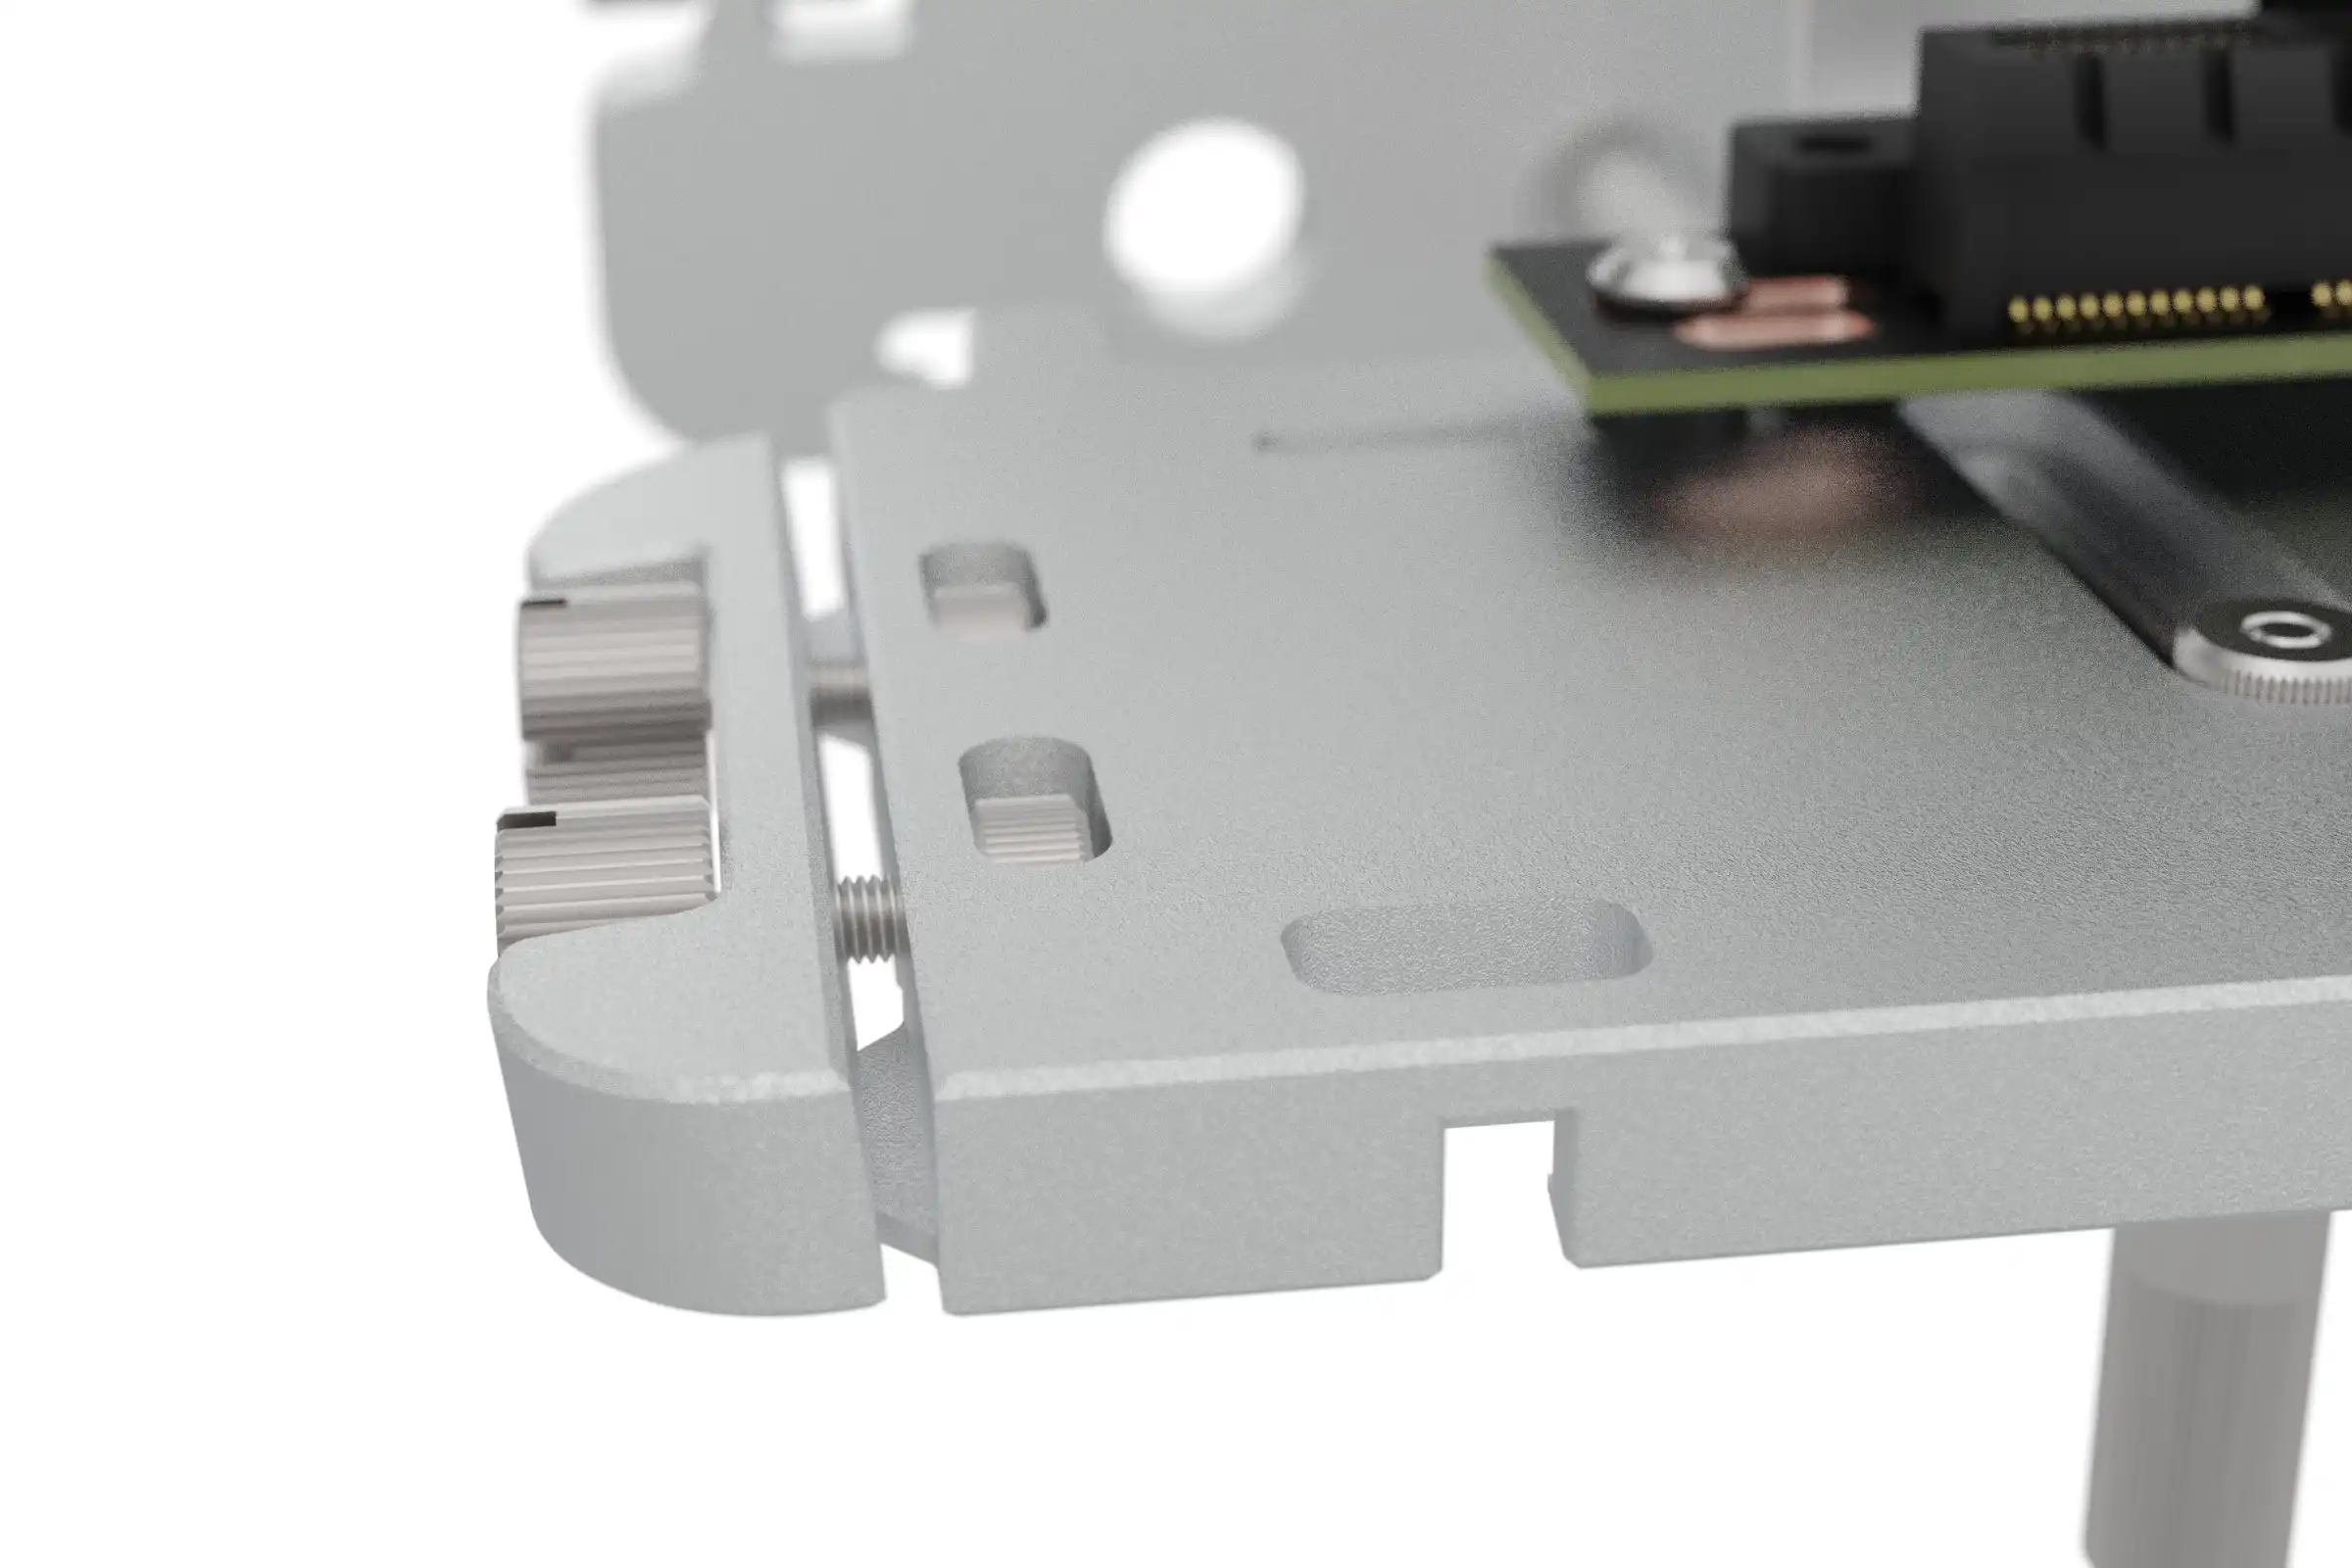
Fitting the VGPU to the BC1
With the VGPU assembled, it can now be attached to the BC1. Simply screw the end of the support rods to the BC1 at the default left side foot mounting holes.
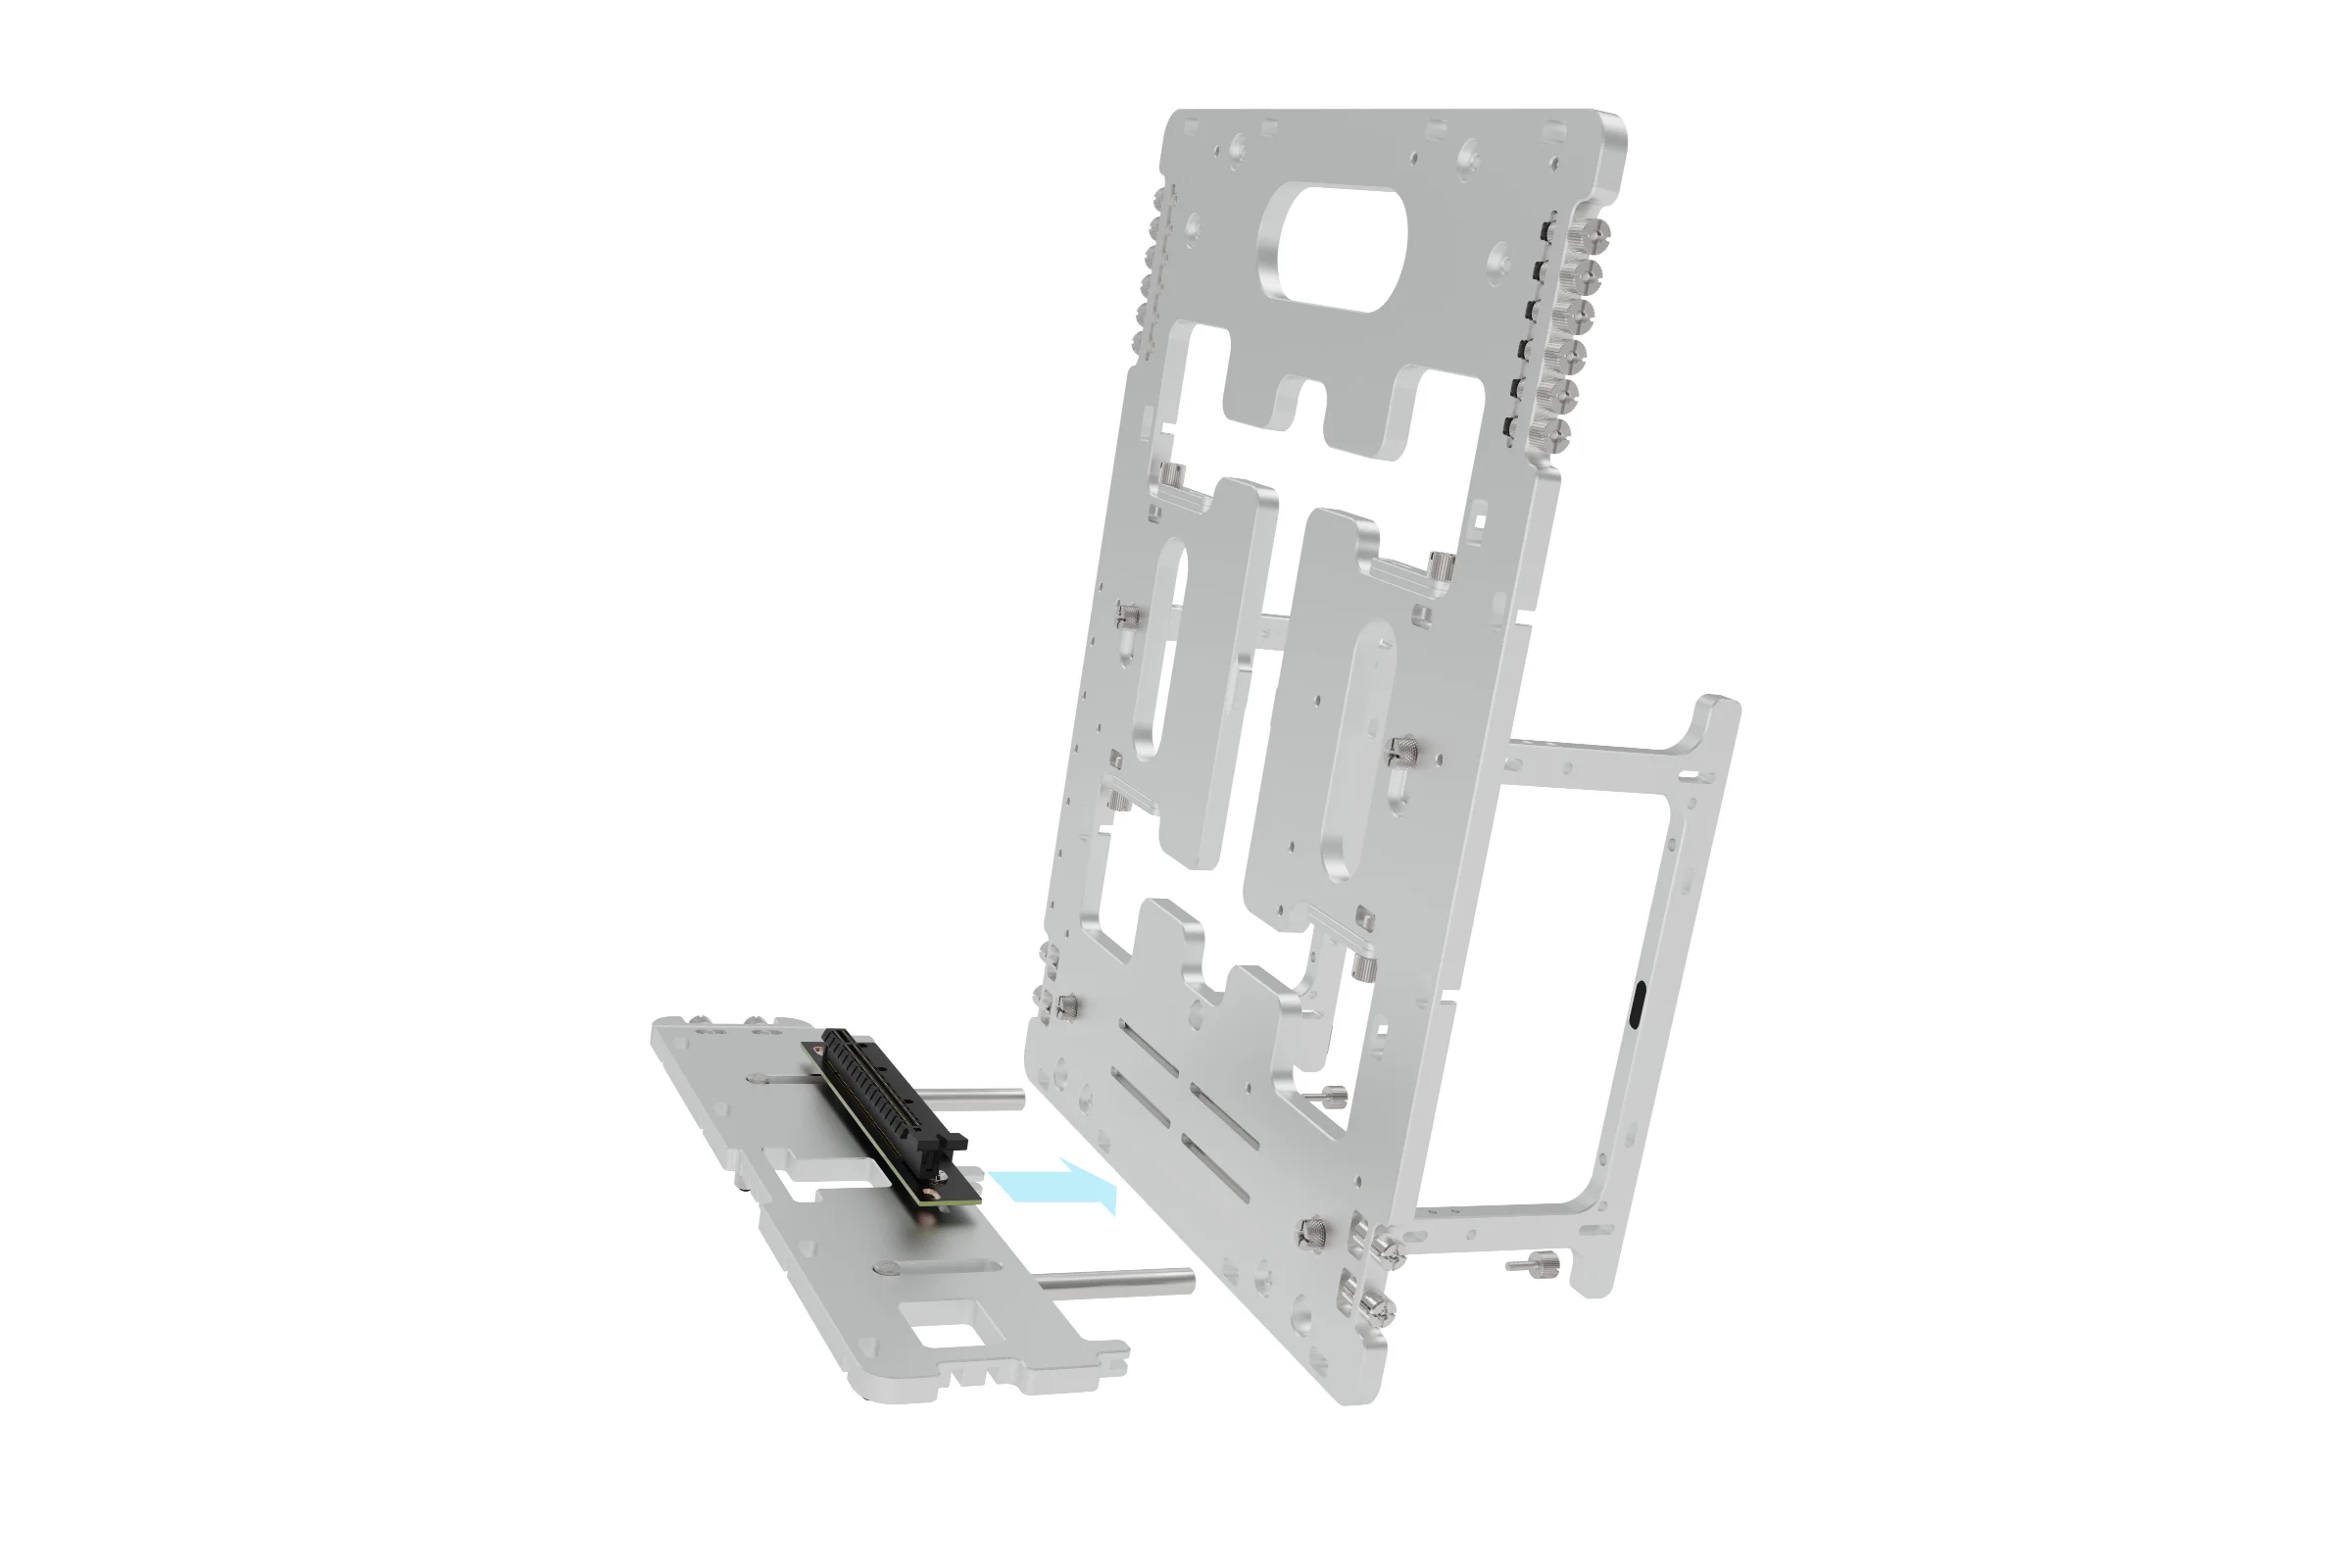
BC1 Foot in Vertical Mode
M3 Thumbscrew
An important feature of the VGPU to note is the ability to adjust the spacing away from the BC1. This allows fine tuning of the gap between the GPU and motherboard should additional clearance be needed.
Screw
Washer
Riser Cable PCB
Nylon Spacer
Slot
Nut
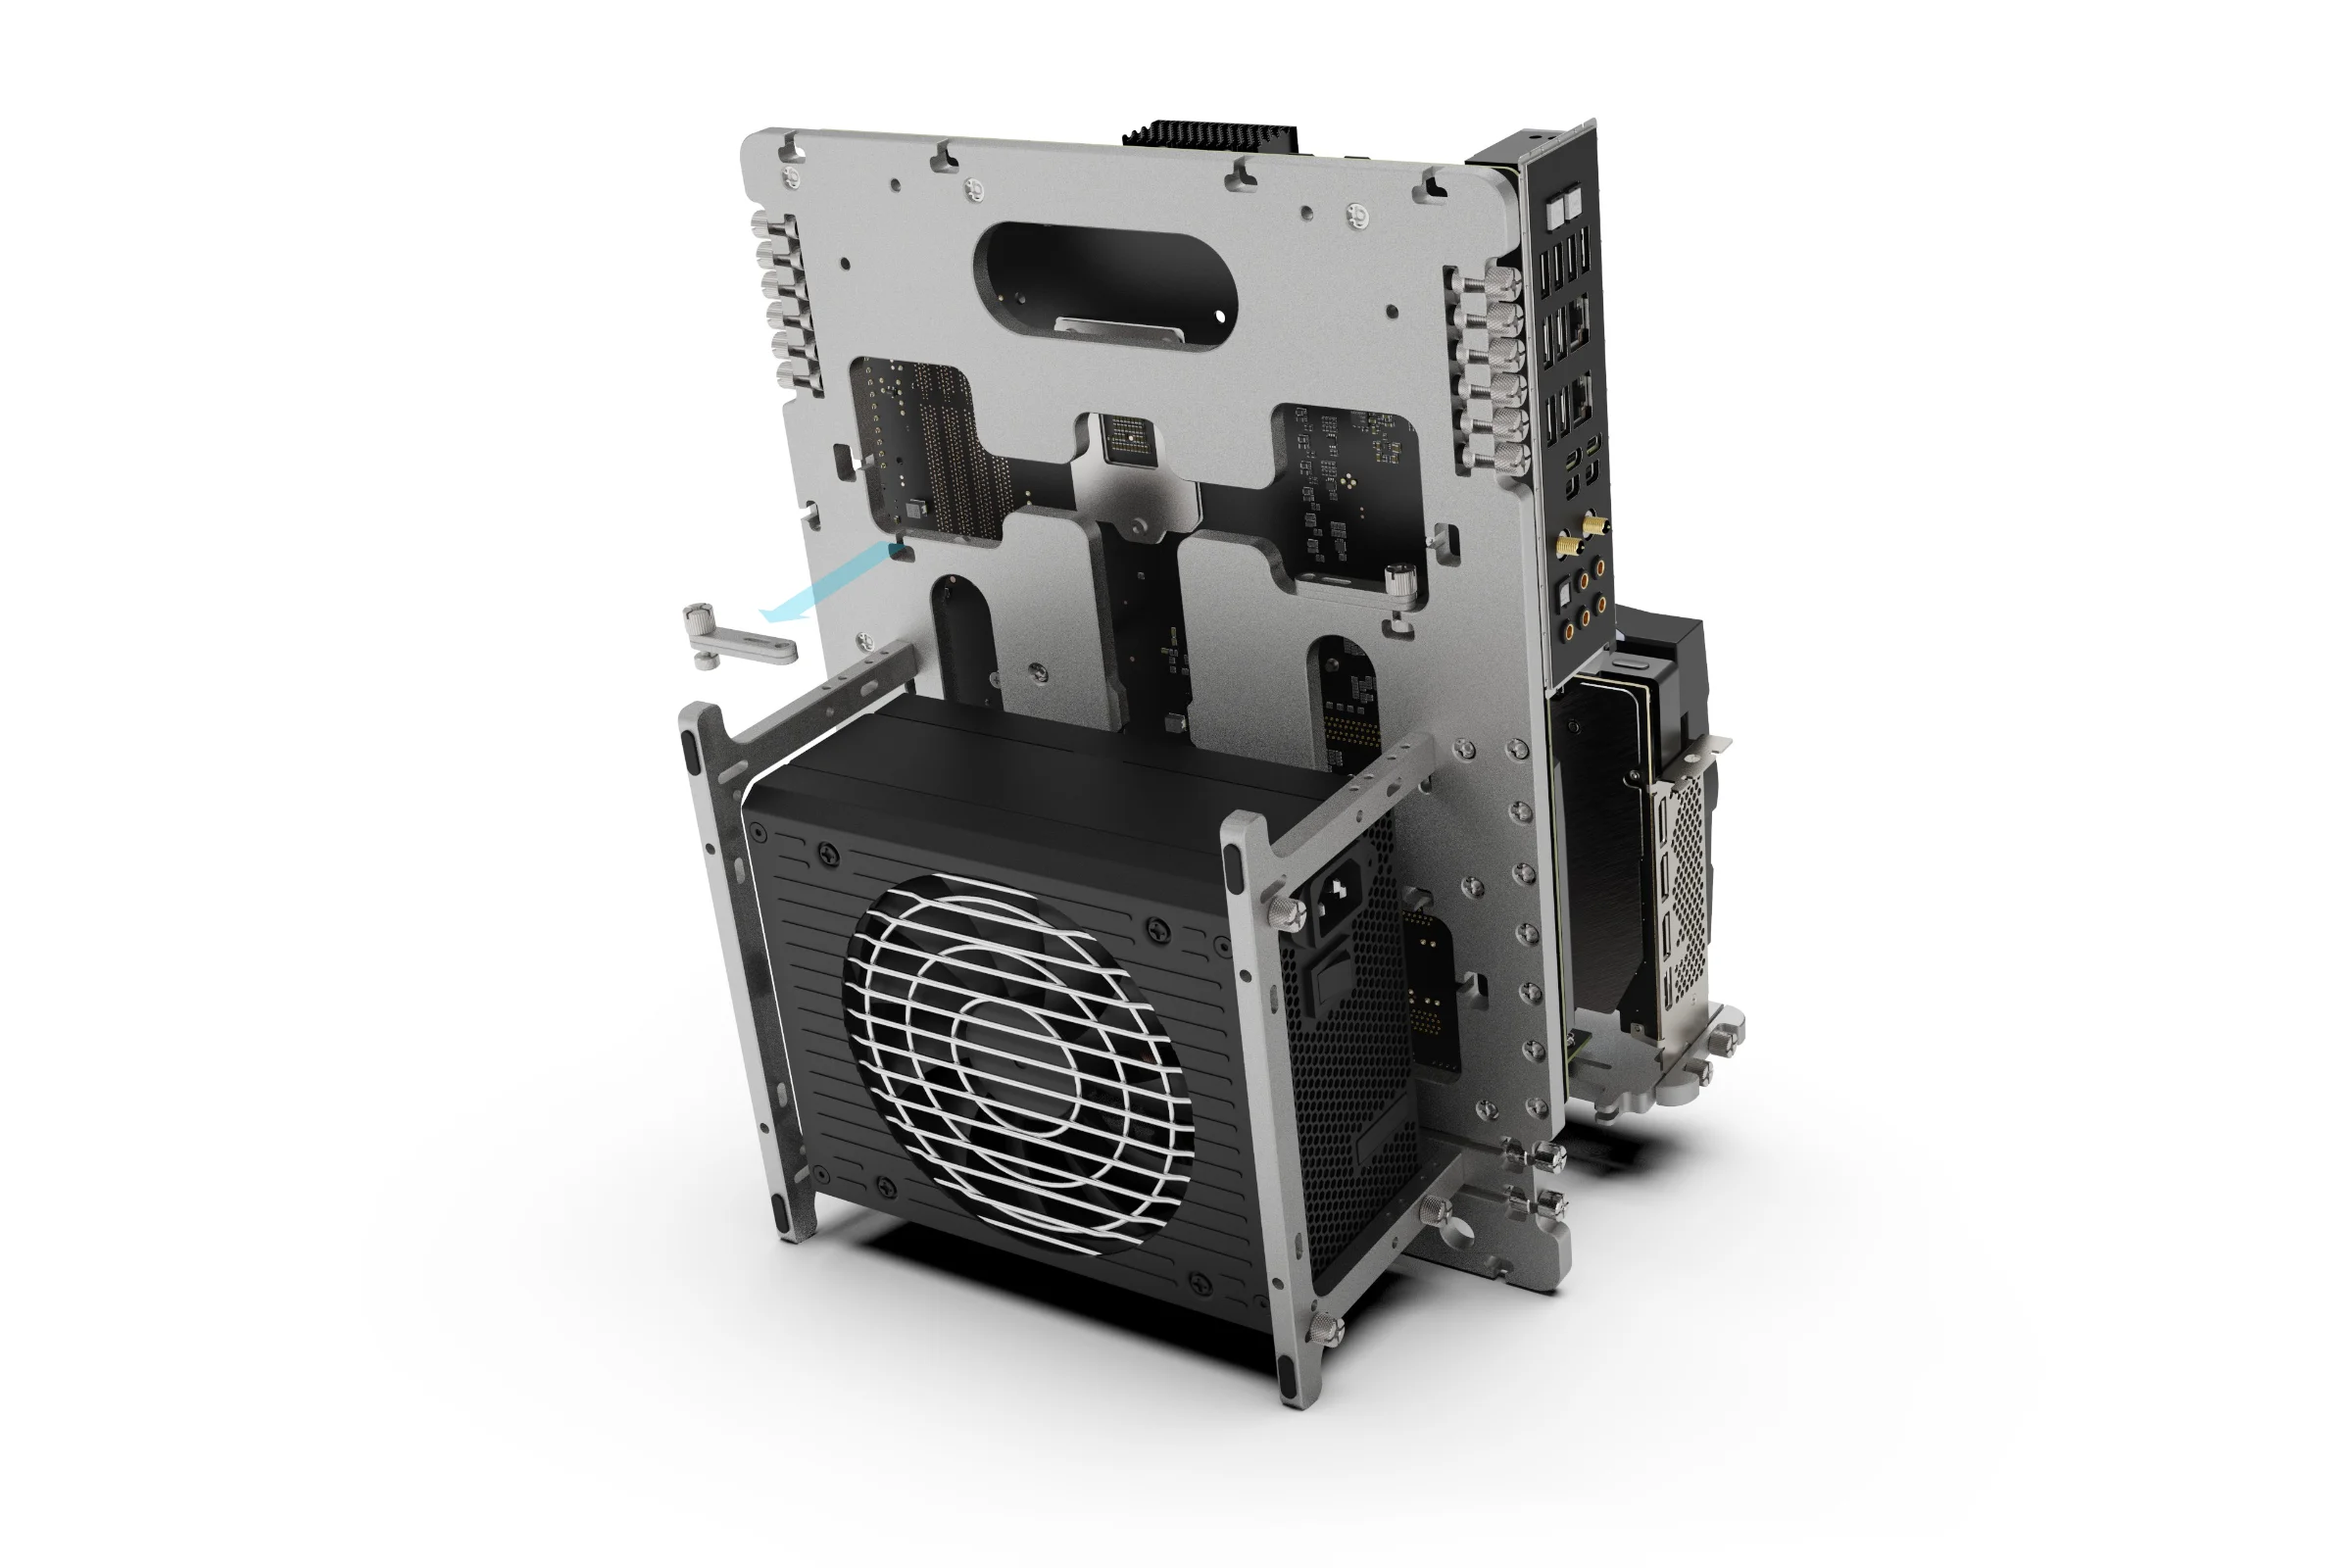
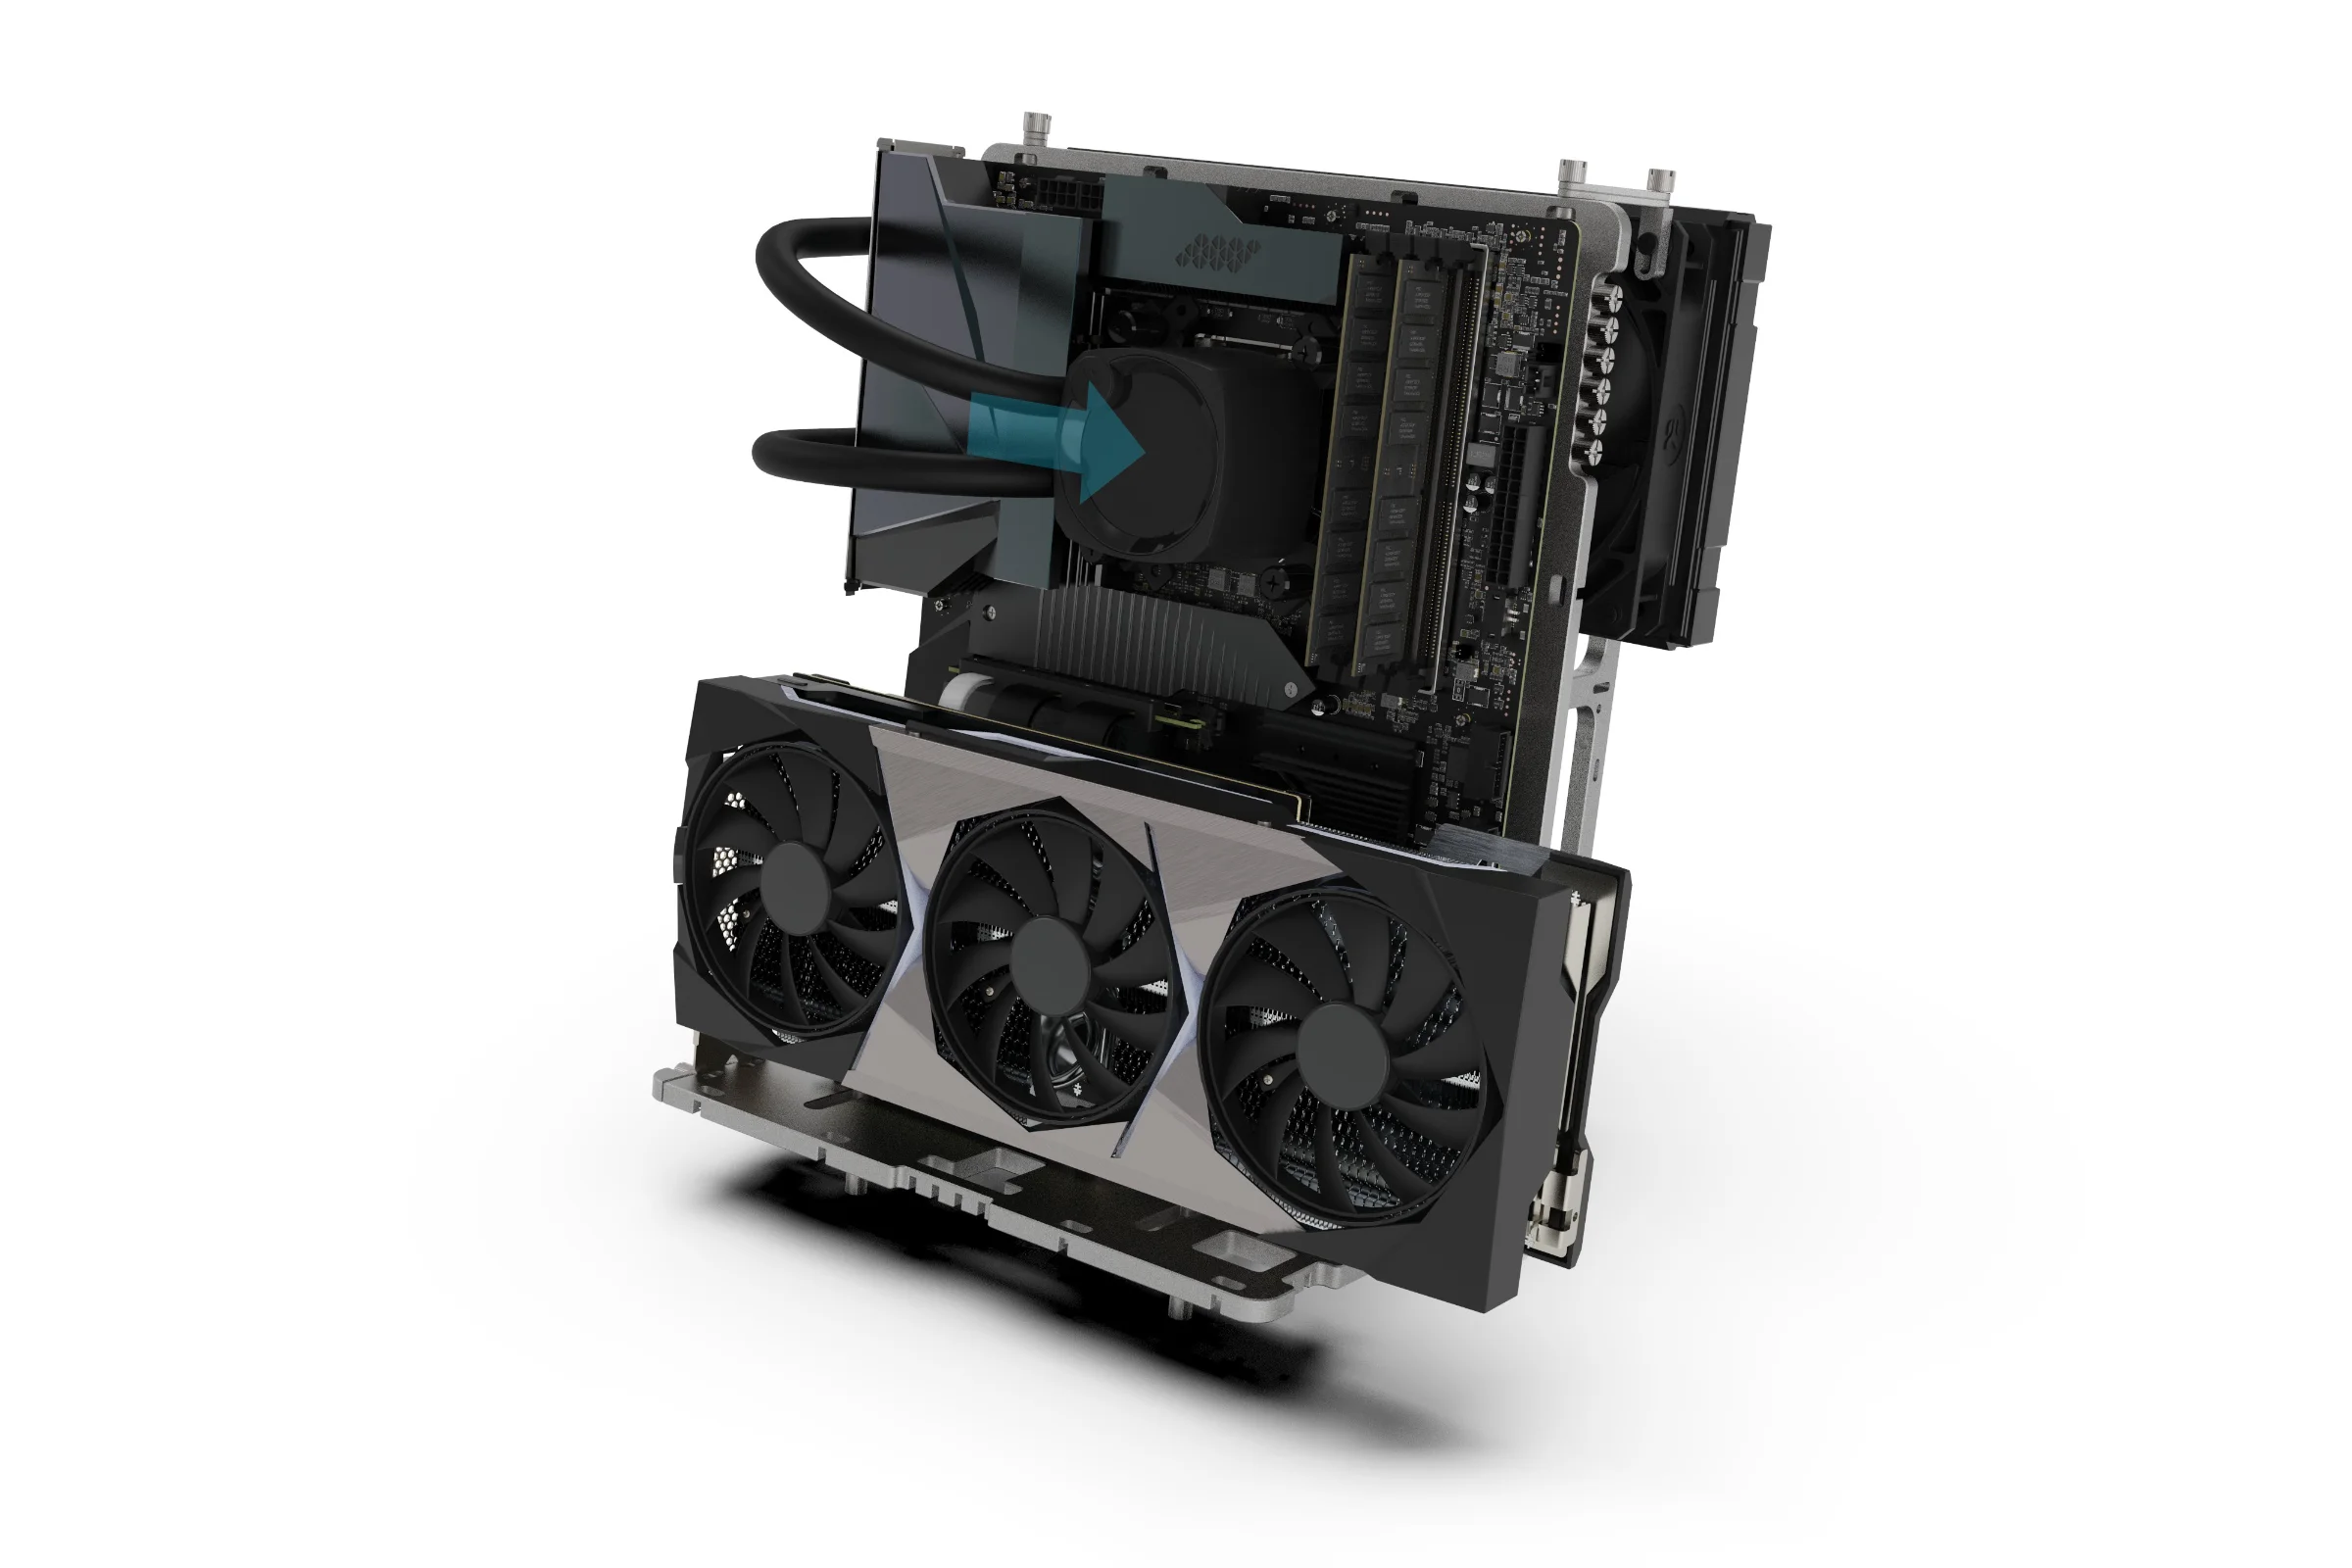
Installing Hardware
Your PC hardware can now be installed onto the BC1. We recommend starting with the PSU as it will add weight and stability, then the motherboard (CPU, RAM, M.2 should already be installed on it). The riser cable should also be connected in preparation for installing the GPU.
Motherboard
PSU
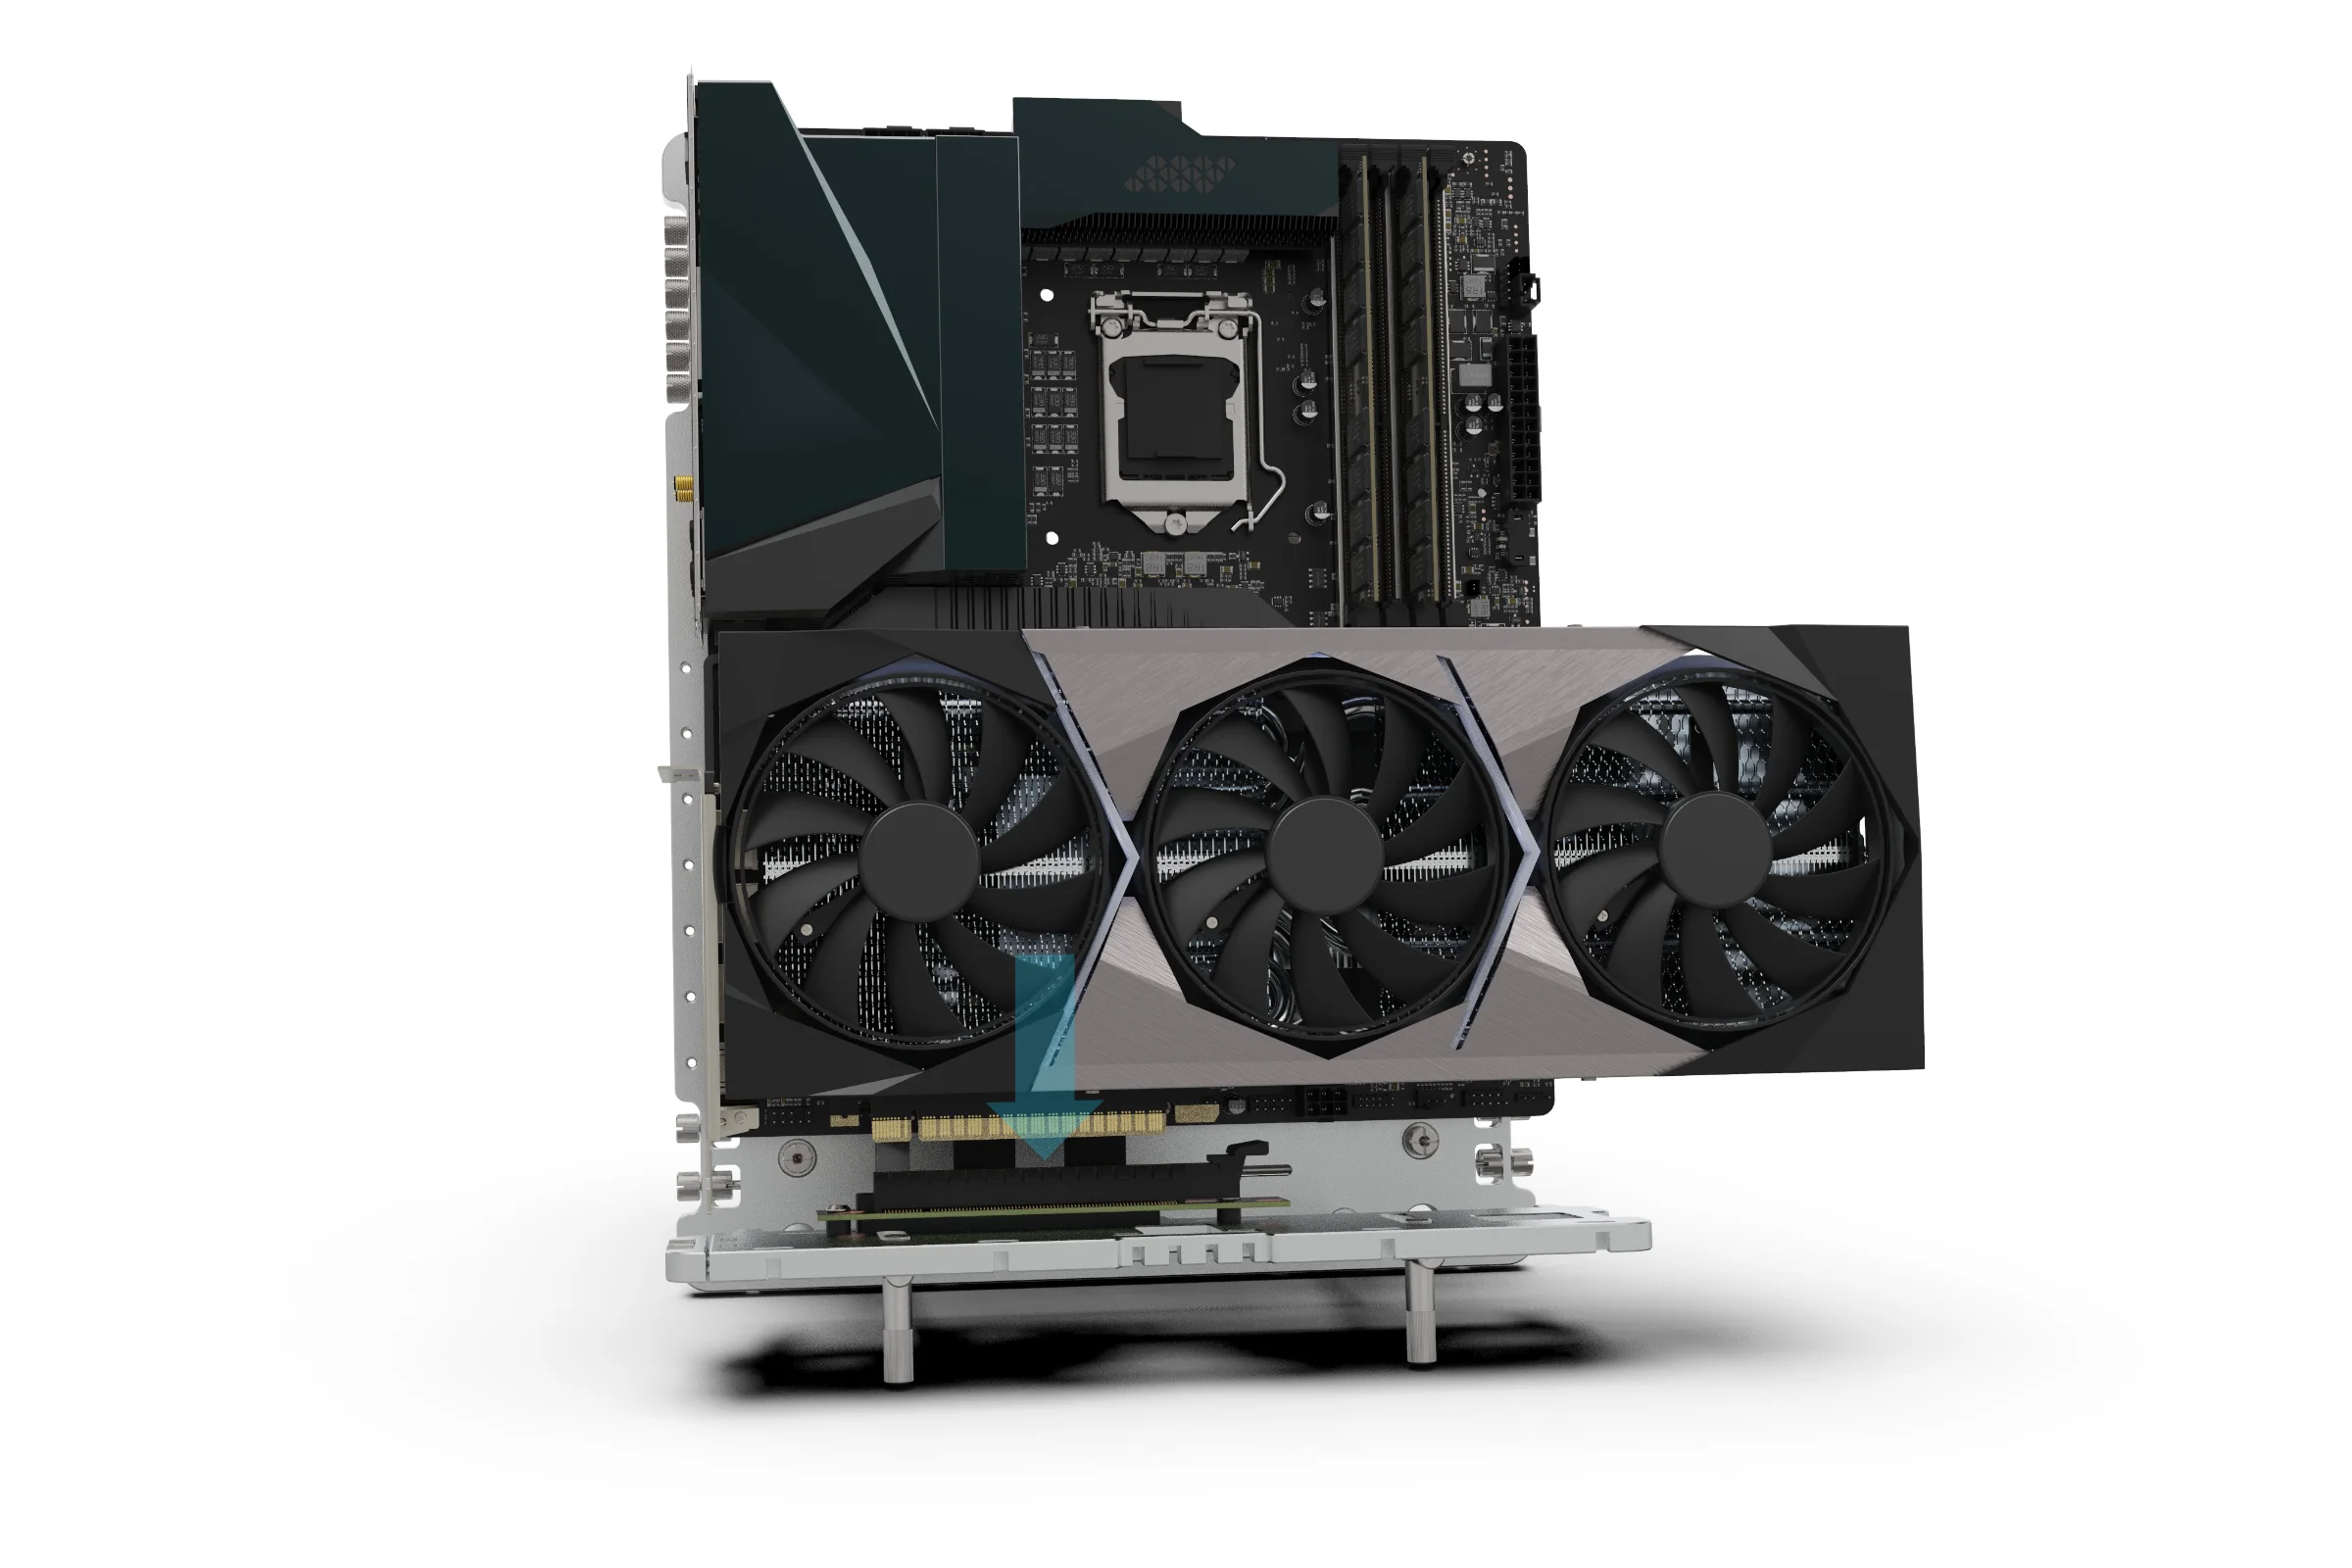
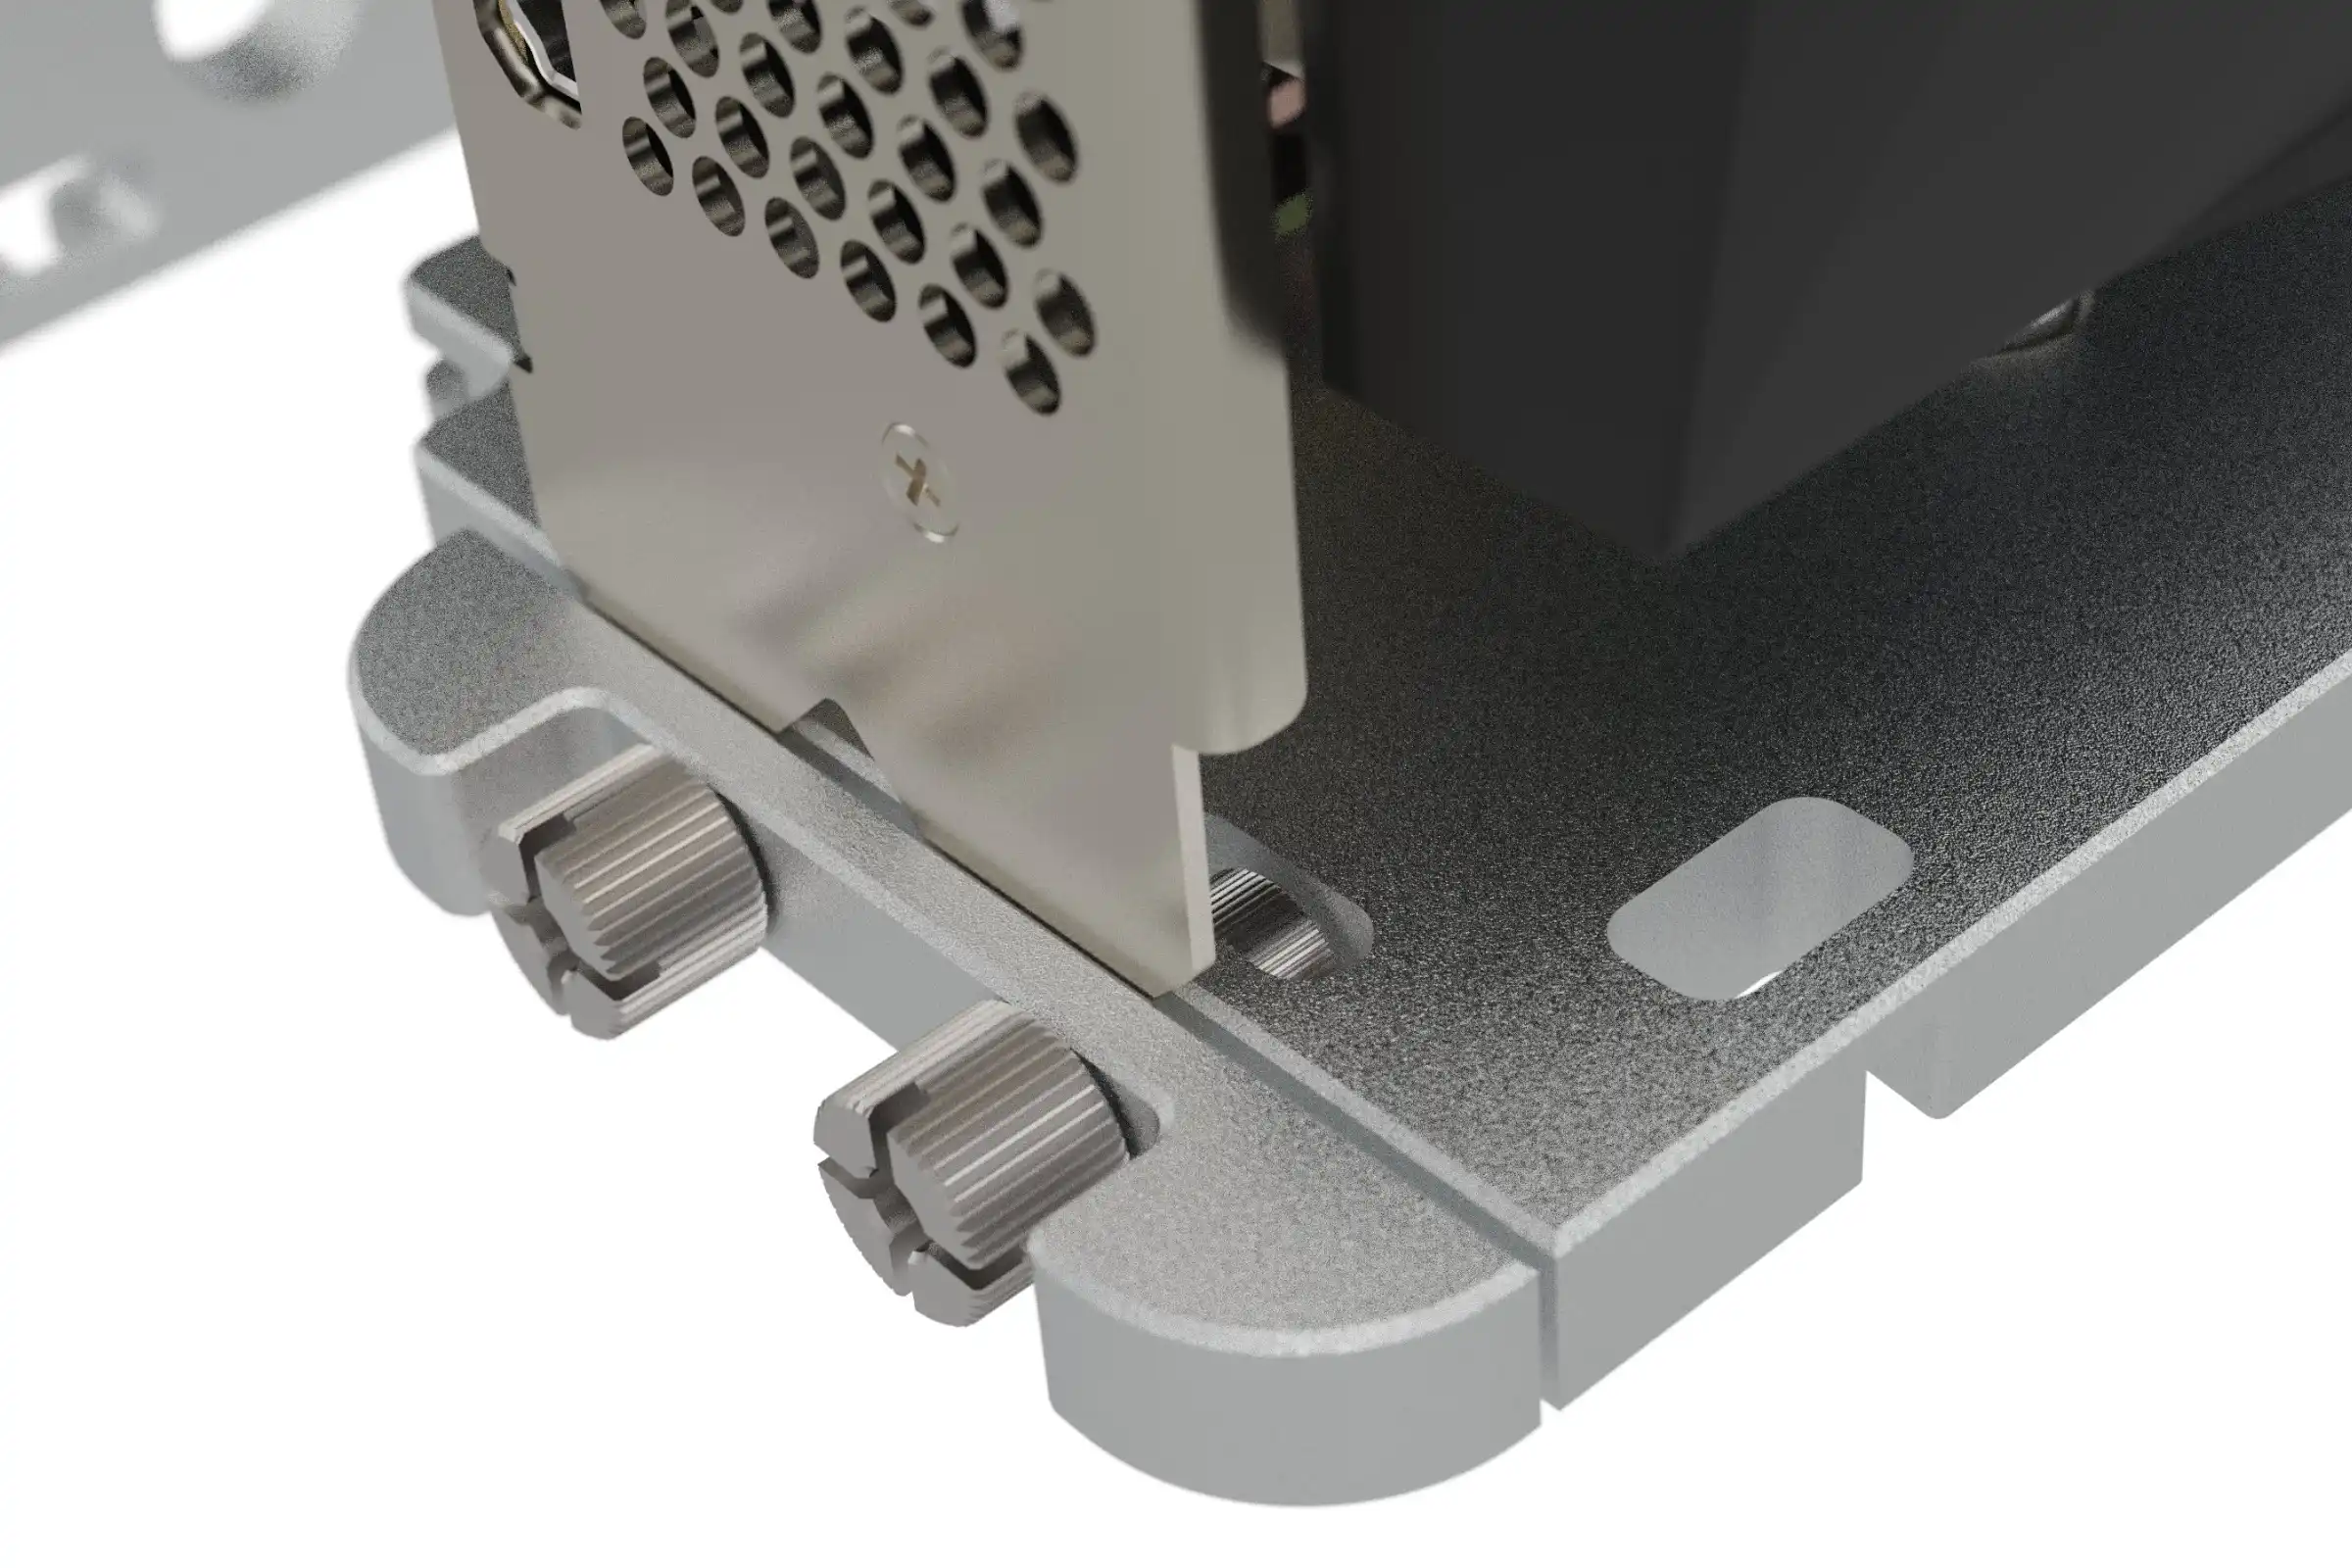
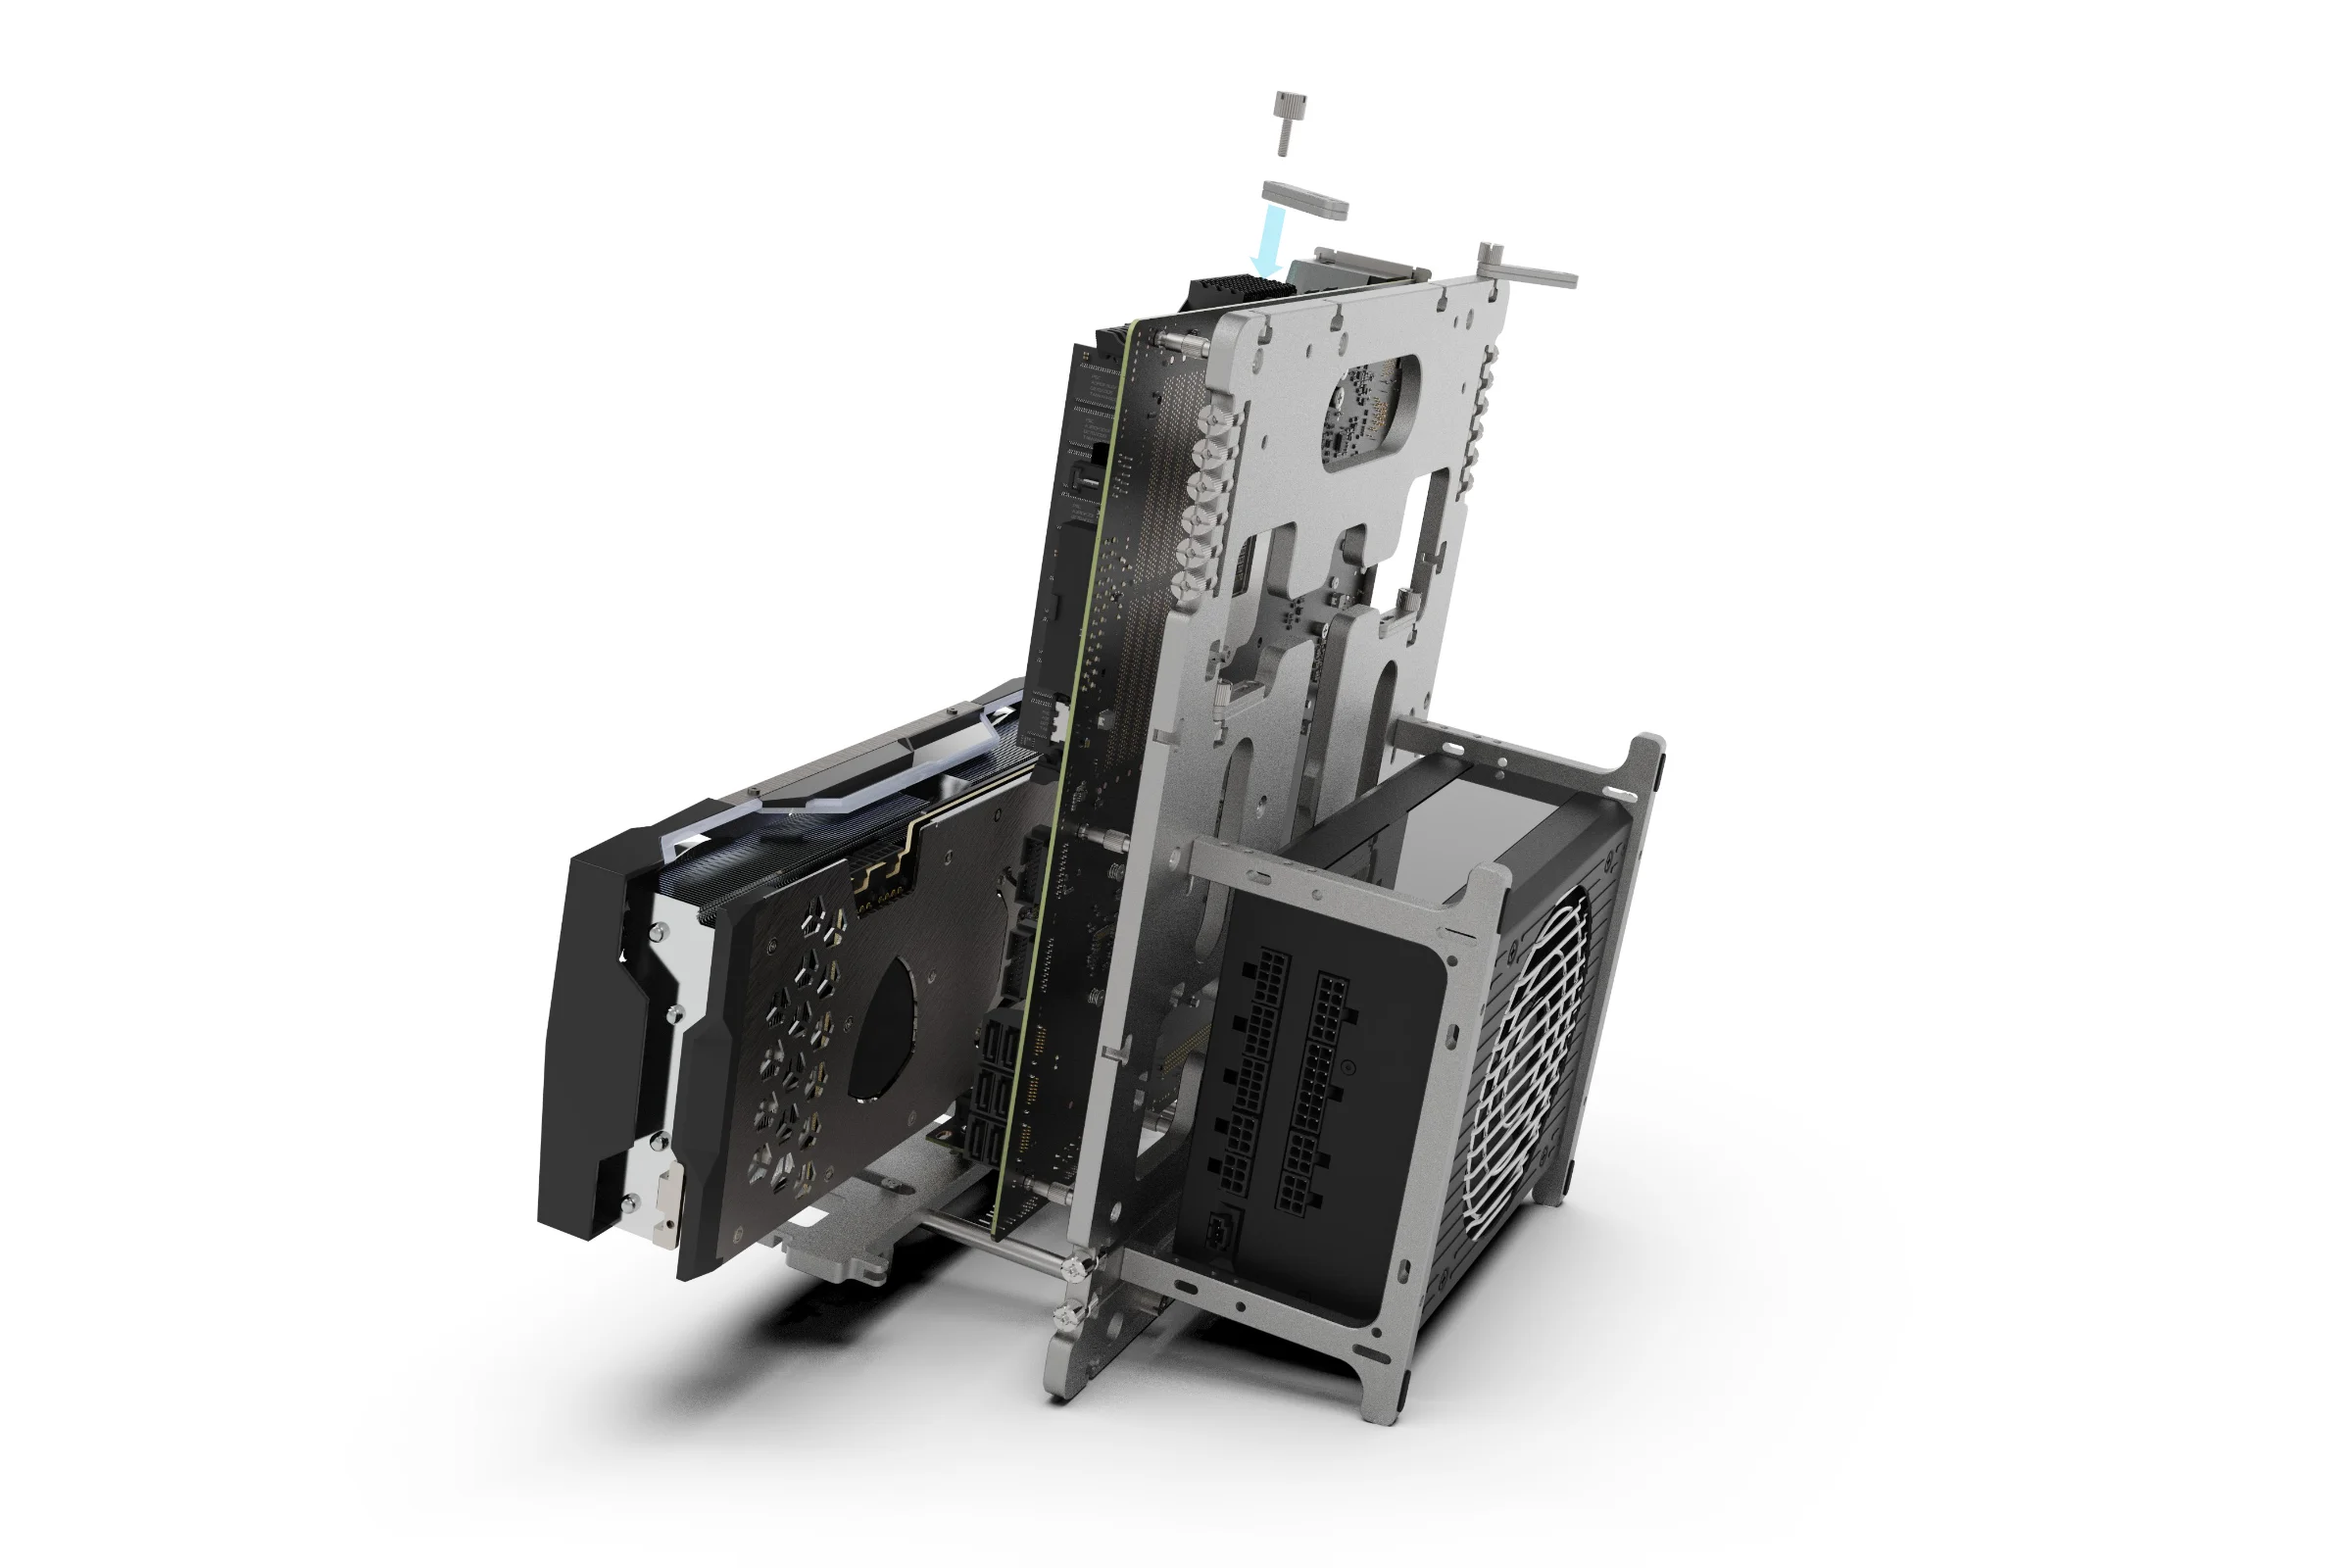
Installing a GPU
M3 Thumbscrew
Gap
Begin by loosening the thumbscrews that secure the PCI lock to the VGPU body. The thumbscrews only need to be loosened, no need to remove them, you just need to make a gap for the cards brackets to fit.
GPU
Align with Gap
Slot the GPU into the PCI socket while also ensuring the PCI bracket of the GPU slots into the PCI Lock gap.
GPU PCI Bracket
M3 Nut
With the GPU properly seated in the PCI socket, lock the card in place by tightening the thumbscrews. For heavy cards or a more secure attachment, we recommend using a screwdriver to apply more torque.
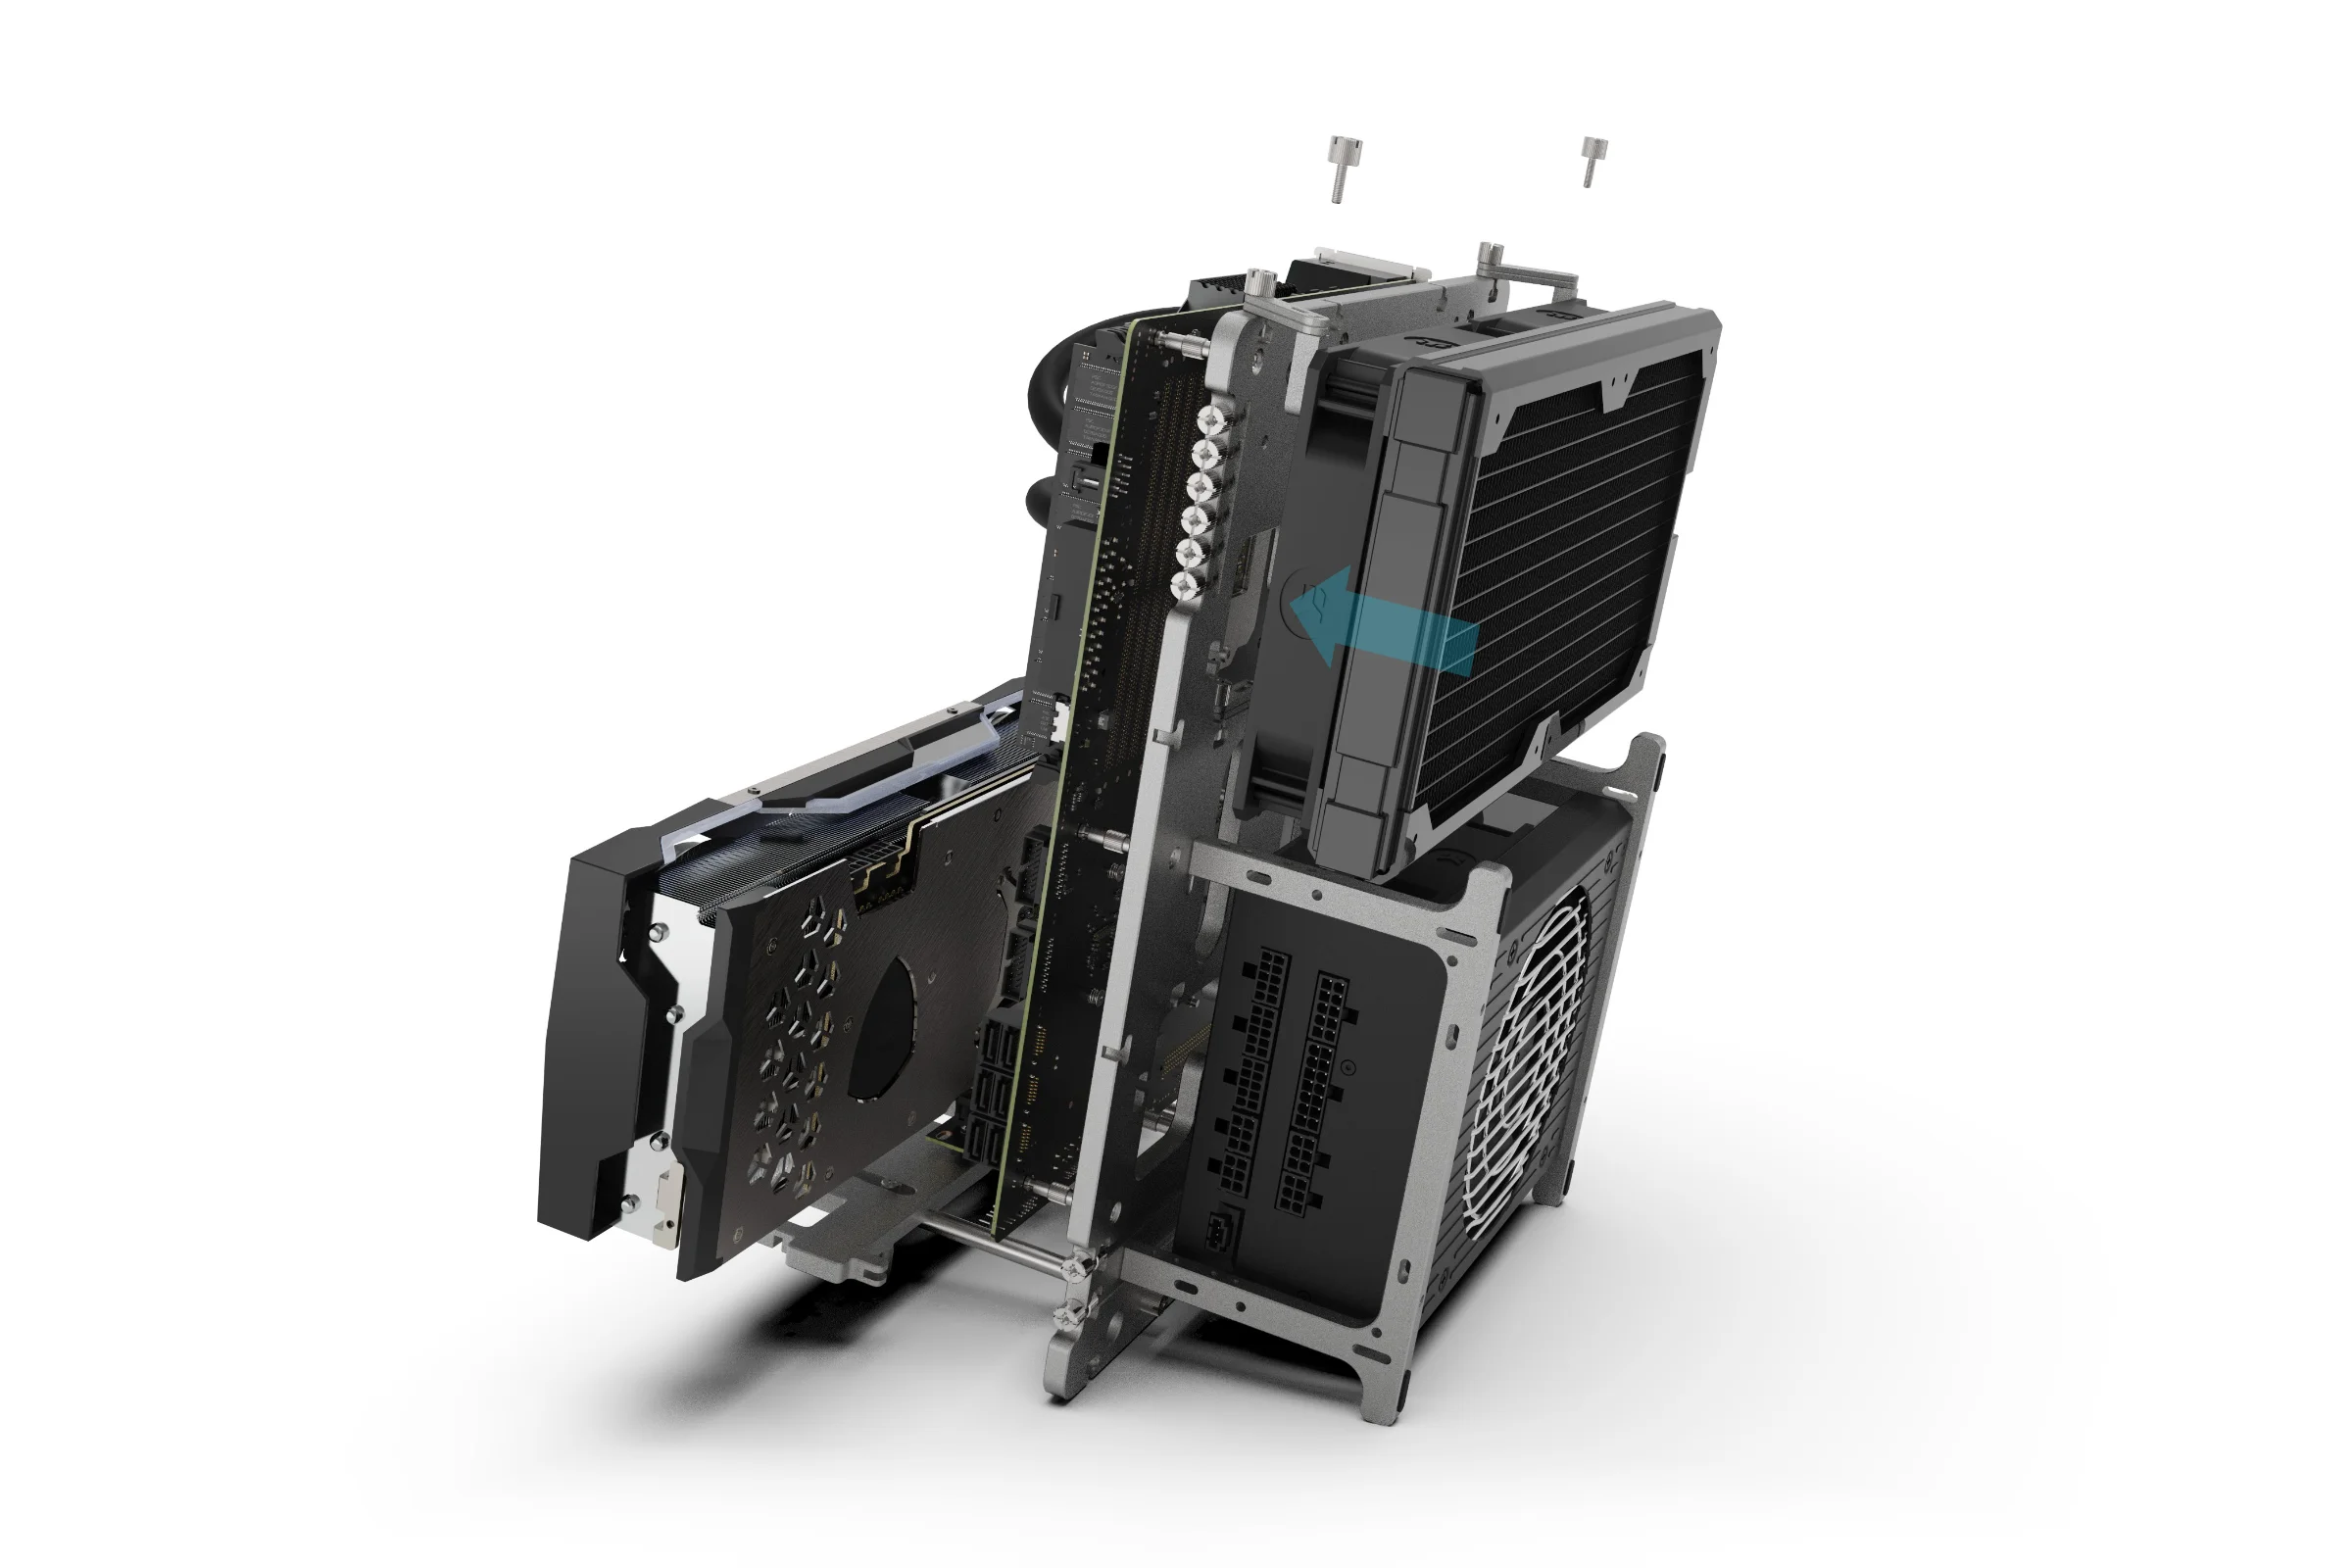
Fitting an AIO
The VGPU kit also includes a pair of mounts designed to allow vertical mounting of a radiator behind the motherboard. These must be used in combination with the standard BC1 brackets and work by giving a 90 degree fixture point to the radiator.
Vertical Mount
M3 Thumbscrew
Standard BC1 Bracket
If you haven’t already done so, remove the standard BC1 brackets from their stored position on the BC1.
M3 Nut
Standard Bracket
M3 Thumbscrew
Install the brackets onto the BC1 at the top edge mounting points. Unless you are mounting a 120 or 140 radiator, the widest mounting points should be used.
240mm Radiator
Vertical Bracket
Mounting Screw (not supplied)
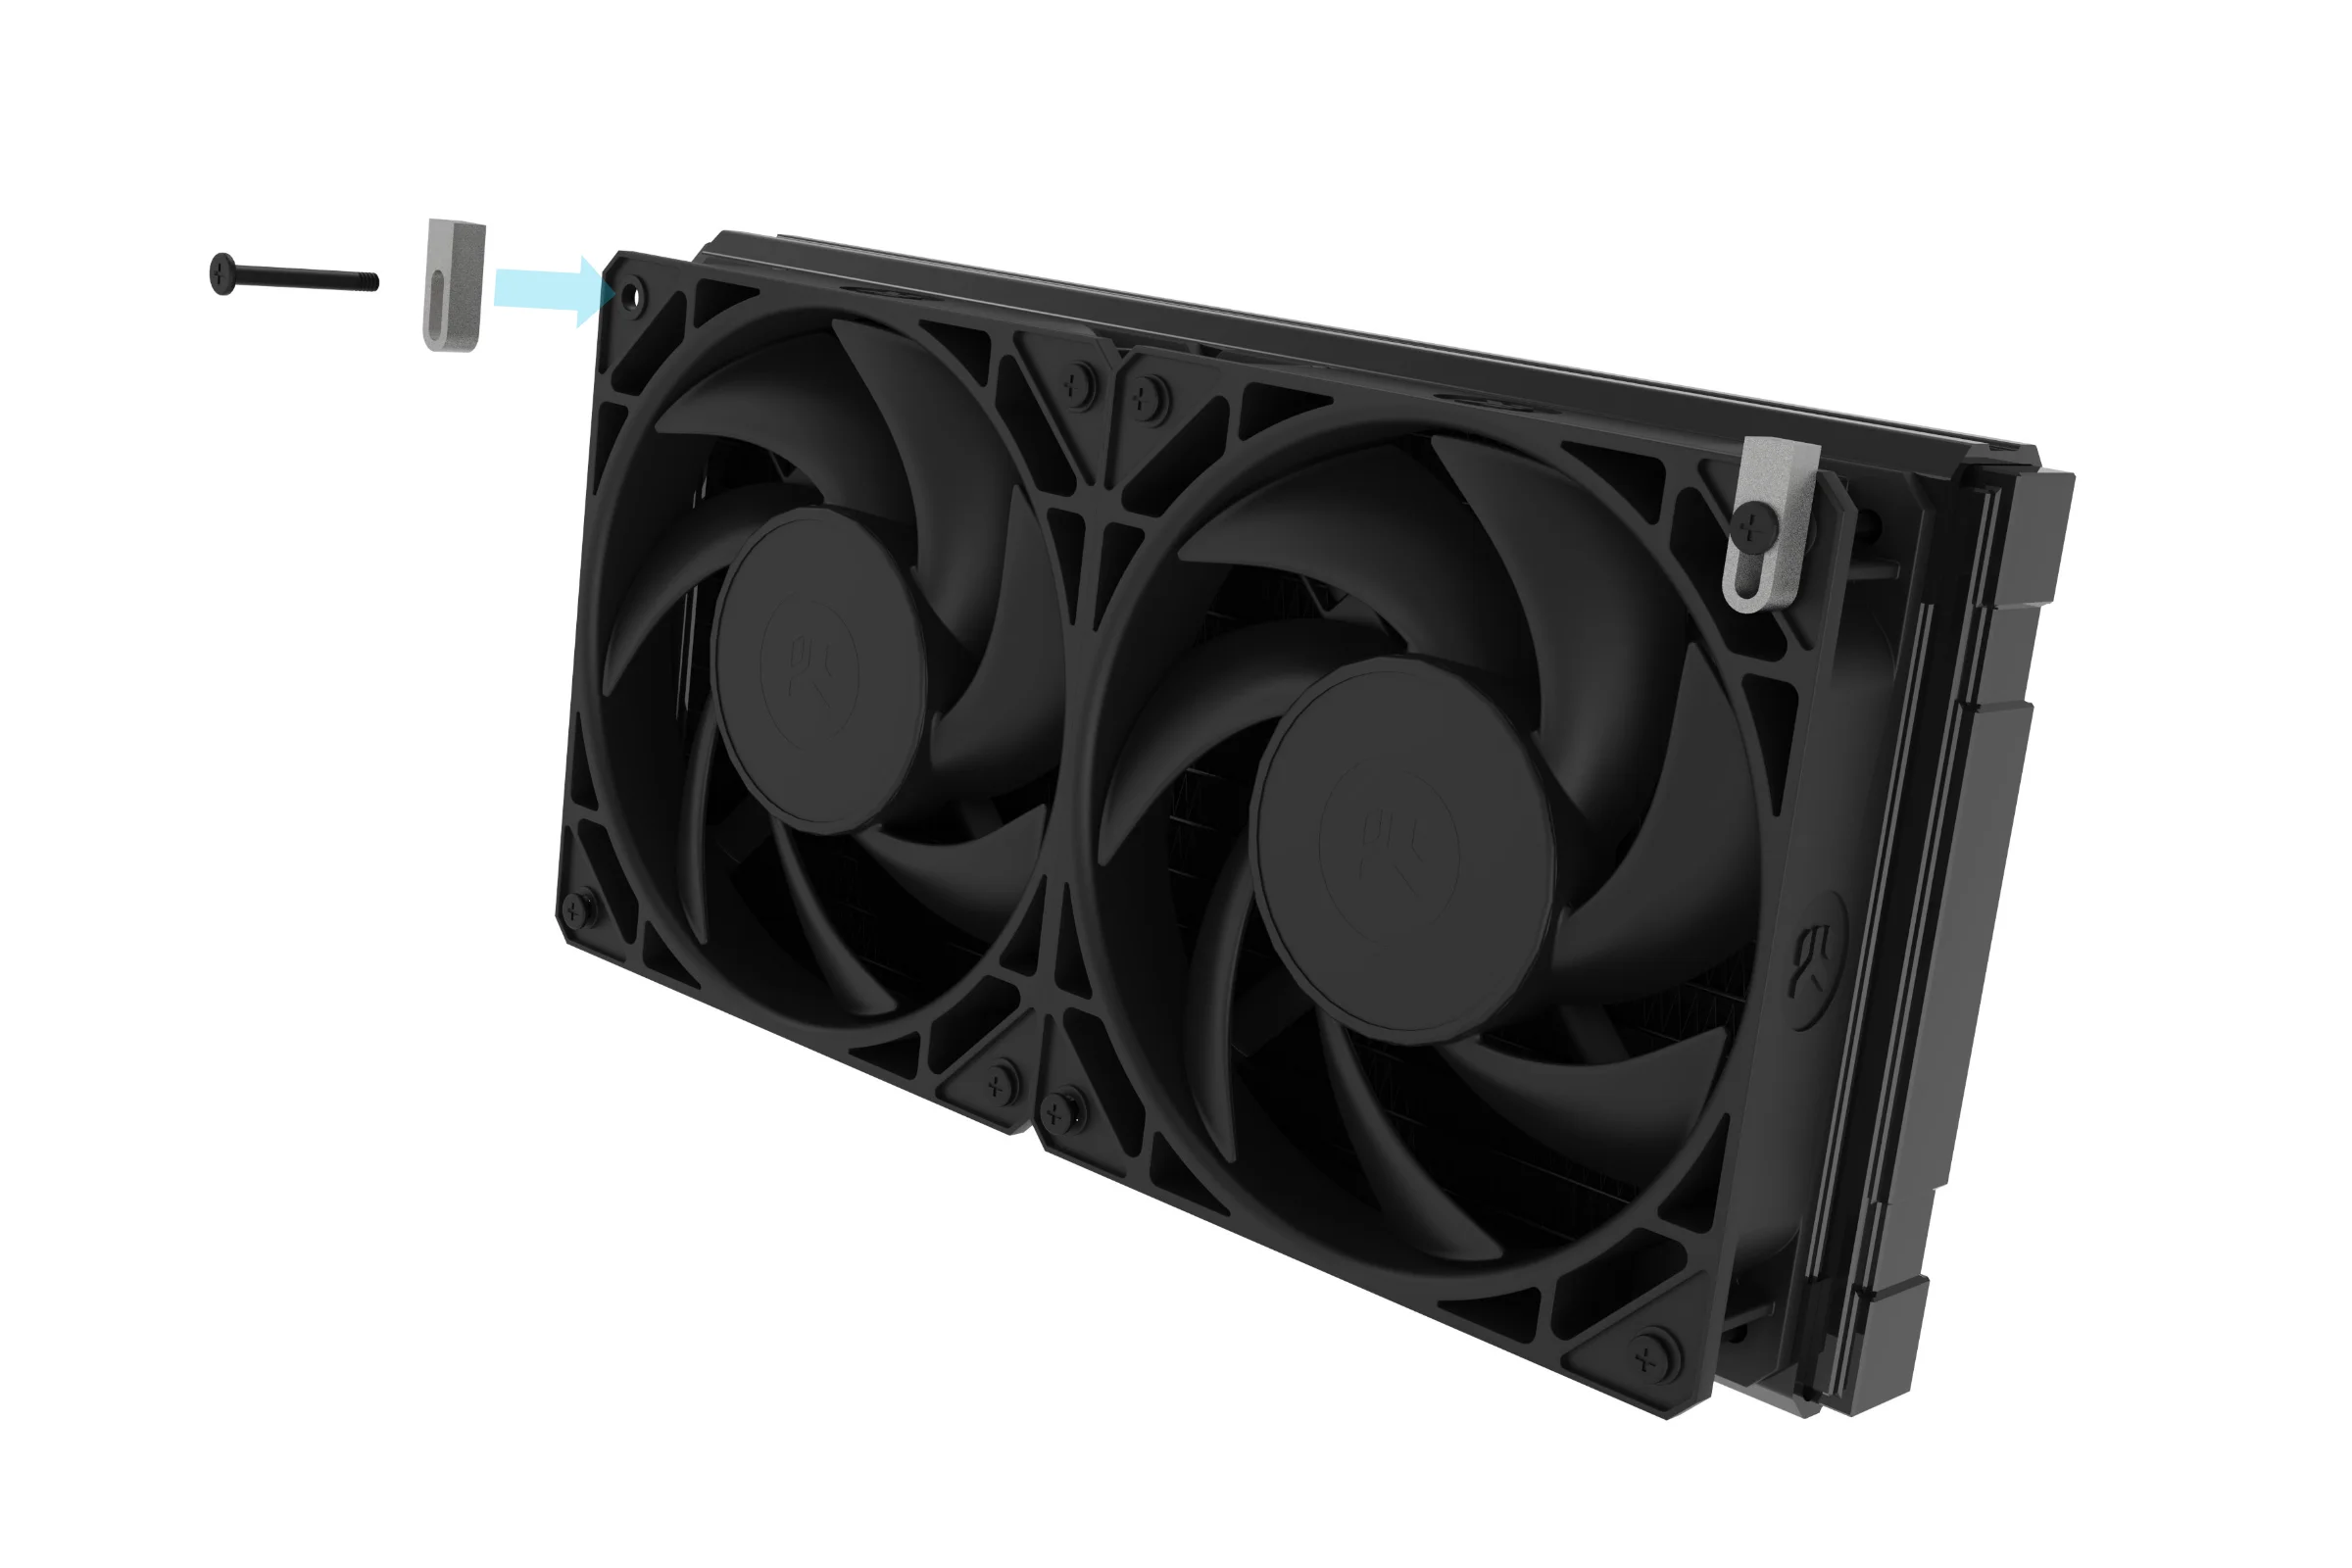
Prepare the radiator by attaching the vertical brackets to the fixing points. The exact orientation and mounting screws used will depend on your setup, but in principle, the brackets should be fitted to the outer most mounting holes.
GPU PCI Bracket
M3 Nut
The radiator can now be fitted behind the BC1 (above the PSU) by attaching the vertical brackets to the standard brackets using the M3 thumbscrew.
GPU PCI Bracket
M3 Nut
The CPU cooler can now be fitted.